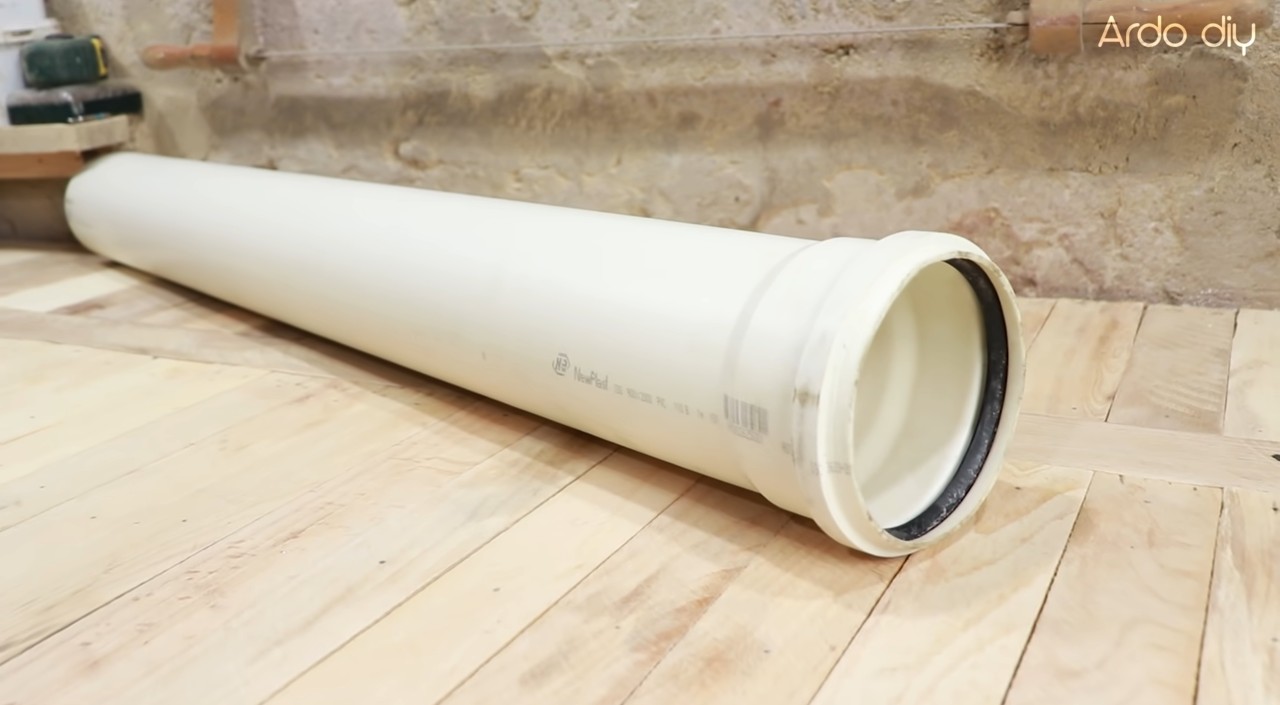
Из отрезка трубы ПВХ можно изготовить стильную люстру, которая по дизайну не уступит модным моделям из магазина.
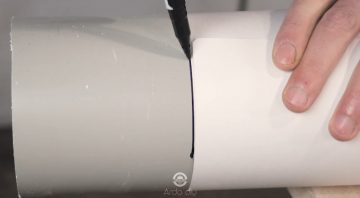
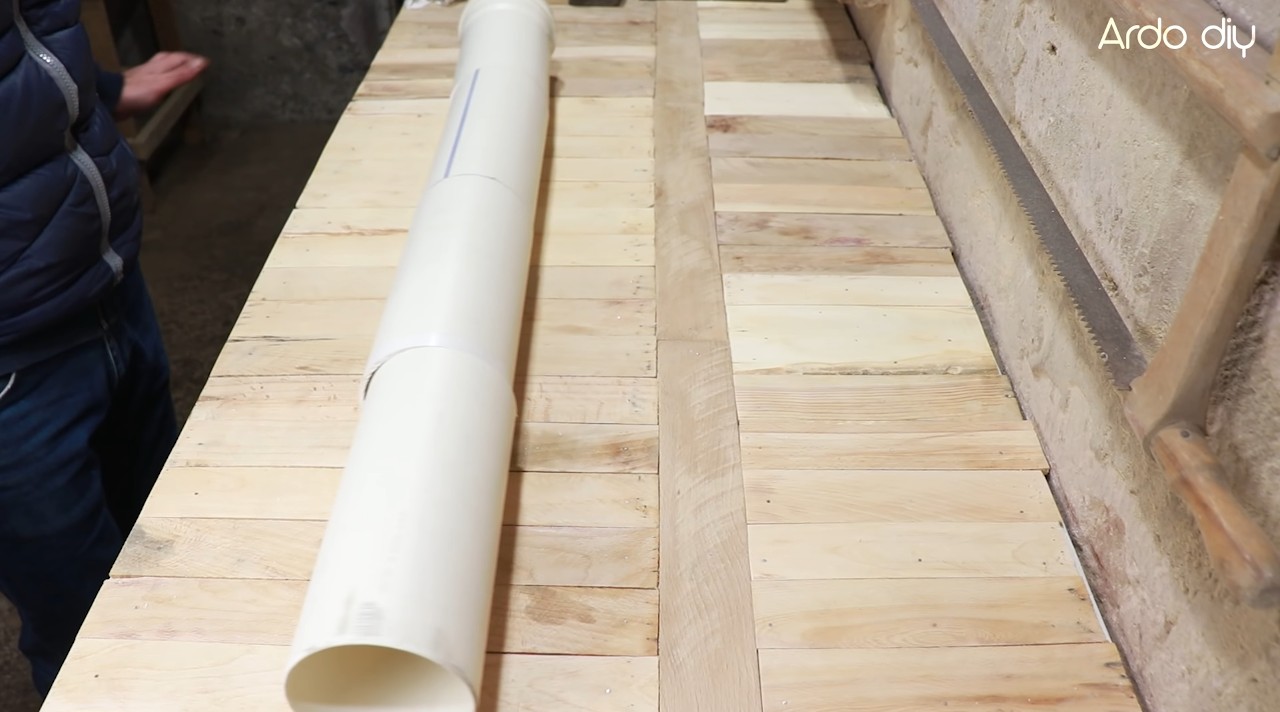
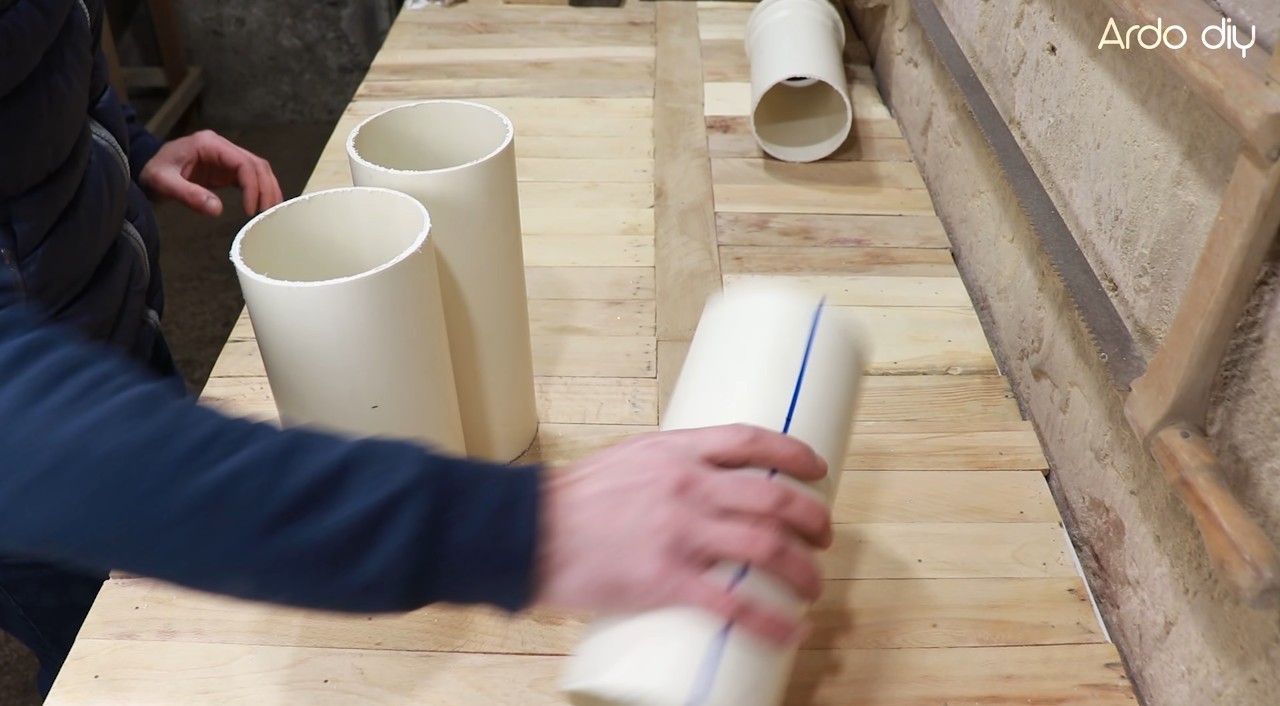
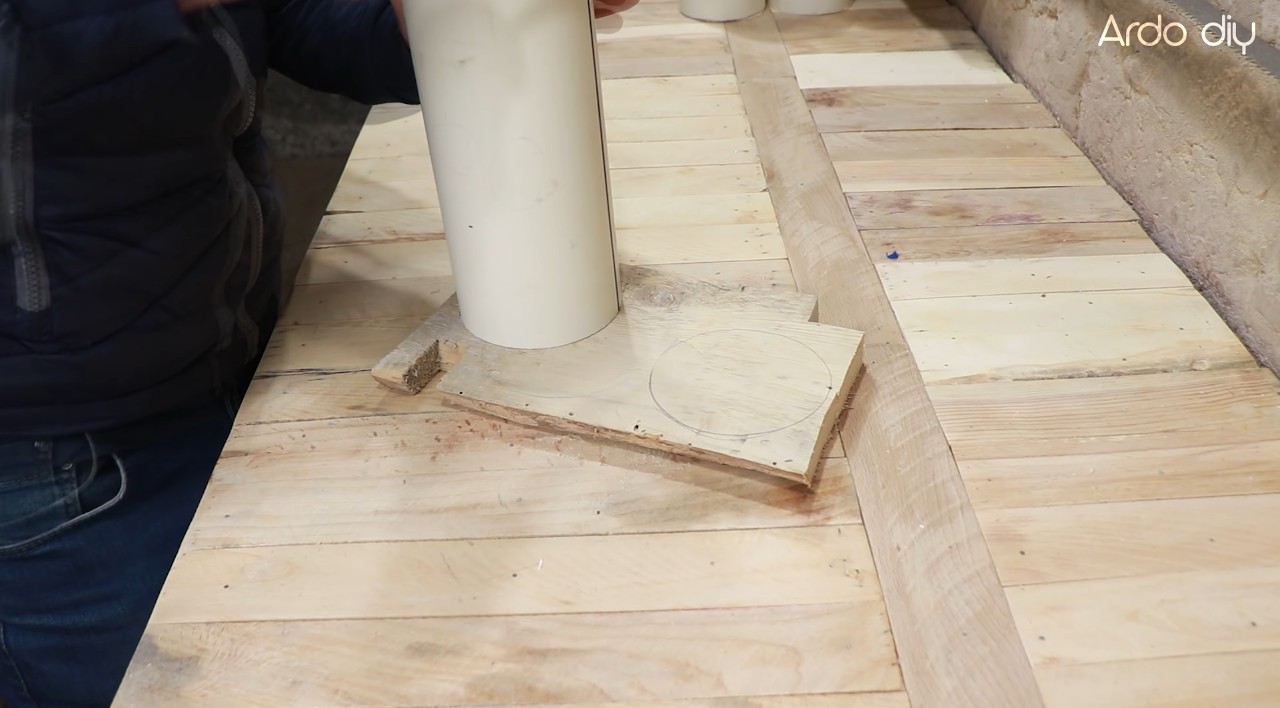
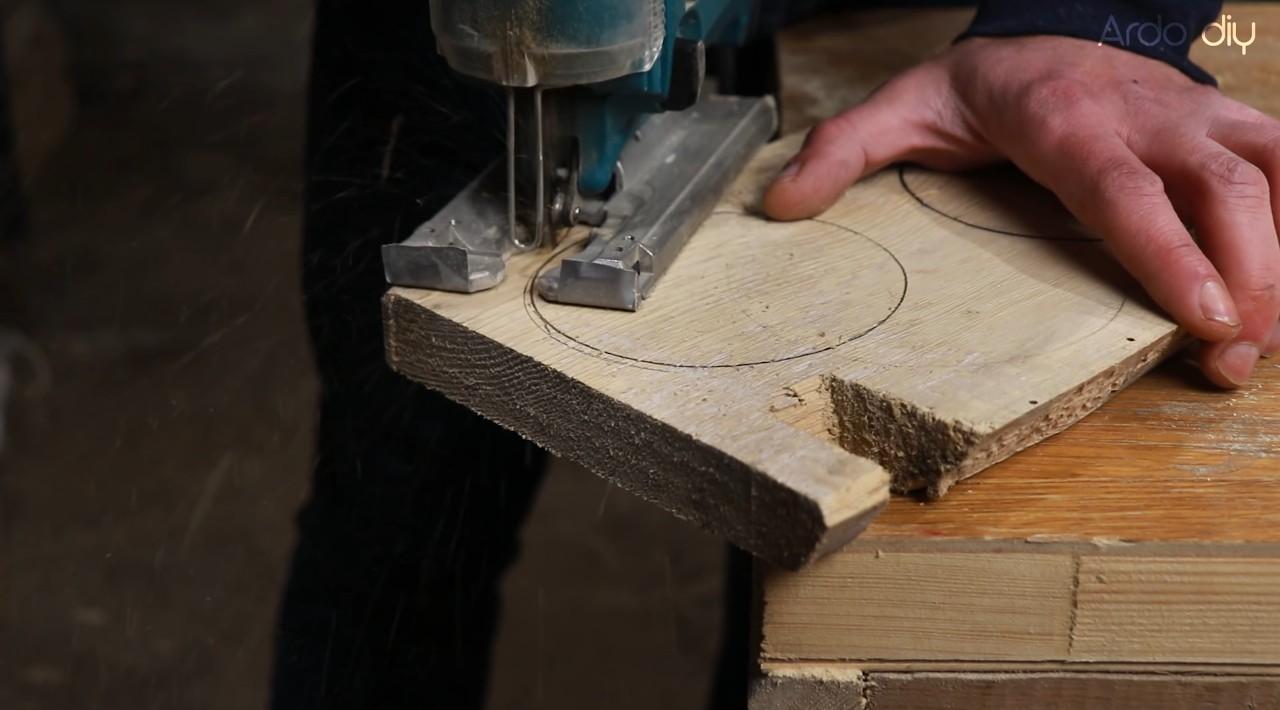
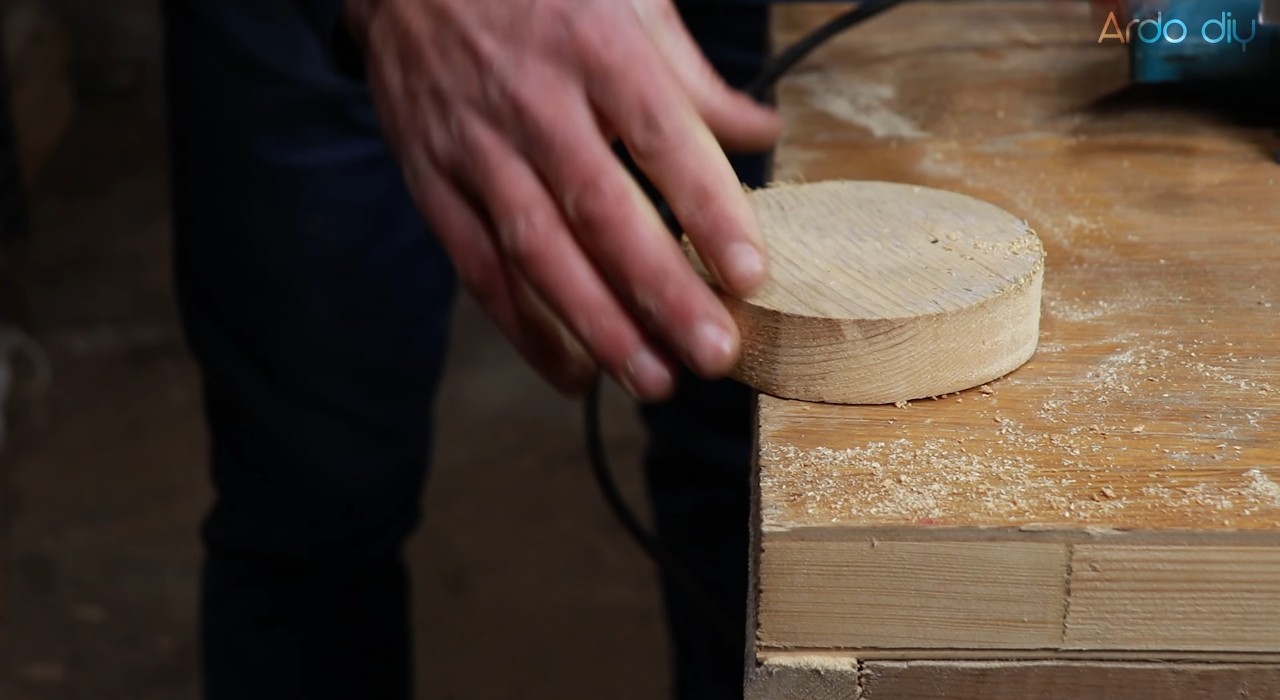
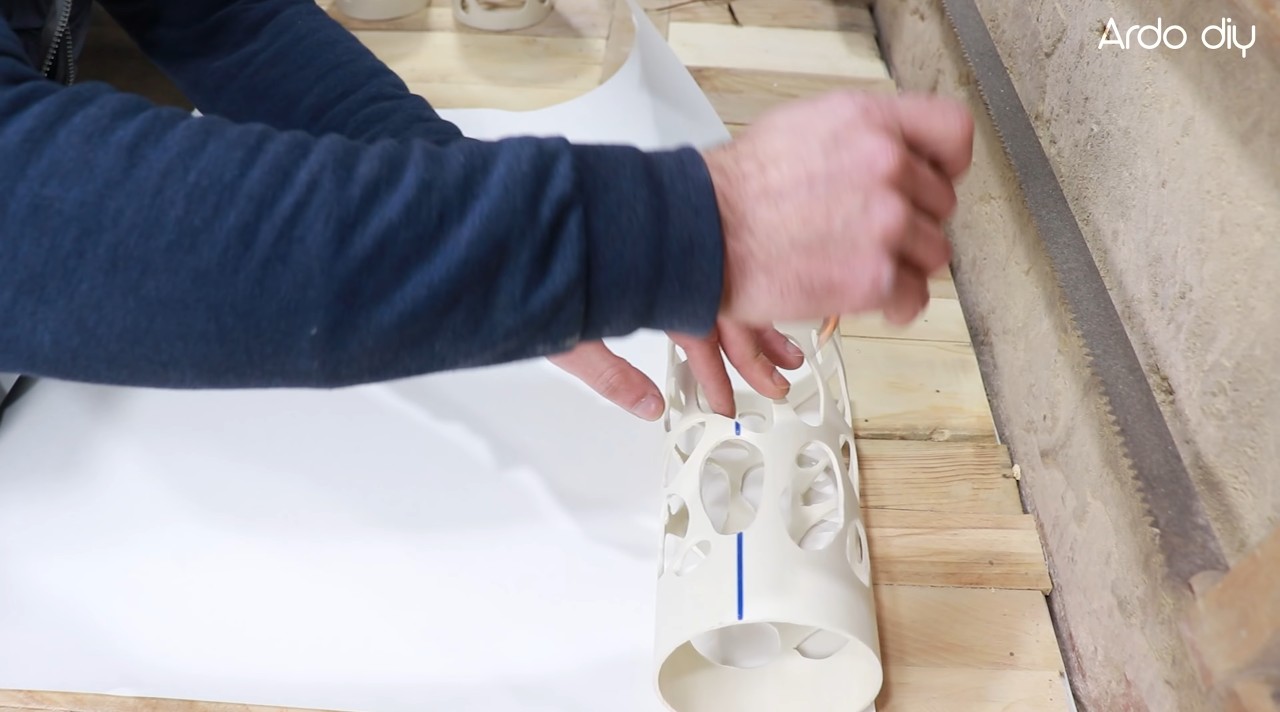
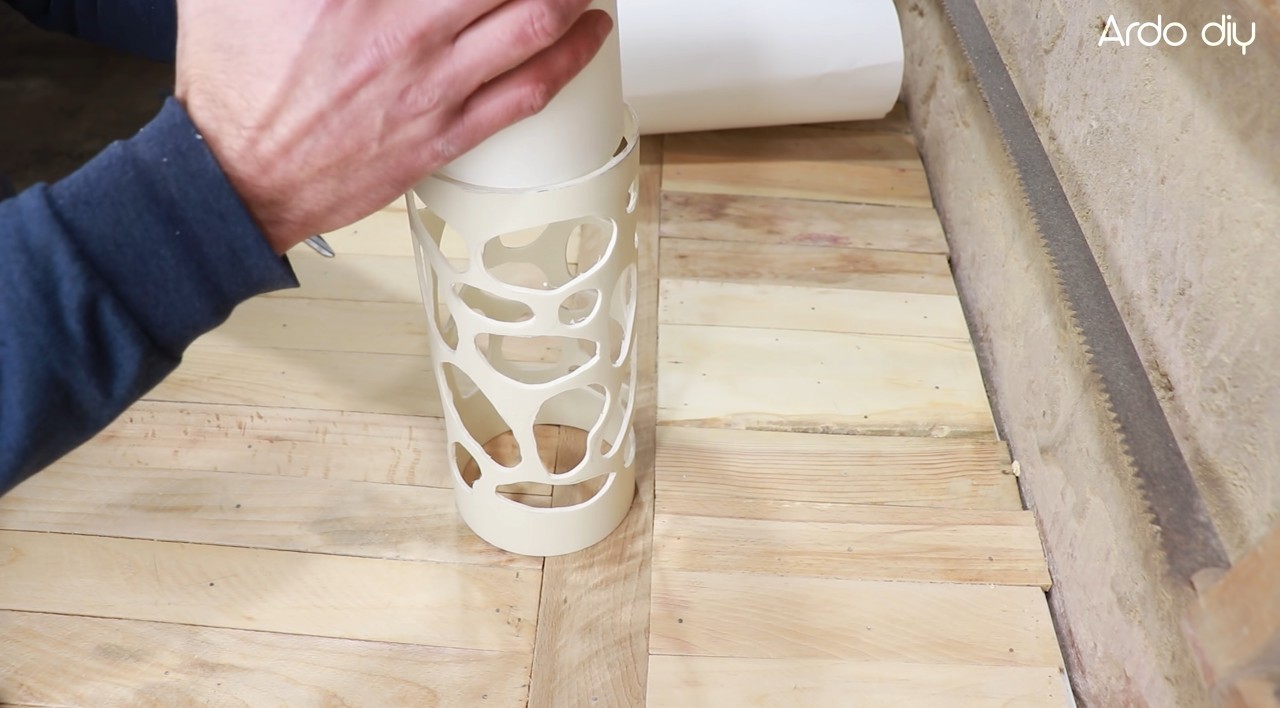
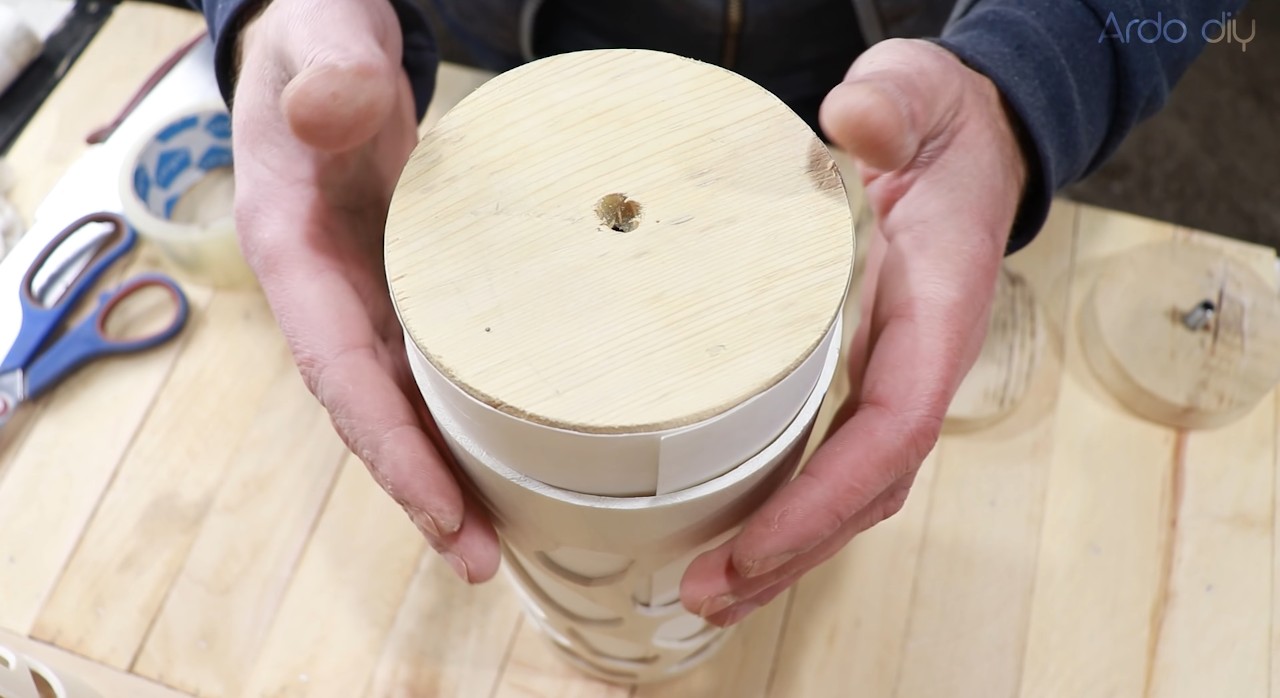
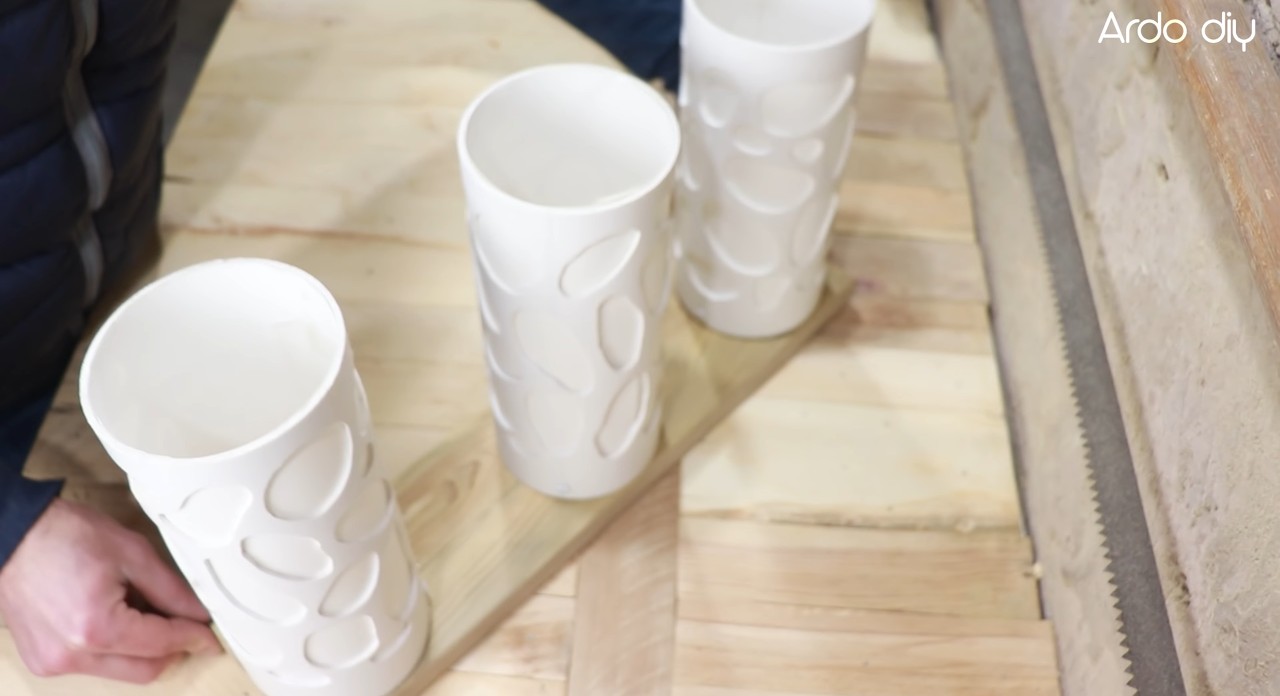
От трубы отрезаем три одинаковых куска (далее — плафоны). Из дерева изготавливаем три заглушки по внутреннему диаметру плафона. Примеряем.
![](https://imbuilder.ru/wp-content/uploads/2022/01/lystra-1-1.jpg)
![](https://imbuilder.ru/wp-content/uploads/2022/01/lystra-1-2.jpg)
![](https://imbuilder.ru/wp-content/uploads/2022/01/lystra-1-3.jpg)
![](https://imbuilder.ru/wp-content/uploads/2022/01/lystra-1-4.jpg)
![](https://imbuilder.ru/wp-content/uploads/2022/01/lystra-1-5.jpg)
![](https://imbuilder.ru/wp-content/uploads/2022/01/lystra-1-6.jpg)
![](https://imbuilder.ru/wp-content/uploads/2022/01/lystra-1-7.jpg)
![](https://imbuilder.ru/wp-content/uploads/2022/01/lystra-1-1-80x80.jpg)
![](https://imbuilder.ru/wp-content/uploads/2022/01/lystra-1-2-80x80.jpg)
![](https://imbuilder.ru/wp-content/uploads/2022/01/lystra-1-3-80x80.jpg)
![](https://imbuilder.ru/wp-content/uploads/2022/01/lystra-1-4-80x80.jpg)
![](https://imbuilder.ru/wp-content/uploads/2022/01/lystra-1-5-80x80.jpg)
![](https://imbuilder.ru/wp-content/uploads/2022/01/lystra-1-6-80x80.jpg)
![](https://imbuilder.ru/wp-content/uploads/2022/01/lystra-1-7-80x80.jpg)
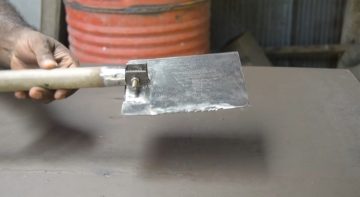
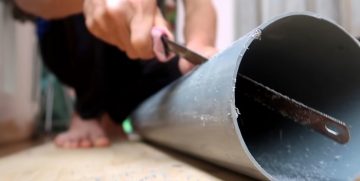
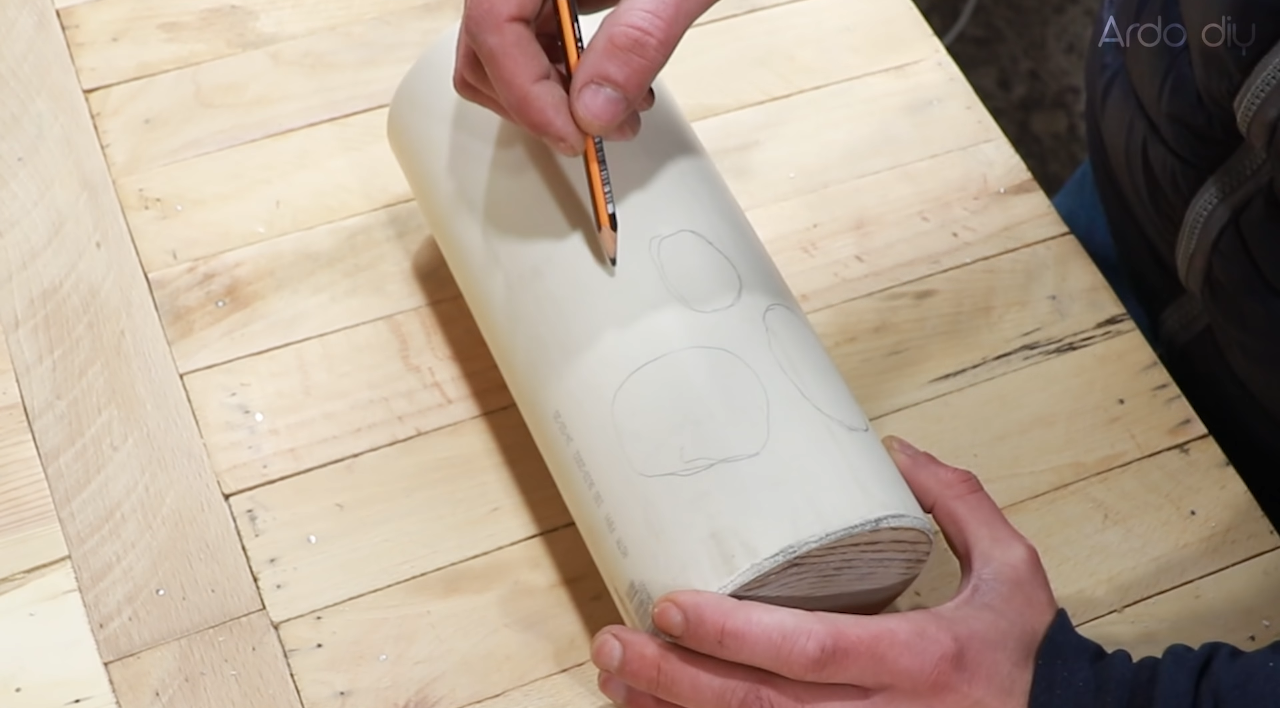
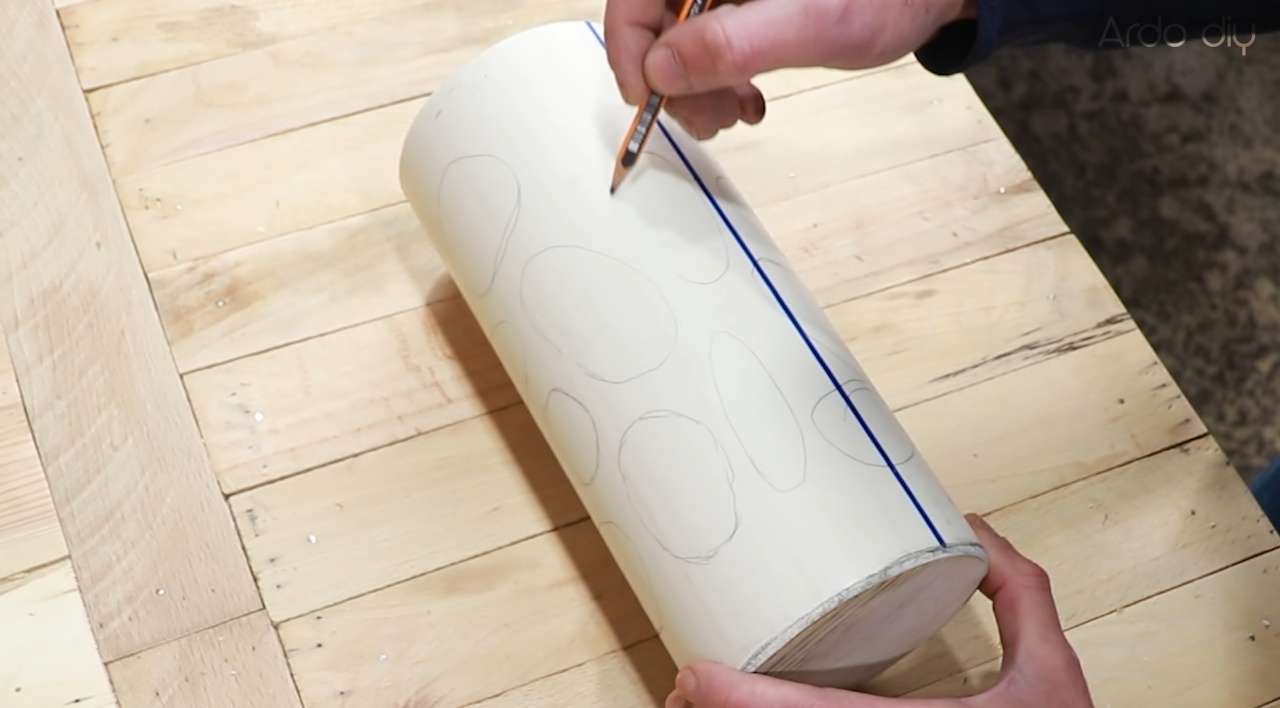
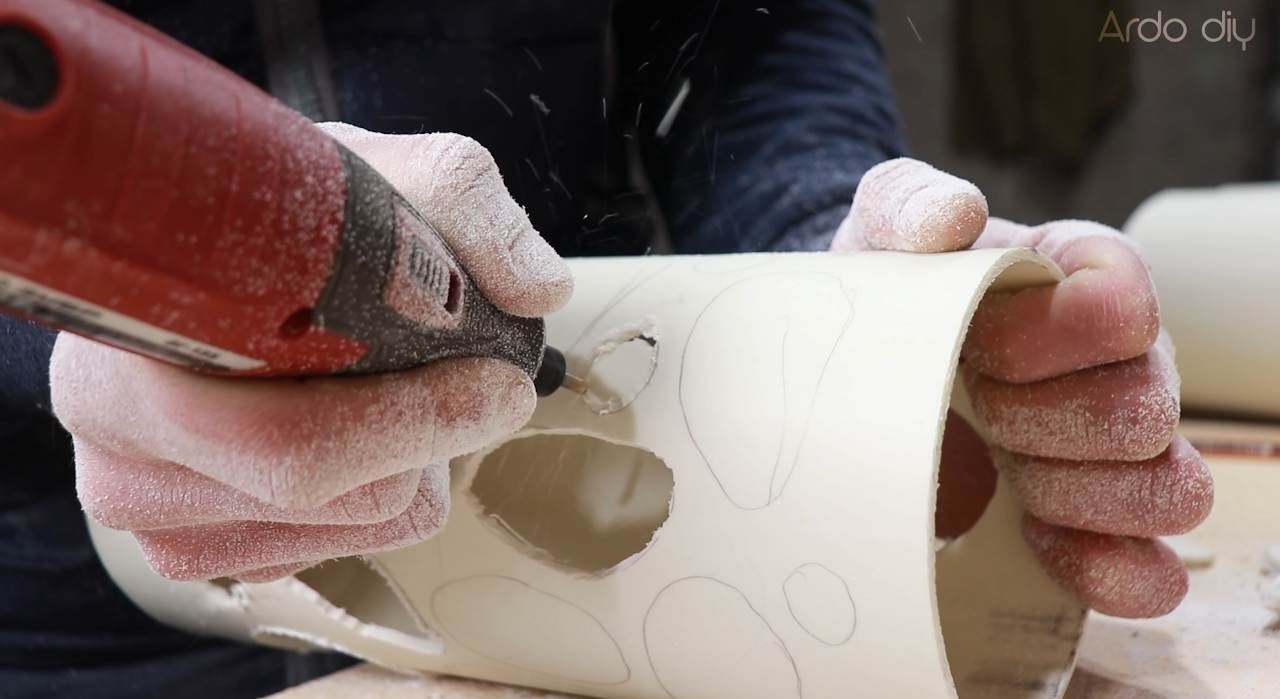
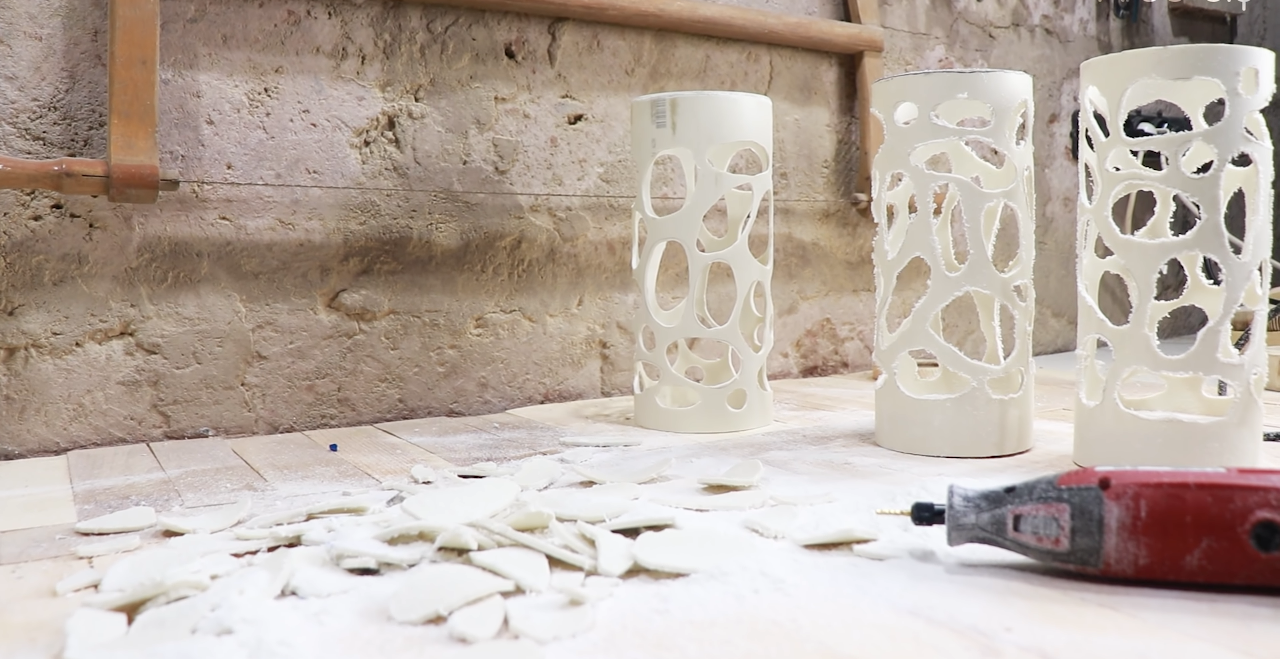
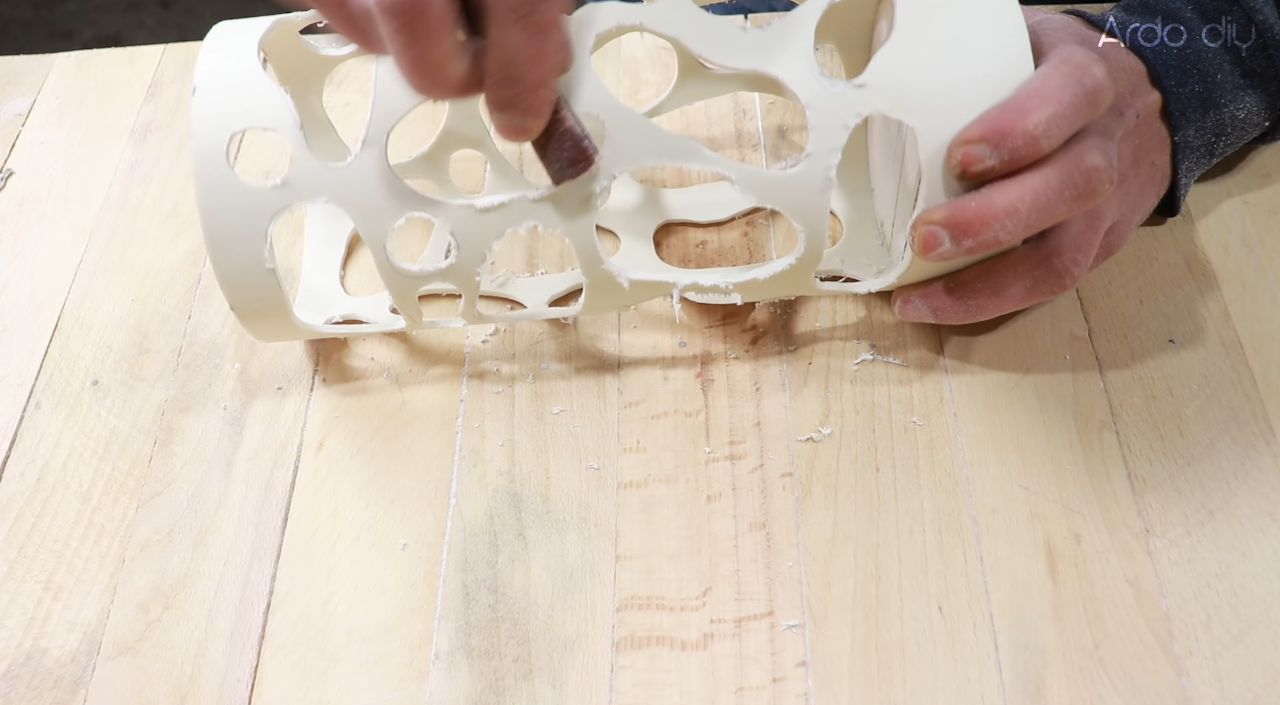
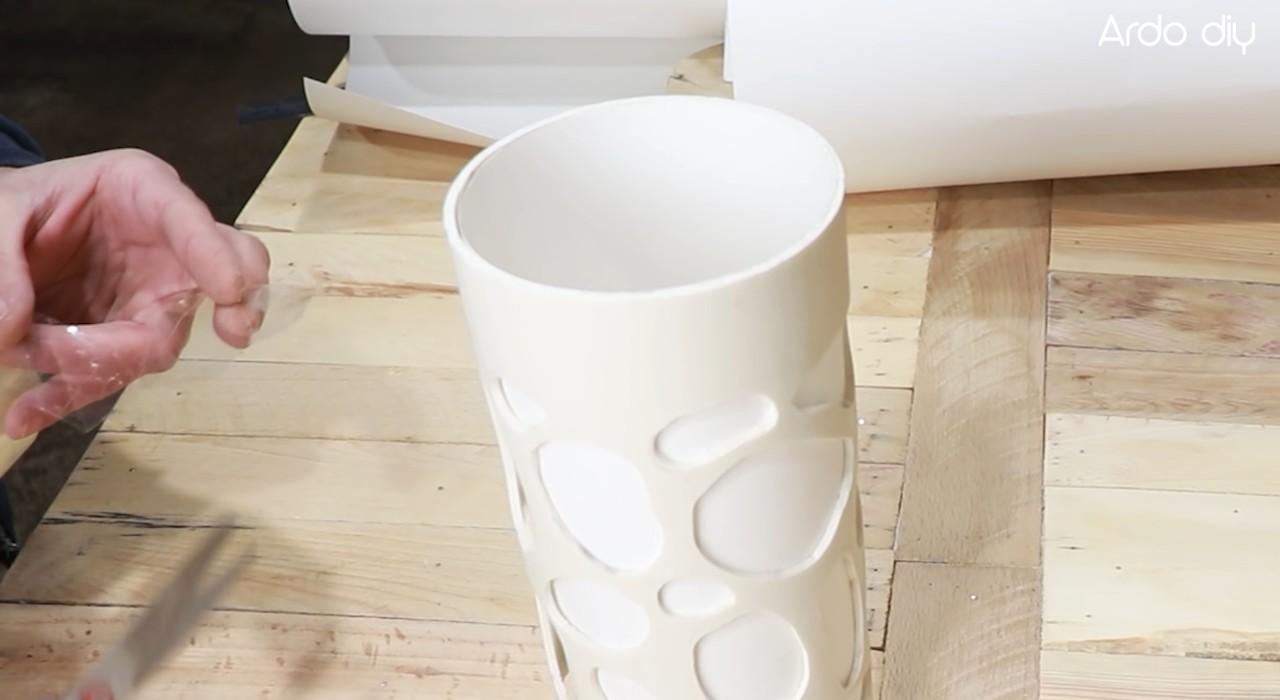
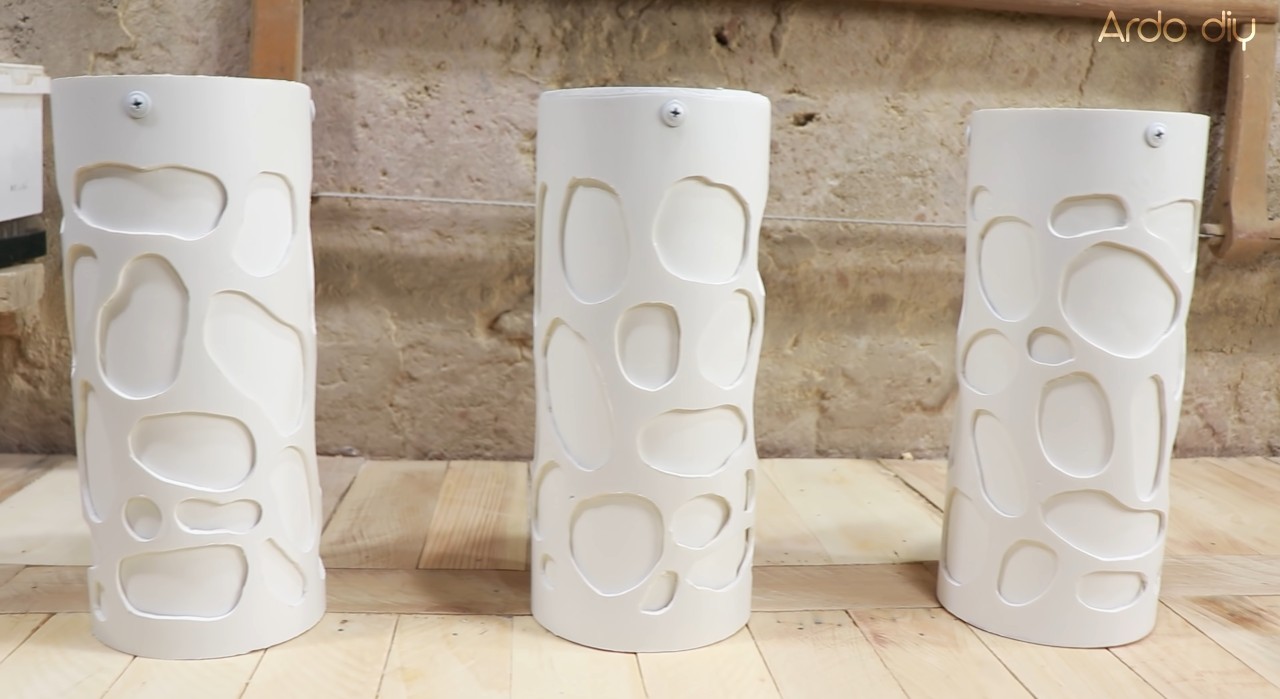
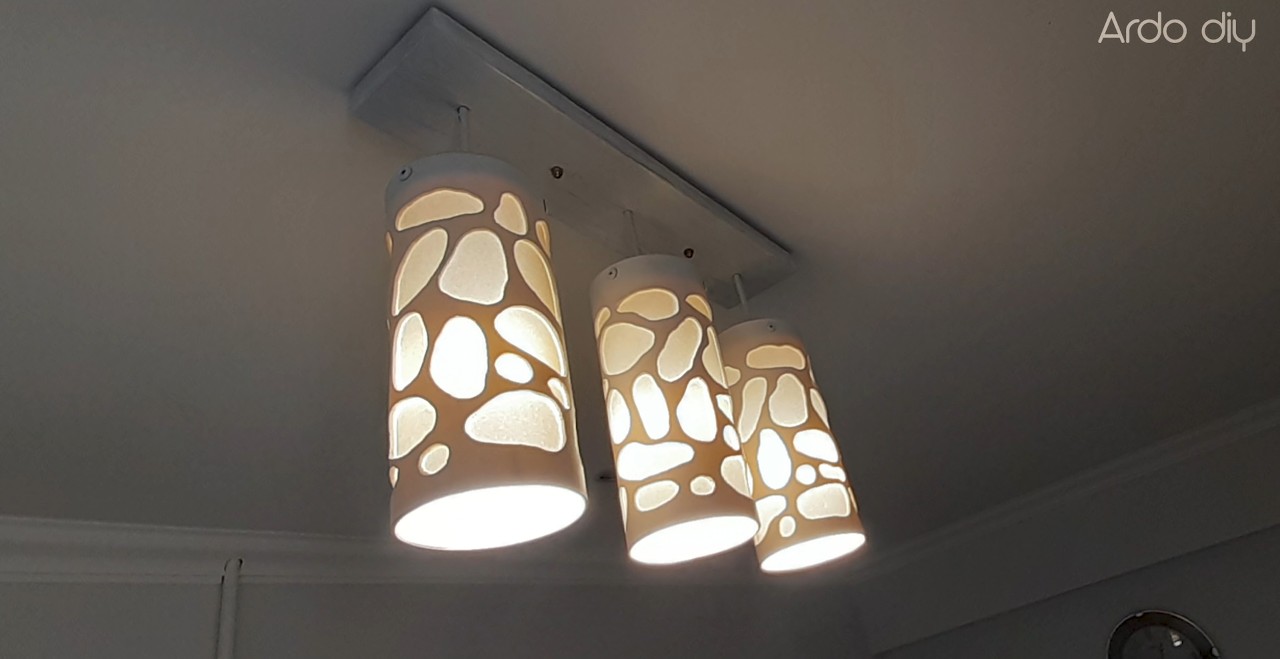
На плафонах произвольно наносим контуры фигур. Вырезаем, шлифуем, подчищаем.
![](https://imbuilder.ru/wp-content/uploads/2022/01/2022-01-07_12-08-36.png)
![](https://imbuilder.ru/wp-content/uploads/2022/01/2022-01-07_12-09-08.png)
![](https://imbuilder.ru/wp-content/uploads/2022/01/2022-01-07_12-09-59.png)
![](https://imbuilder.ru/wp-content/uploads/2022/01/2022-01-07_12-10-42.png)
![](https://imbuilder.ru/wp-content/uploads/2022/01/2022-01-07_12-12-47.png)
![](https://imbuilder.ru/wp-content/uploads/2022/01/2022-01-07_12-15-13.png)
![](https://imbuilder.ru/wp-content/uploads/2022/01/2022-01-07_12-08-36-80x80.png)
![](https://imbuilder.ru/wp-content/uploads/2022/01/2022-01-07_12-09-08-80x80.png)
![](https://imbuilder.ru/wp-content/uploads/2022/01/2022-01-07_12-09-59-80x80.png)
![](https://imbuilder.ru/wp-content/uploads/2022/01/2022-01-07_12-10-42-80x80.png)
![](https://imbuilder.ru/wp-content/uploads/2022/01/2022-01-07_12-12-47-80x80.png)
![](https://imbuilder.ru/wp-content/uploads/2022/01/2022-01-07_12-15-13-80x80.png)
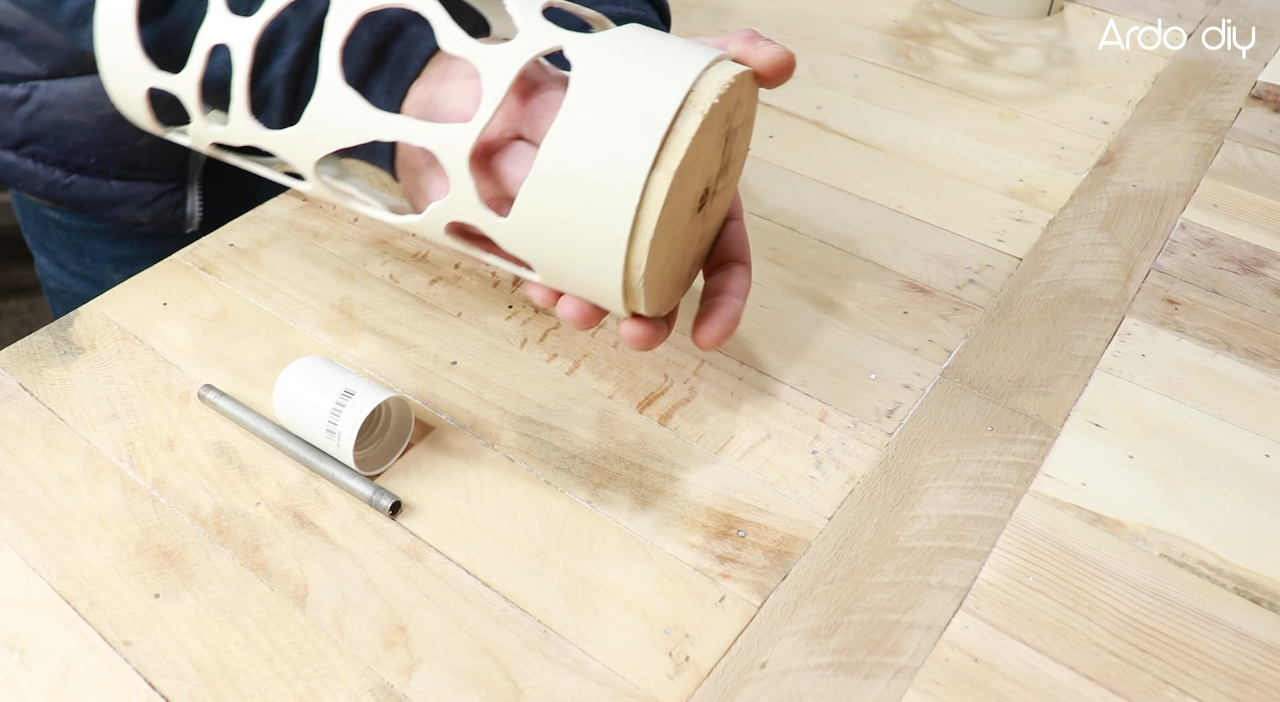
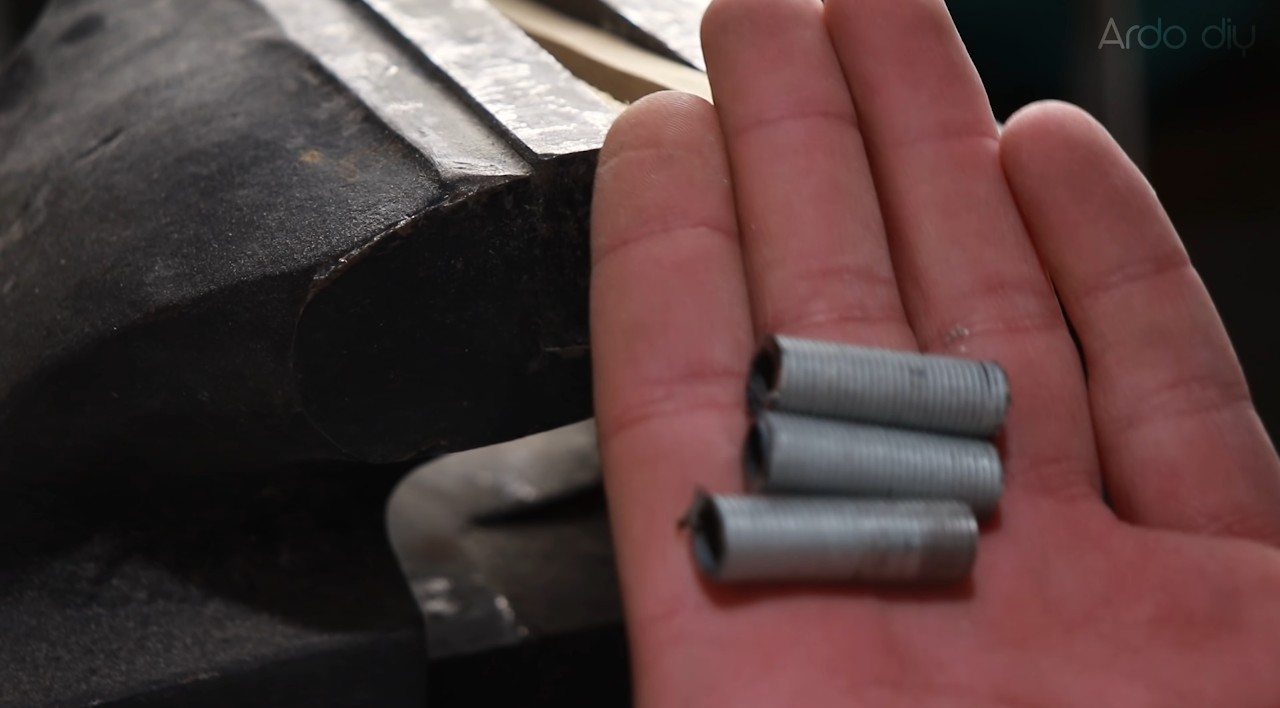
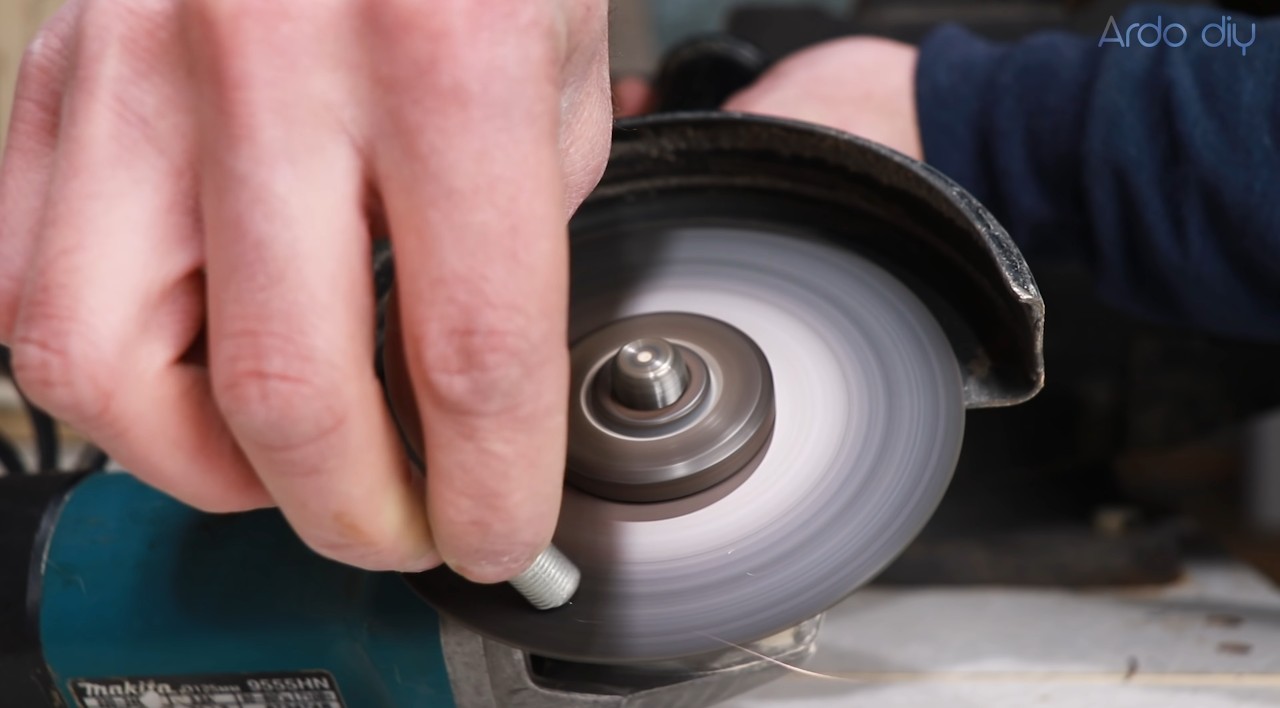
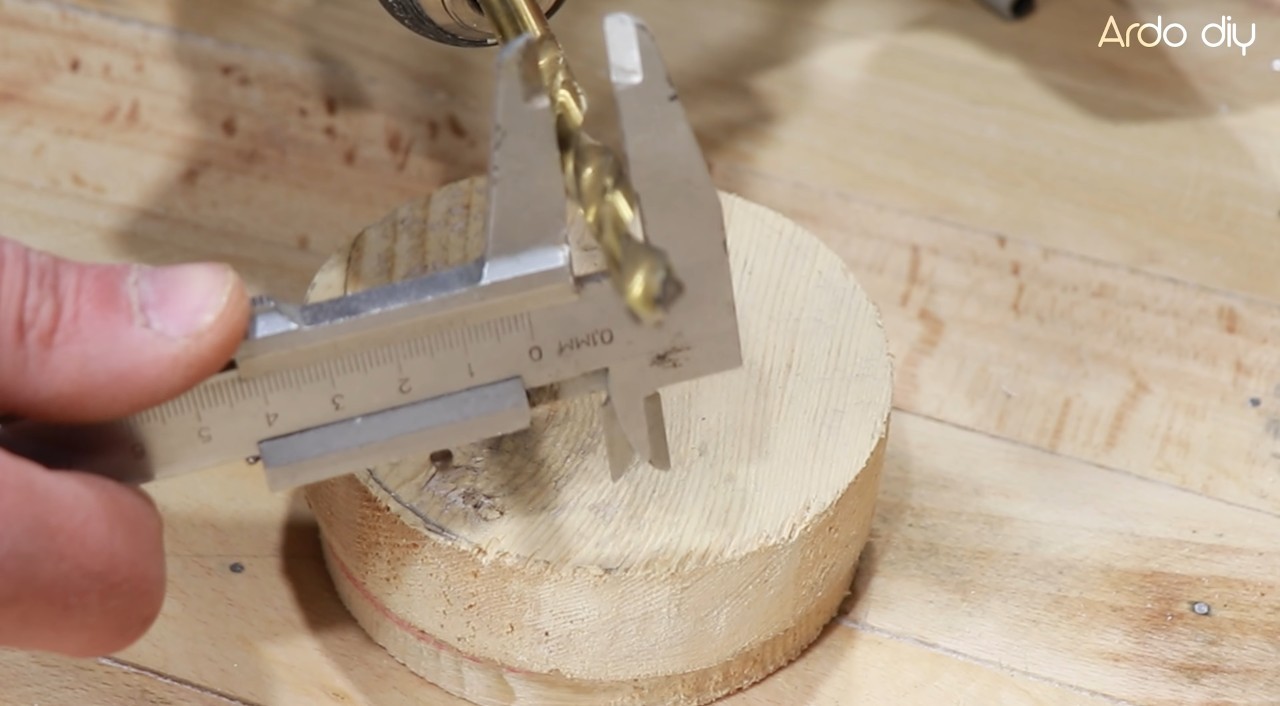
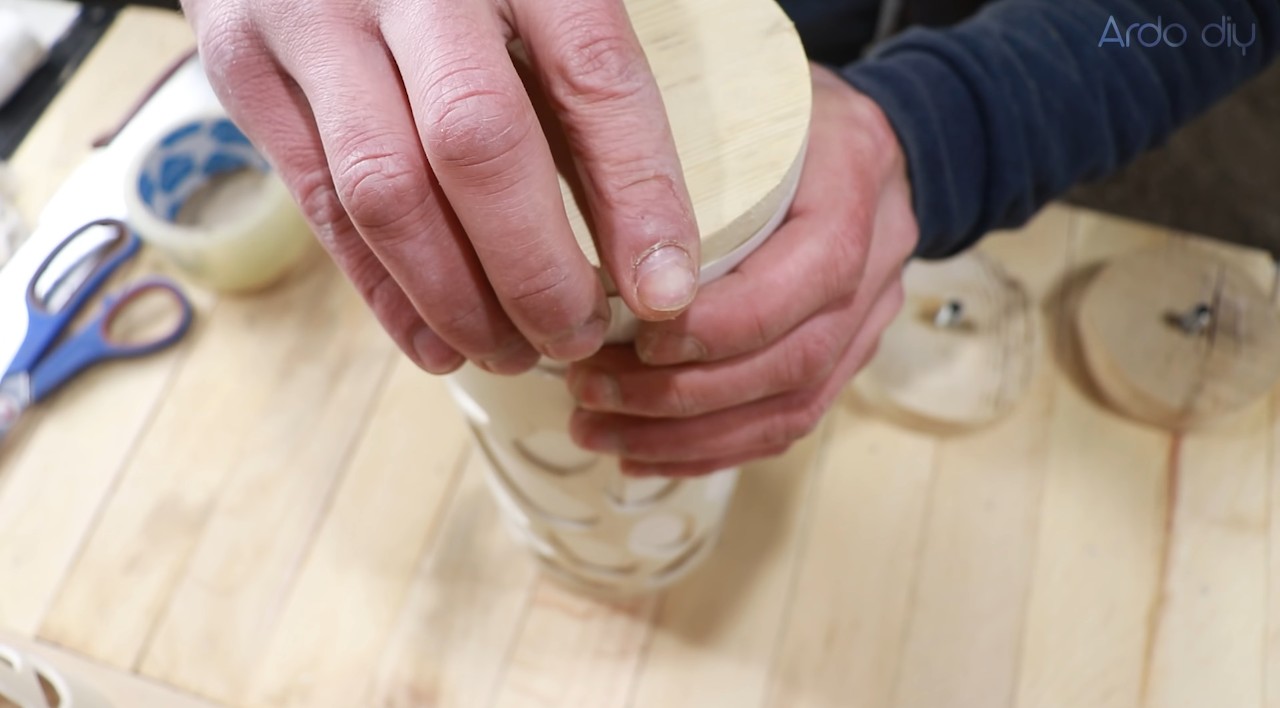
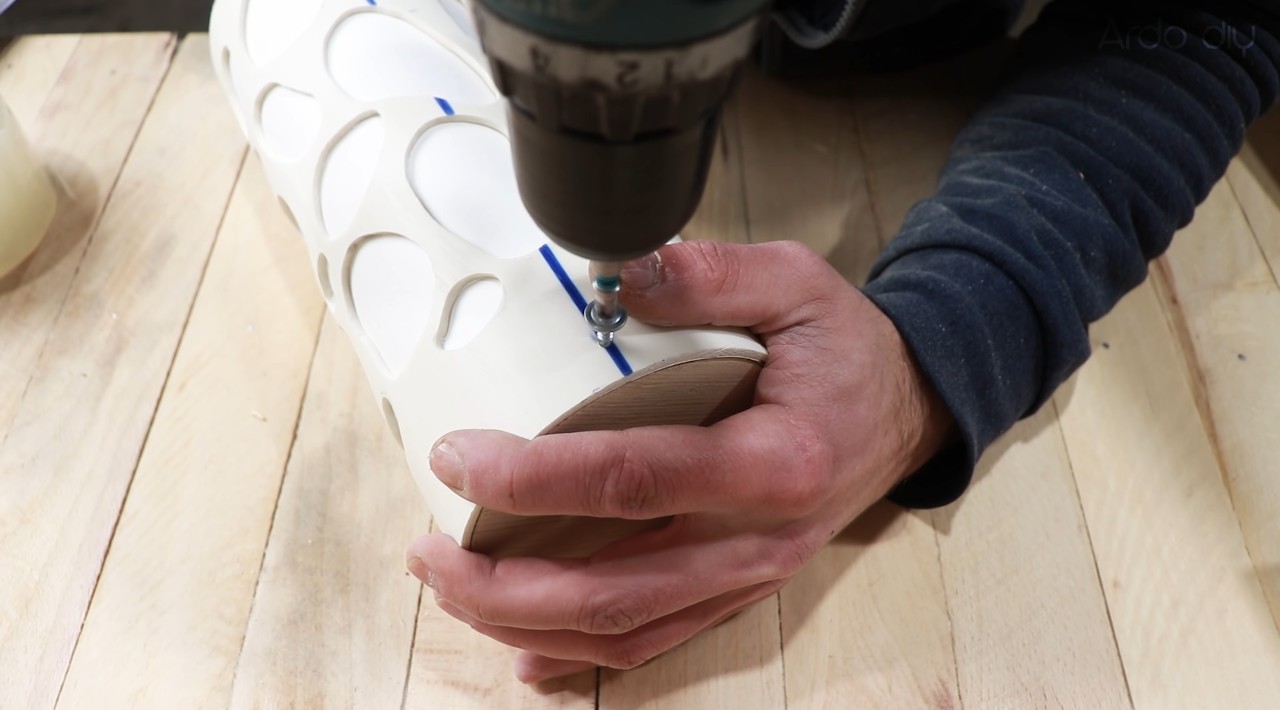
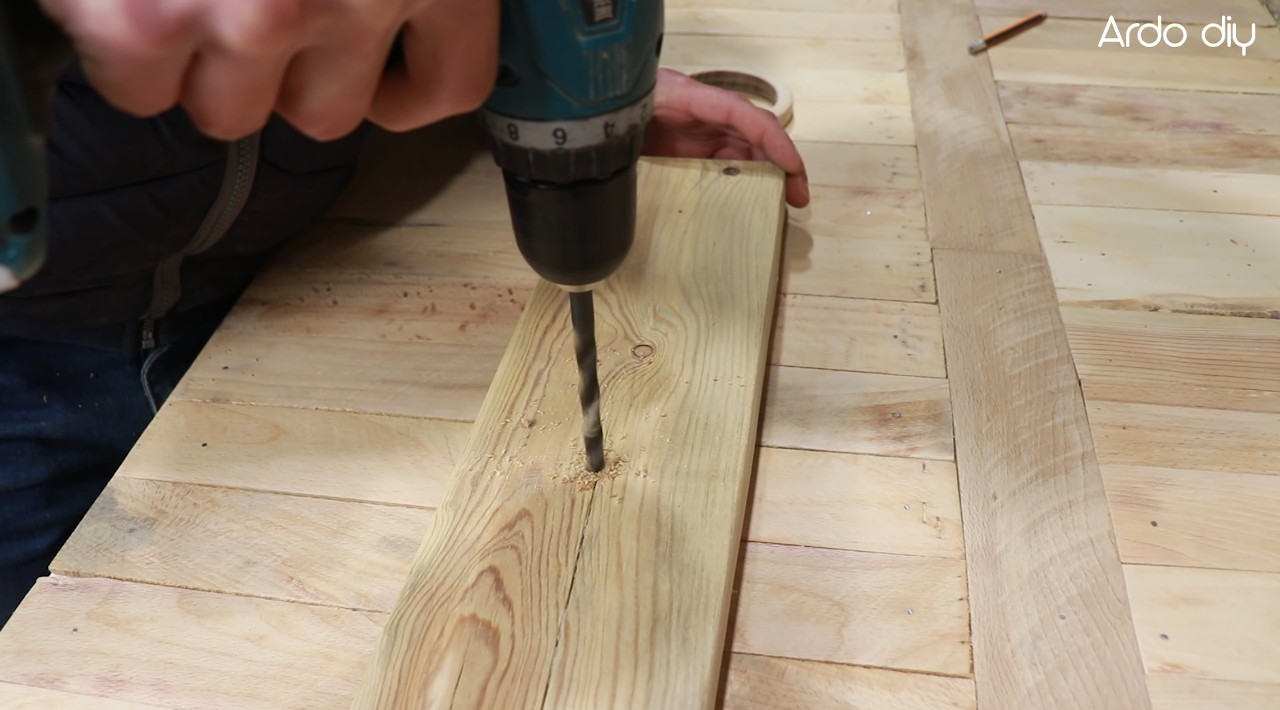
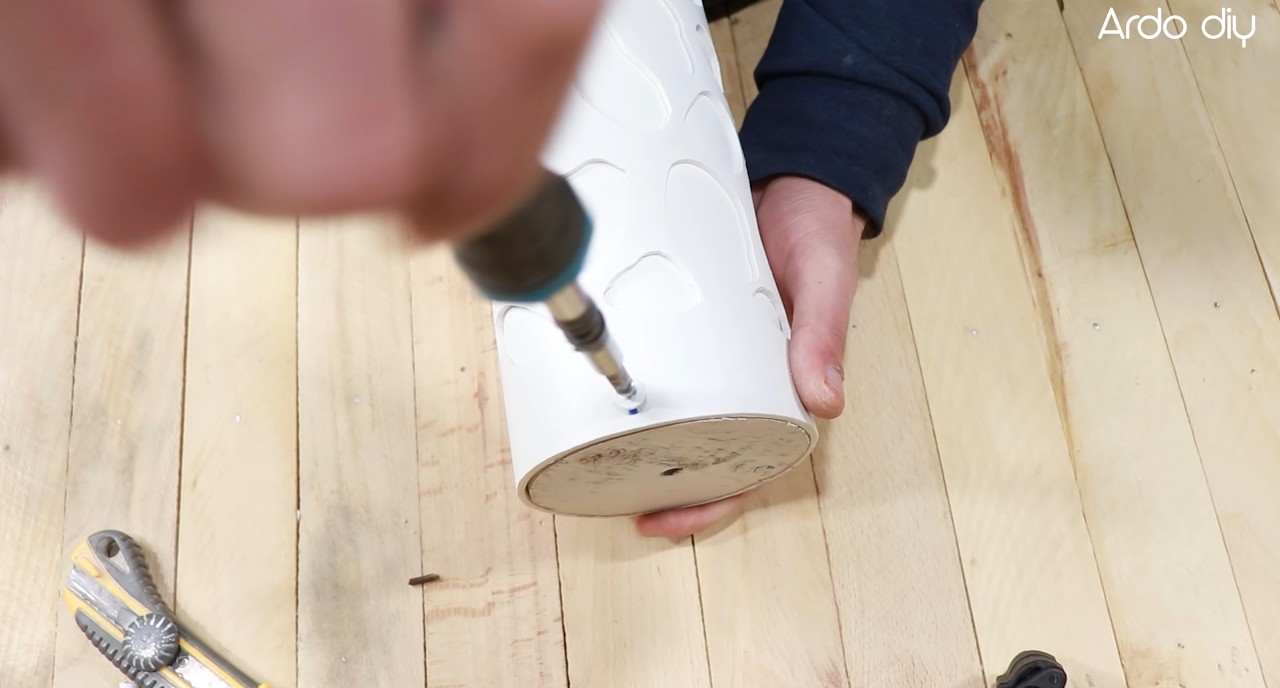
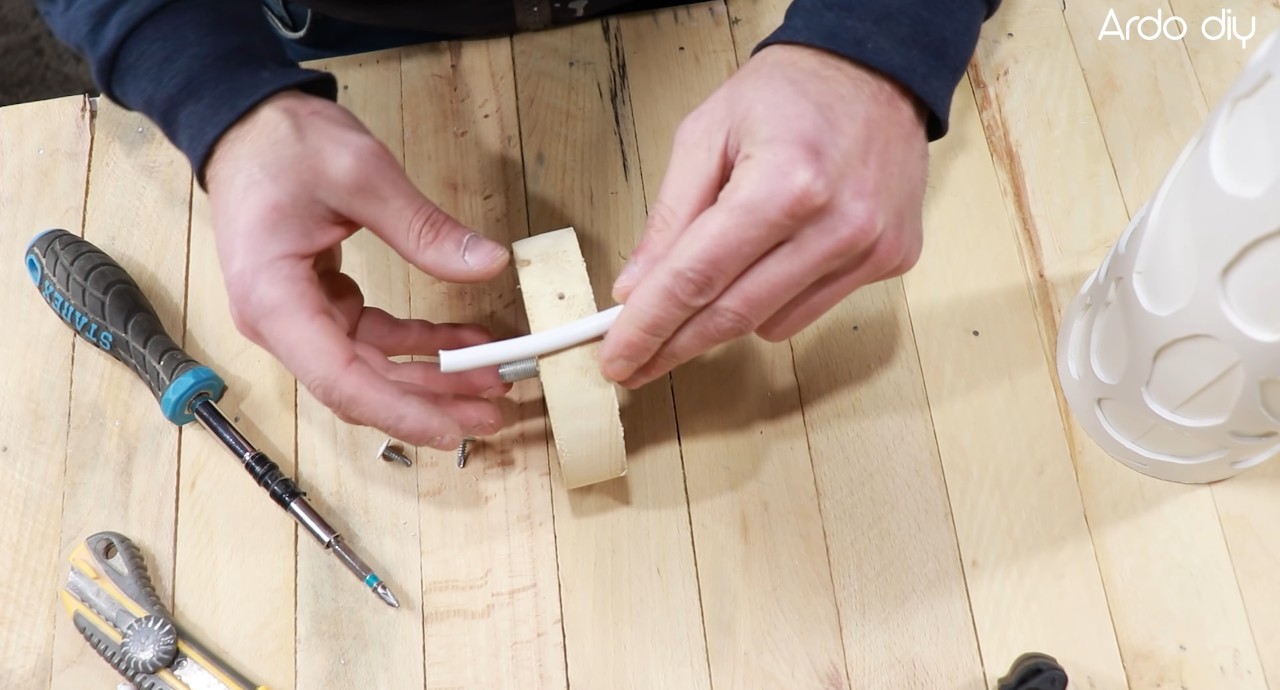
Для крепления патронов отрезаем три втулки с наружной резьбой совместимой с резьбой в патроне. Длину втулок определяем опытным путём (наворачиваем патрон, добавляем толщину обработанной заглушки), ставим метку. Отпиливаем от втулки и снимаем фаску на концах ввёртышей.
![](https://imbuilder.ru/wp-content/uploads/2022/01/lystra-2-1.jpg)
![](https://imbuilder.ru/wp-content/uploads/2022/01/lystra-2-2.jpg)
![](https://imbuilder.ru/wp-content/uploads/2022/01/lystra-2-3.jpg)
![](https://imbuilder.ru/wp-content/uploads/2022/01/lystra-2-4.jpg)
![](https://imbuilder.ru/wp-content/uploads/2022/01/lystra-2-5.jpg)
![](https://imbuilder.ru/wp-content/uploads/2022/01/lystra-2-1-80x80.jpg)
![](https://imbuilder.ru/wp-content/uploads/2022/01/lystra-2-2-80x80.jpg)
![](https://imbuilder.ru/wp-content/uploads/2022/01/lystra-2-3-80x80.jpg)
![](https://imbuilder.ru/wp-content/uploads/2022/01/lystra-2-4-80x80.jpg)
![](https://imbuilder.ru/wp-content/uploads/2022/01/lystra-2-5-80x80.jpg)
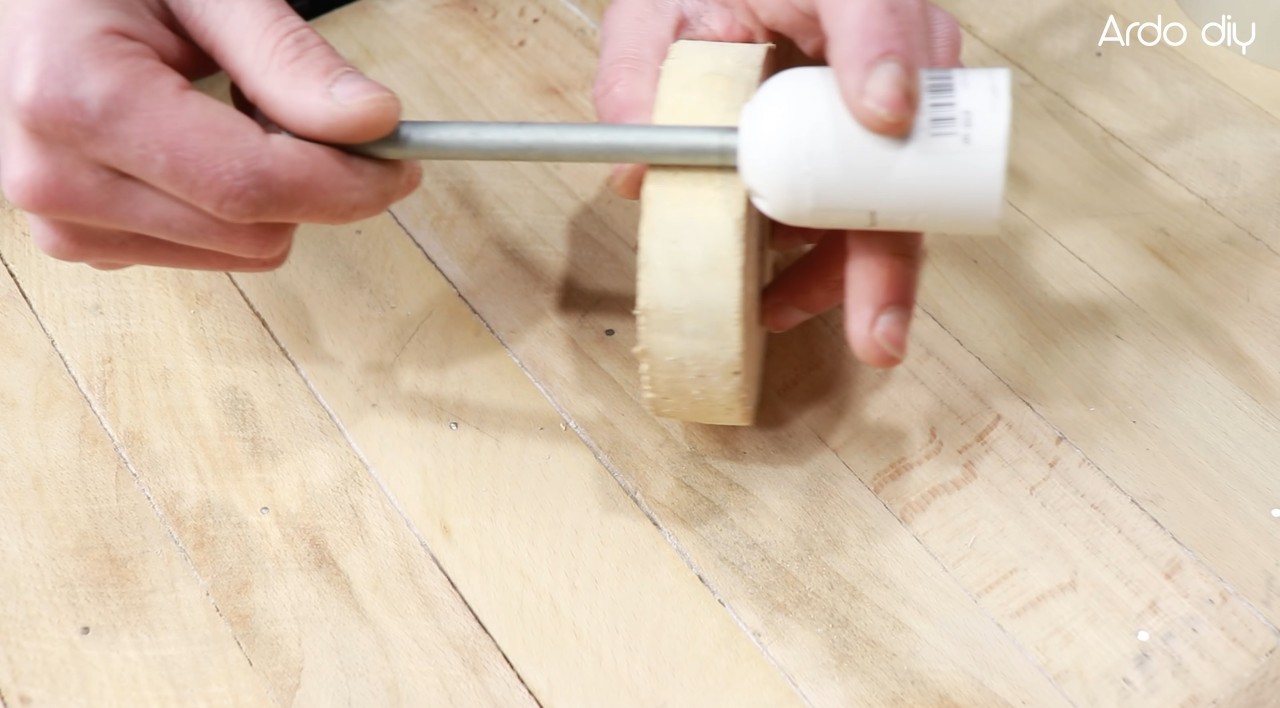
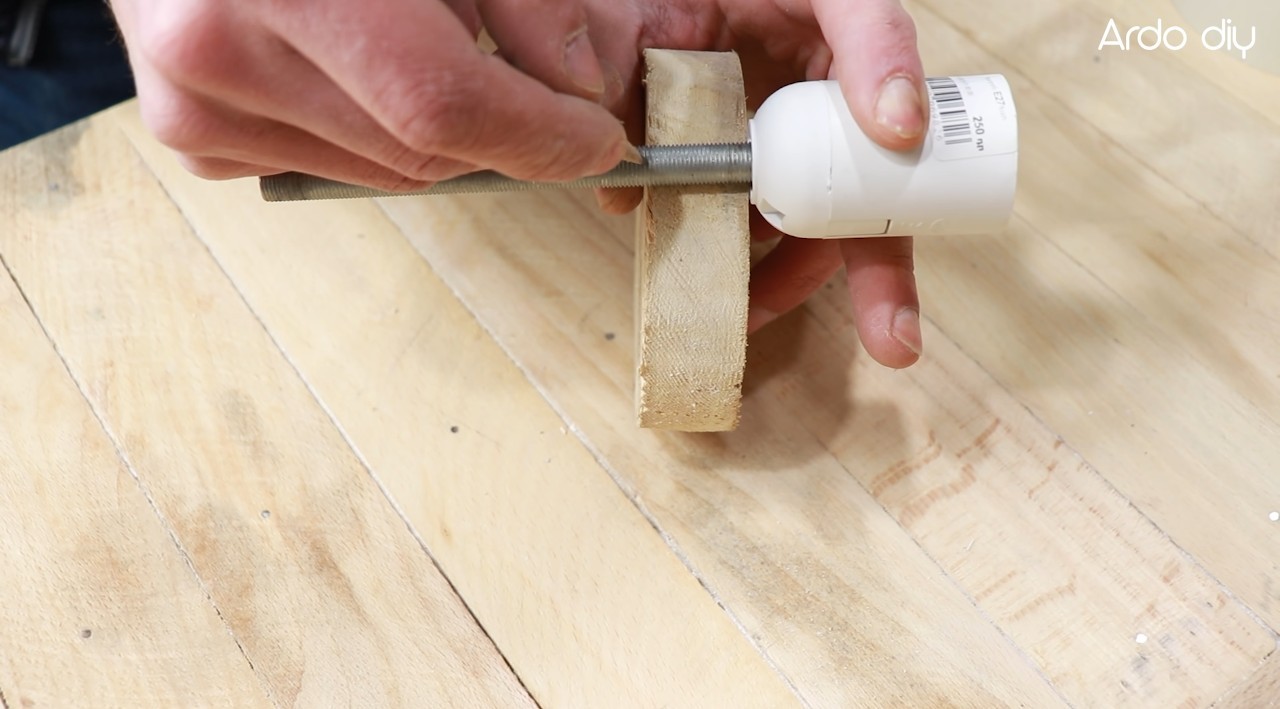
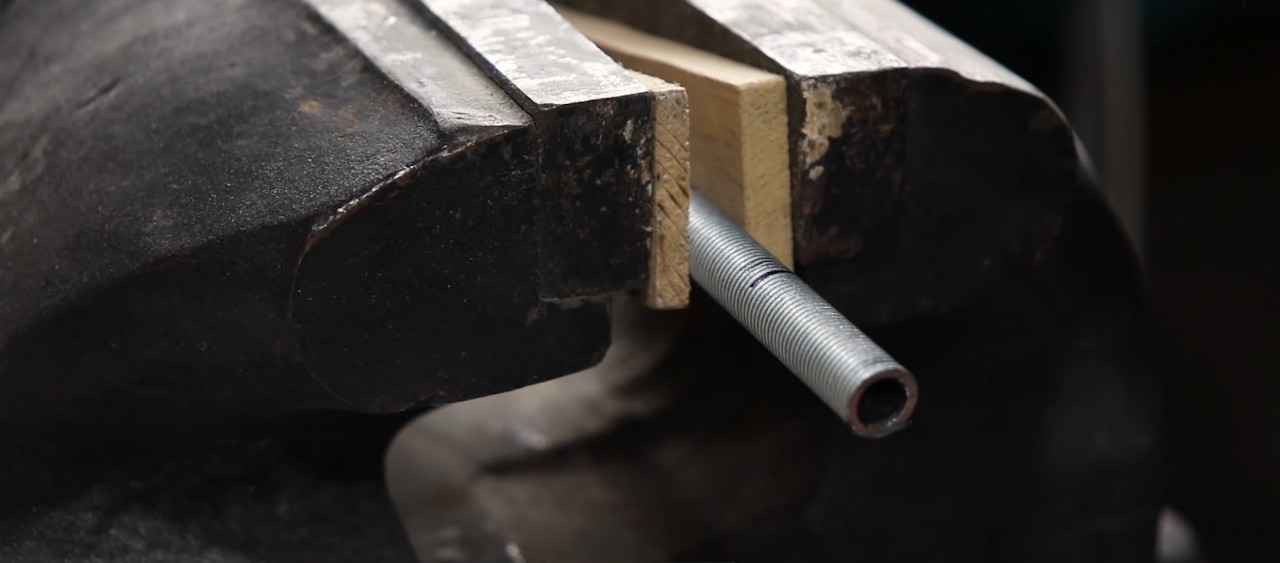
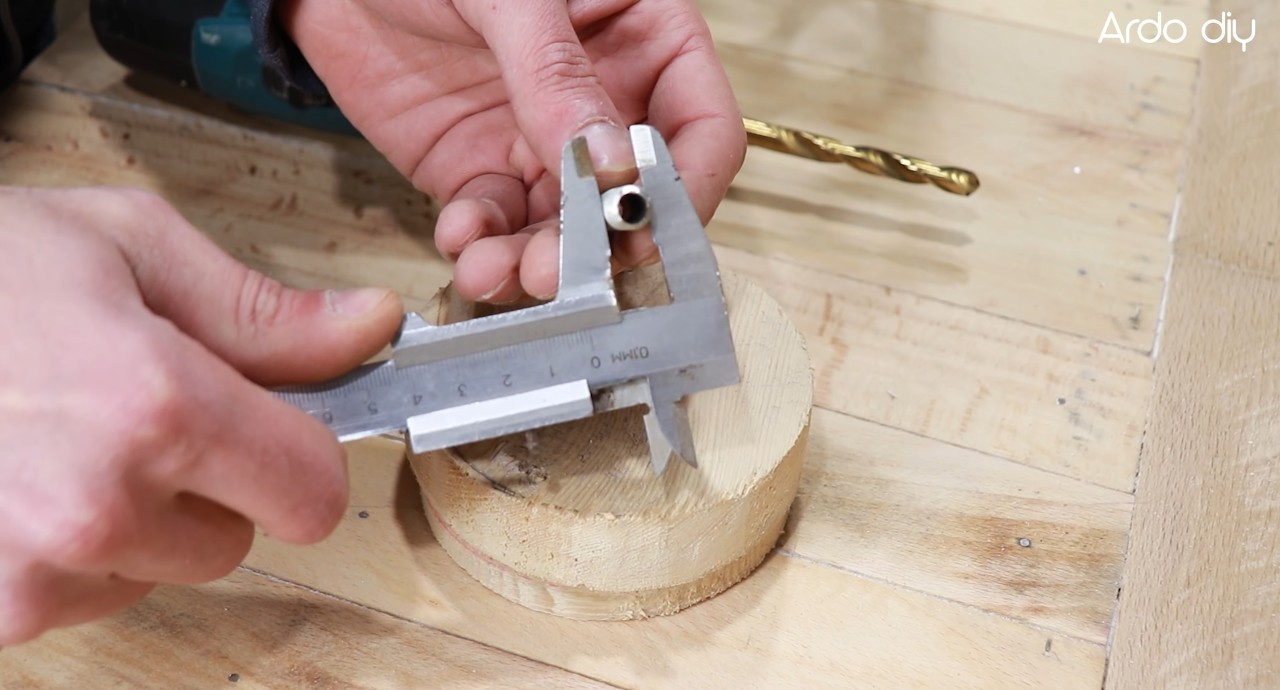
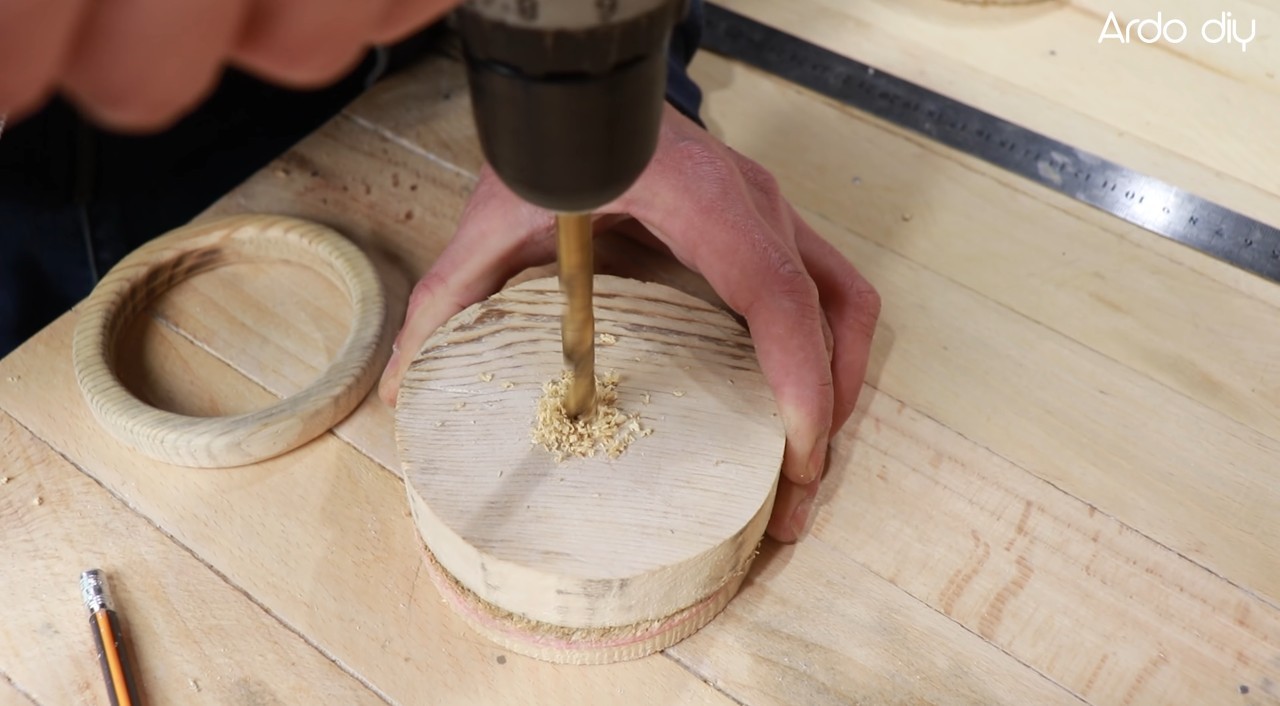
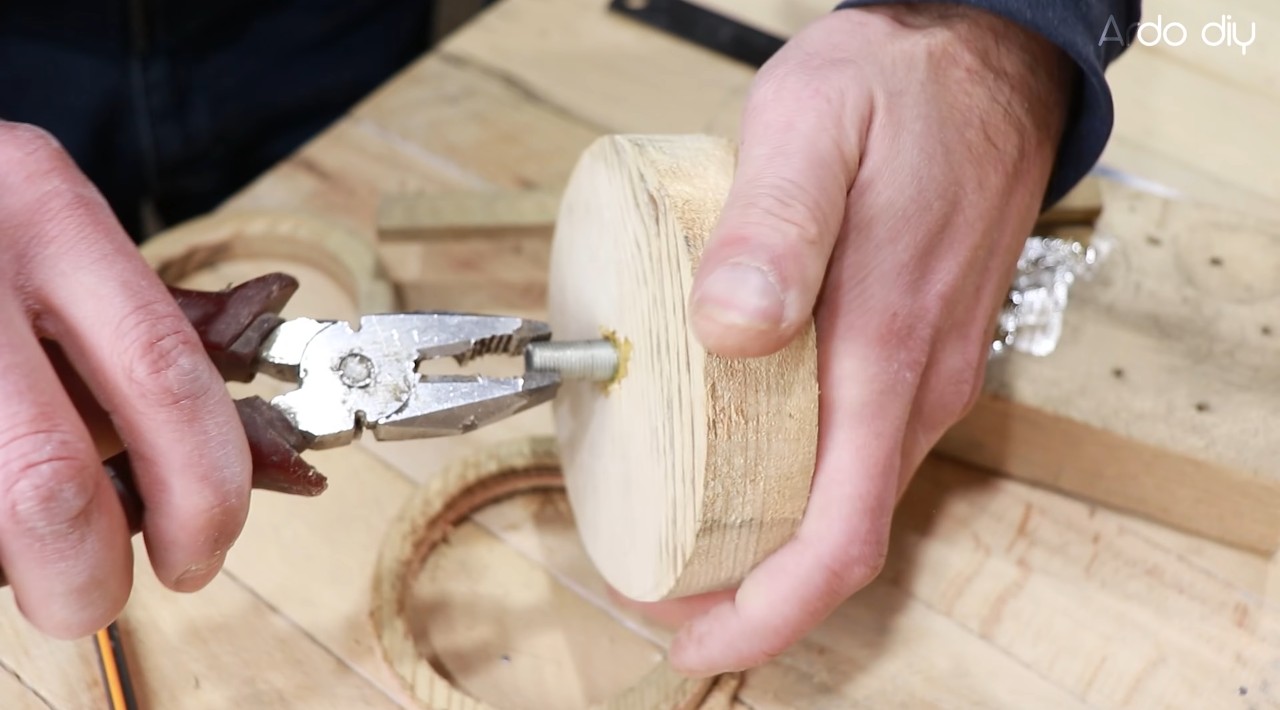
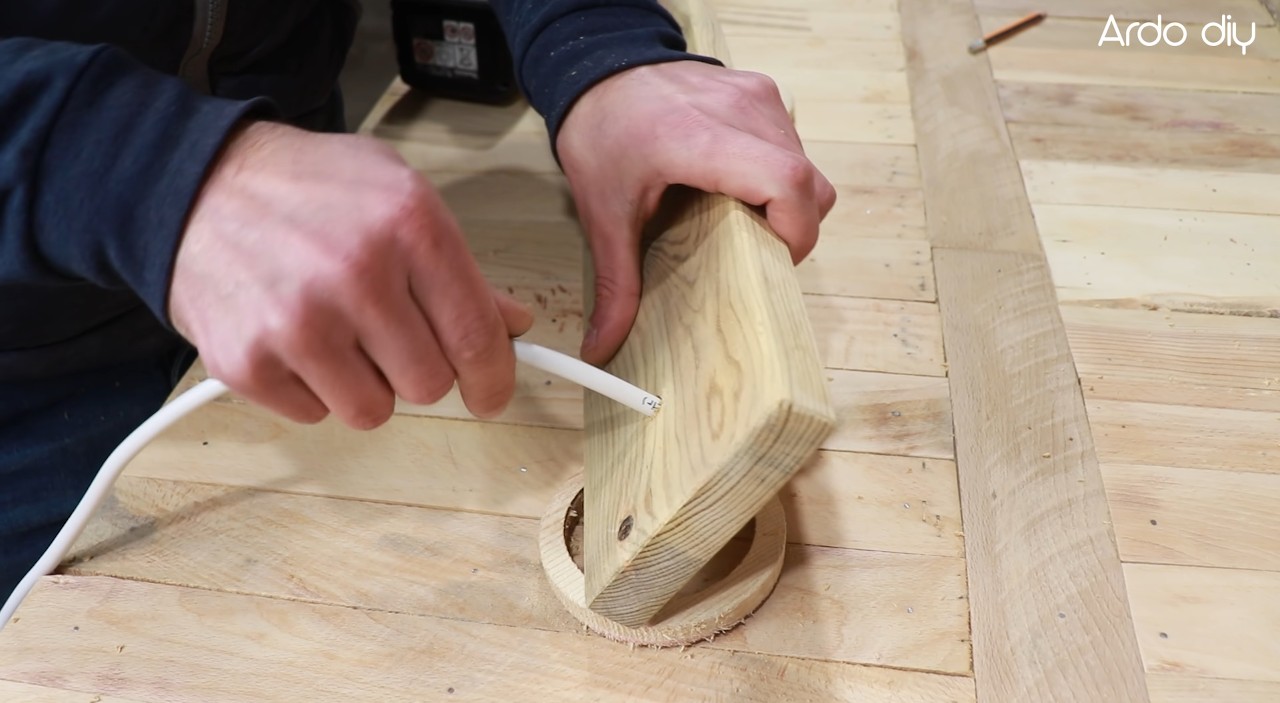
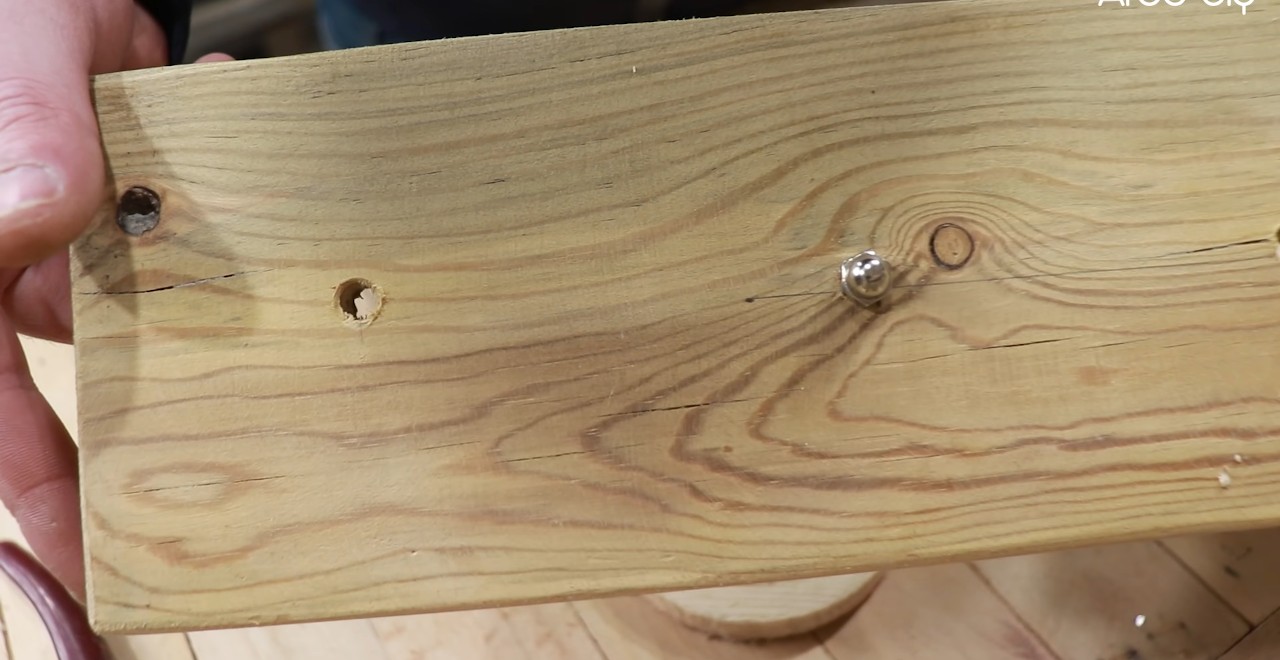
Штангенциркулем измеряем наружный диаметр втулки и по нему подбираем диаметр сверла по дереву. Сверлим заглушку по центру и вворачиваем «на клей» ввёртыши.
![](https://imbuilder.ru/wp-content/uploads/2022/01/lystra-3-1.jpg)
![](https://imbuilder.ru/wp-content/uploads/2022/01/lystra-3-3.jpg)
![](https://imbuilder.ru/wp-content/uploads/2022/01/lystra-3-4.jpg)
![](https://imbuilder.ru/wp-content/uploads/2022/01/lystra-3-5.jpg)
![](https://imbuilder.ru/wp-content/uploads/2022/01/lystra-3-6.jpg)
![](https://imbuilder.ru/wp-content/uploads/2022/01/lystra-3-1-80x80.jpg)
![](https://imbuilder.ru/wp-content/uploads/2022/01/lystra-3-3-80x80.jpg)
![](https://imbuilder.ru/wp-content/uploads/2022/01/lystra-3-4-80x80.jpg)
![](https://imbuilder.ru/wp-content/uploads/2022/01/lystra-3-5-80x80.jpg)
![](https://imbuilder.ru/wp-content/uploads/2022/01/lystra-3-6-80x80.jpg)
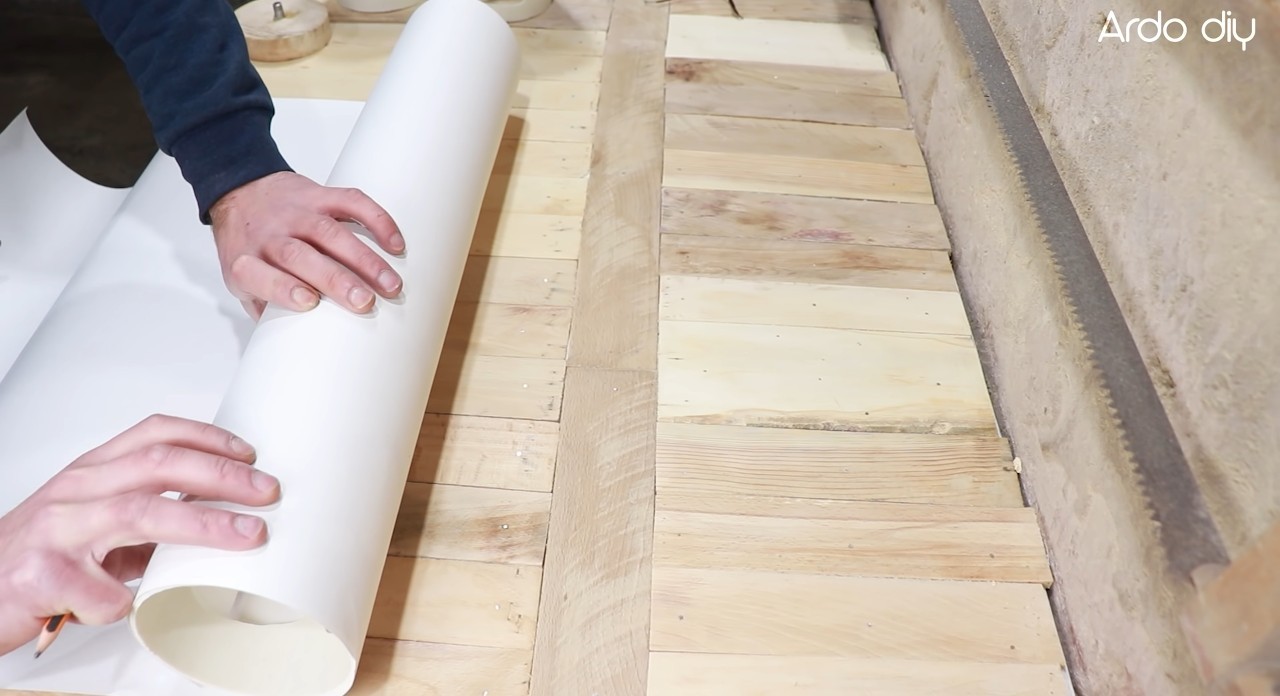
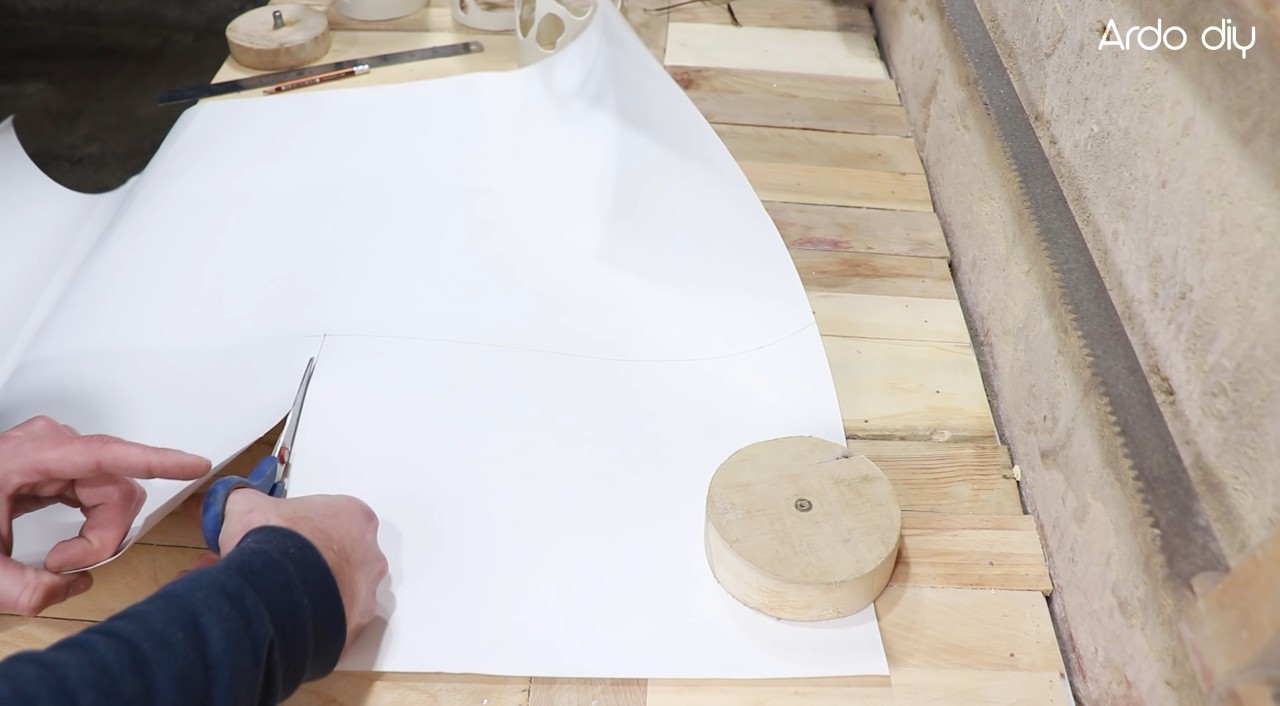
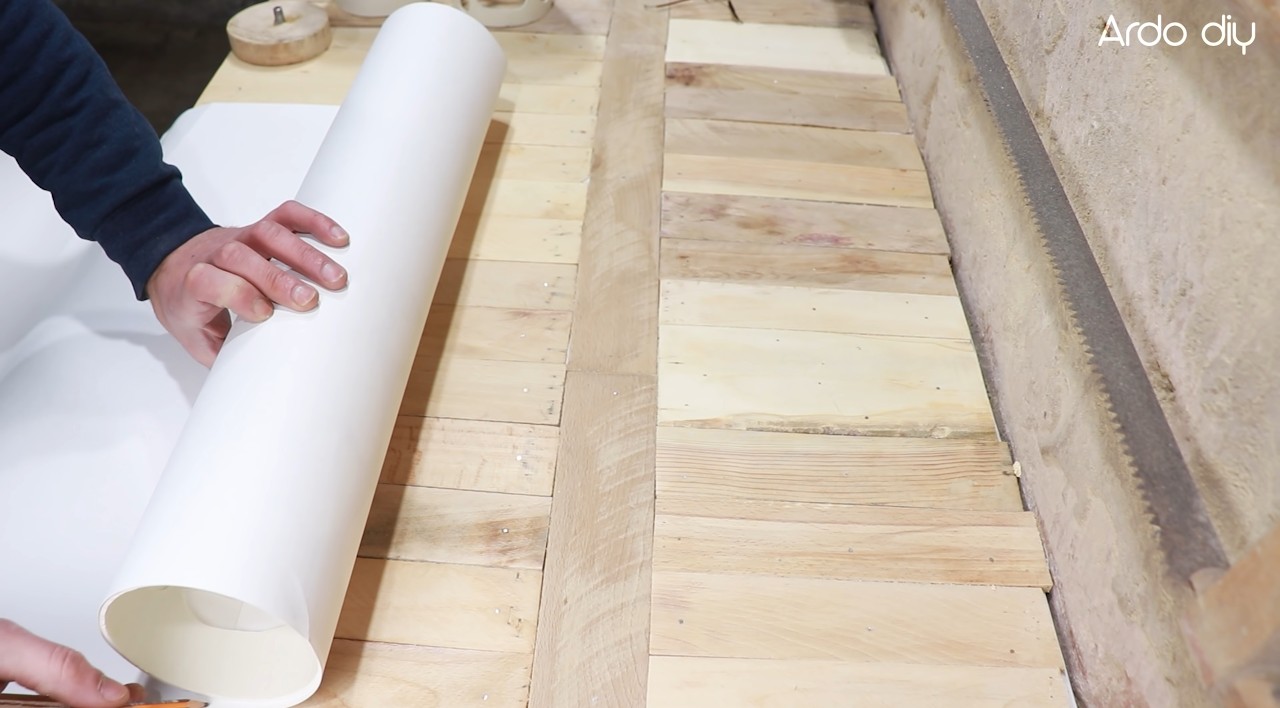
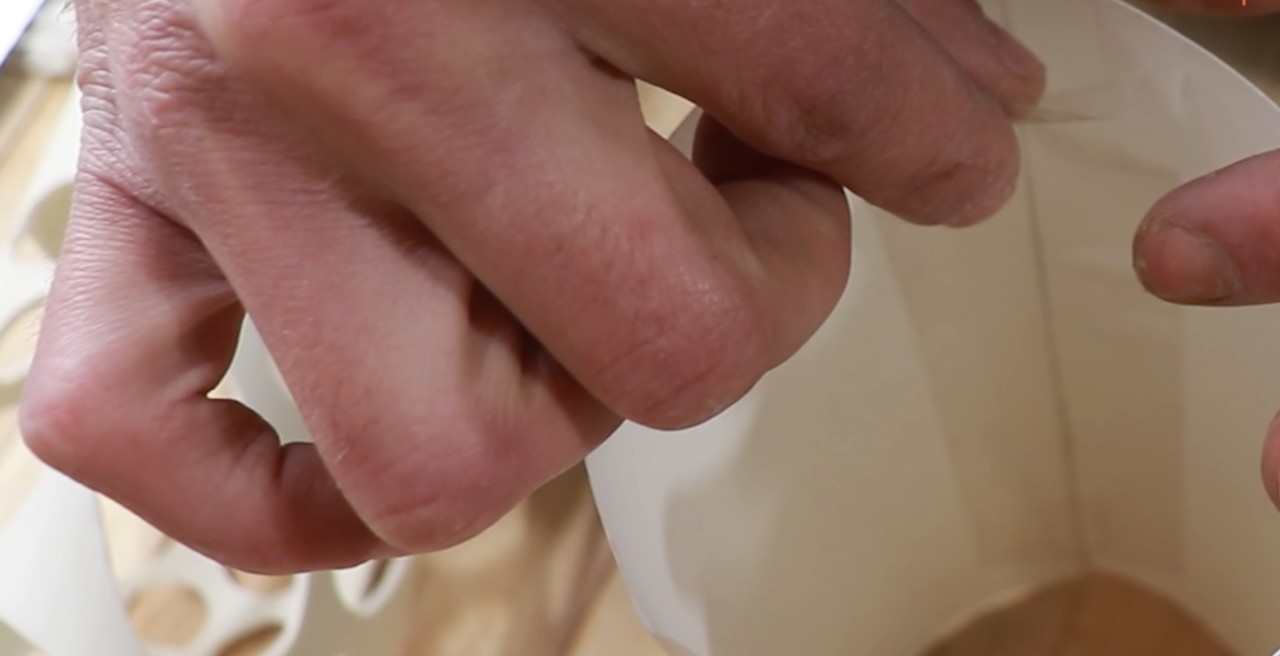
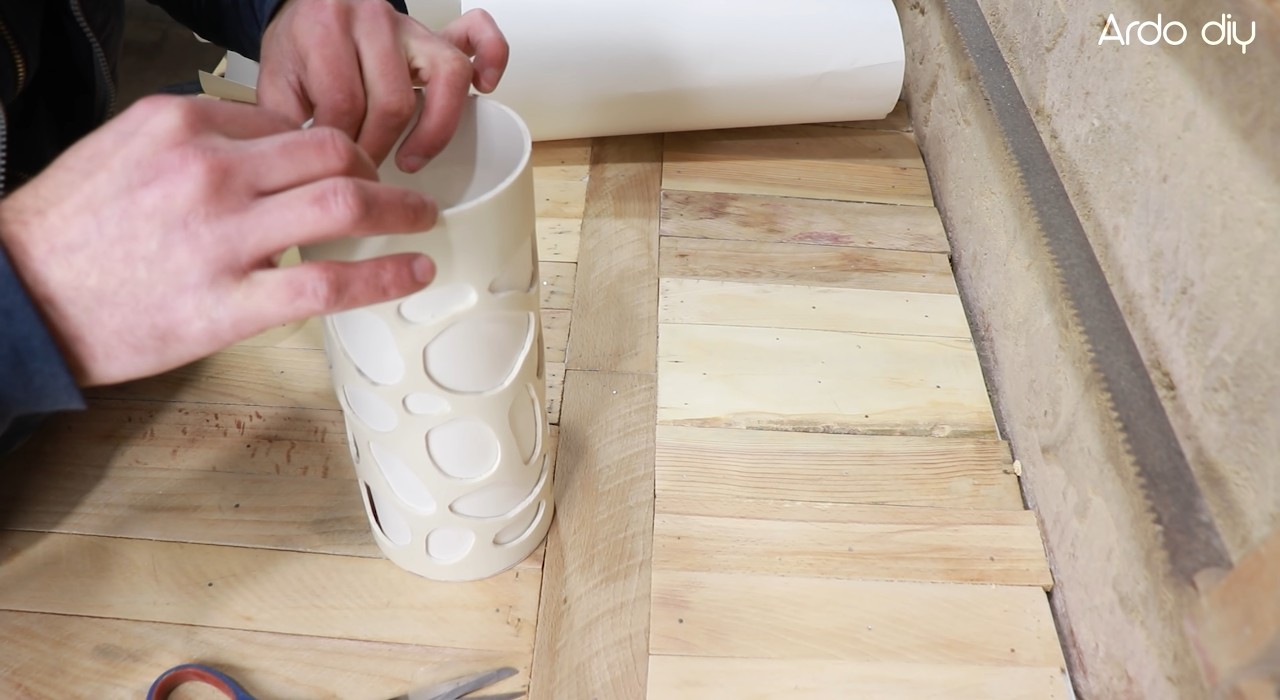
Размечаем лист пластика по плафону, разрезаем и полученный кусок вставляем в плафон. Добавляем по стыку пластиковую полоску. Вставляем заглушки в плафоны и крепим их саморезами.
![](https://imbuilder.ru/wp-content/uploads/2022/01/lystra-4-1-1.jpg)
![](https://imbuilder.ru/wp-content/uploads/2022/01/lystra-4-2-1.jpg)
![](https://imbuilder.ru/wp-content/uploads/2022/01/lystra-4-3-1.jpg)
![](https://imbuilder.ru/wp-content/uploads/2022/01/lystra-4-4-1.jpg)
![](https://imbuilder.ru/wp-content/uploads/2022/01/lystra-4-5-1.jpg)
![](https://imbuilder.ru/wp-content/uploads/2022/01/lystra-4-6-1.jpg)
![](https://imbuilder.ru/wp-content/uploads/2022/01/lystra-4-7-1.jpg)
![](https://imbuilder.ru/wp-content/uploads/2022/01/lystra-4-8-1.jpg)
![](https://imbuilder.ru/wp-content/uploads/2022/01/lystra-4-9-1.jpg)
![](https://imbuilder.ru/wp-content/uploads/2022/01/lystra-4-10-1.jpg)
![](https://imbuilder.ru/wp-content/uploads/2022/01/lystra-4-11-1.jpg)
![](https://imbuilder.ru/wp-content/uploads/2022/01/lystra-5-1-1.jpg)
![](https://imbuilder.ru/wp-content/uploads/2022/01/lystra-5-2-1.jpg)
![](https://imbuilder.ru/wp-content/uploads/2022/01/lystra-5-3-1.jpg)
![](https://imbuilder.ru/wp-content/uploads/2022/01/lystra-5-4-1.jpg)
![](https://imbuilder.ru/wp-content/uploads/2022/01/lystra-5-5-1.jpg)
![](https://imbuilder.ru/wp-content/uploads/2022/01/lystra-5-6-1.jpg)
![](https://imbuilder.ru/wp-content/uploads/2022/01/lystra-5-7-1.jpg)
![](https://imbuilder.ru/wp-content/uploads/2022/01/lystra-5-8-1.jpg)
![](https://imbuilder.ru/wp-content/uploads/2022/01/lystra-5-9-1.jpg)
![](https://imbuilder.ru/wp-content/uploads/2022/01/lystra-5-10-1.jpg)
![](https://imbuilder.ru/wp-content/uploads/2022/01/lystra-5-11-1.jpg)
![](https://imbuilder.ru/wp-content/uploads/2022/01/lystra-4-1-1-80x80.jpg)
![](https://imbuilder.ru/wp-content/uploads/2022/01/lystra-4-2-1-80x80.jpg)
![](https://imbuilder.ru/wp-content/uploads/2022/01/lystra-4-3-1-80x80.jpg)
![](https://imbuilder.ru/wp-content/uploads/2022/01/lystra-4-4-1-80x80.jpg)
![](https://imbuilder.ru/wp-content/uploads/2022/01/lystra-4-5-1-80x80.jpg)
![](https://imbuilder.ru/wp-content/uploads/2022/01/lystra-4-6-1-80x80.jpg)
![](https://imbuilder.ru/wp-content/uploads/2022/01/lystra-4-7-1-80x80.jpg)
![](https://imbuilder.ru/wp-content/uploads/2022/01/lystra-4-8-1-80x80.jpg)
![](https://imbuilder.ru/wp-content/uploads/2022/01/lystra-4-9-1-80x80.jpg)
![](https://imbuilder.ru/wp-content/uploads/2022/01/lystra-4-10-1-80x80.jpg)
![](https://imbuilder.ru/wp-content/uploads/2022/01/lystra-4-11-1-80x80.jpg)
![](https://imbuilder.ru/wp-content/uploads/2022/01/lystra-5-1-1-80x80.jpg)
![](https://imbuilder.ru/wp-content/uploads/2022/01/lystra-5-2-1-80x80.jpg)
![](https://imbuilder.ru/wp-content/uploads/2022/01/lystra-5-3-1-80x80.jpg)
![](https://imbuilder.ru/wp-content/uploads/2022/01/lystra-5-4-1-80x80.jpg)
![](https://imbuilder.ru/wp-content/uploads/2022/01/lystra-5-5-1-80x80.jpg)
![](https://imbuilder.ru/wp-content/uploads/2022/01/lystra-5-6-1-80x80.jpg)
![](https://imbuilder.ru/wp-content/uploads/2022/01/lystra-5-7-1-80x80.jpg)
![](https://imbuilder.ru/wp-content/uploads/2022/01/lystra-5-8-1-80x80.jpg)
![](https://imbuilder.ru/wp-content/uploads/2022/01/lystra-5-9-1-80x80.jpg)
![](https://imbuilder.ru/wp-content/uploads/2022/01/lystra-5-10-1-80x80.jpg)
![](https://imbuilder.ru/wp-content/uploads/2022/01/lystra-5-11-1-80x80.jpg)
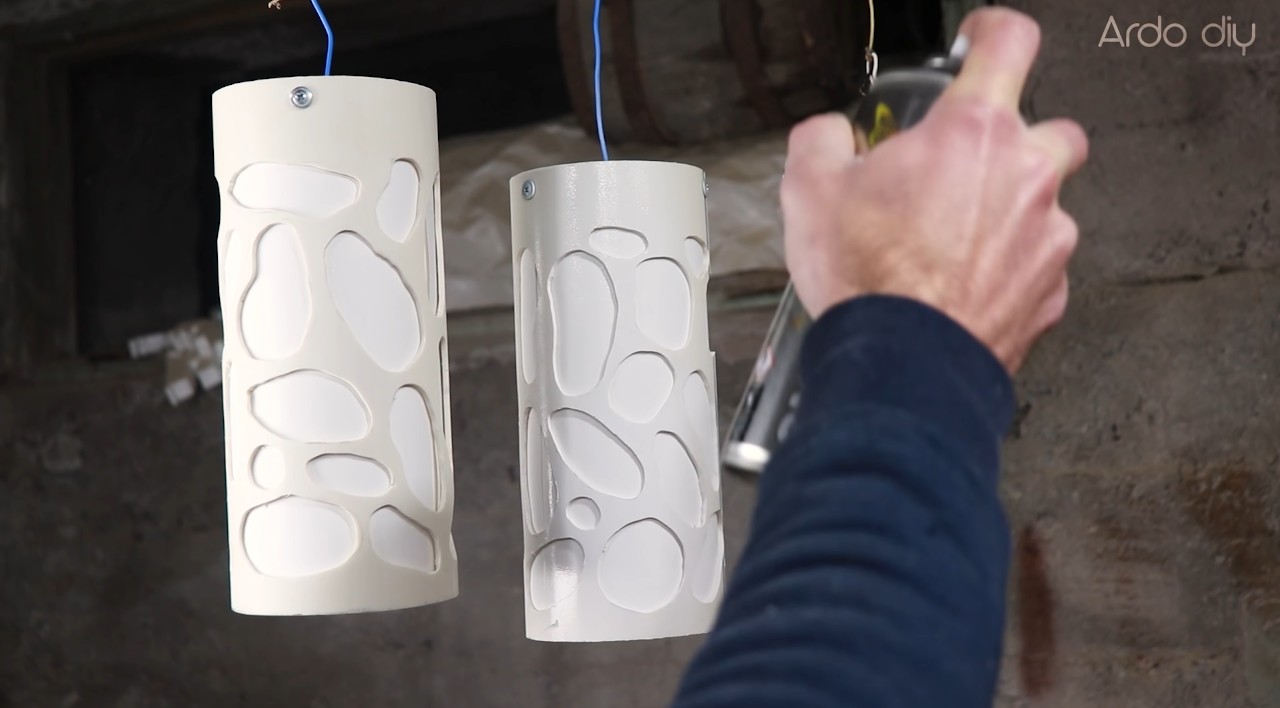
Подвешиваем и окрашиваем плафоны.
![](https://imbuilder.ru/wp-content/uploads/2022/01/lystra-6-1.jpg)
![](https://imbuilder.ru/wp-content/uploads/2022/01/lystra-6-2.jpg)
![](https://imbuilder.ru/wp-content/uploads/2022/01/lystra-6-1-80x80.jpg)
![](https://imbuilder.ru/wp-content/uploads/2022/01/lystra-6-2-80x80.jpg)
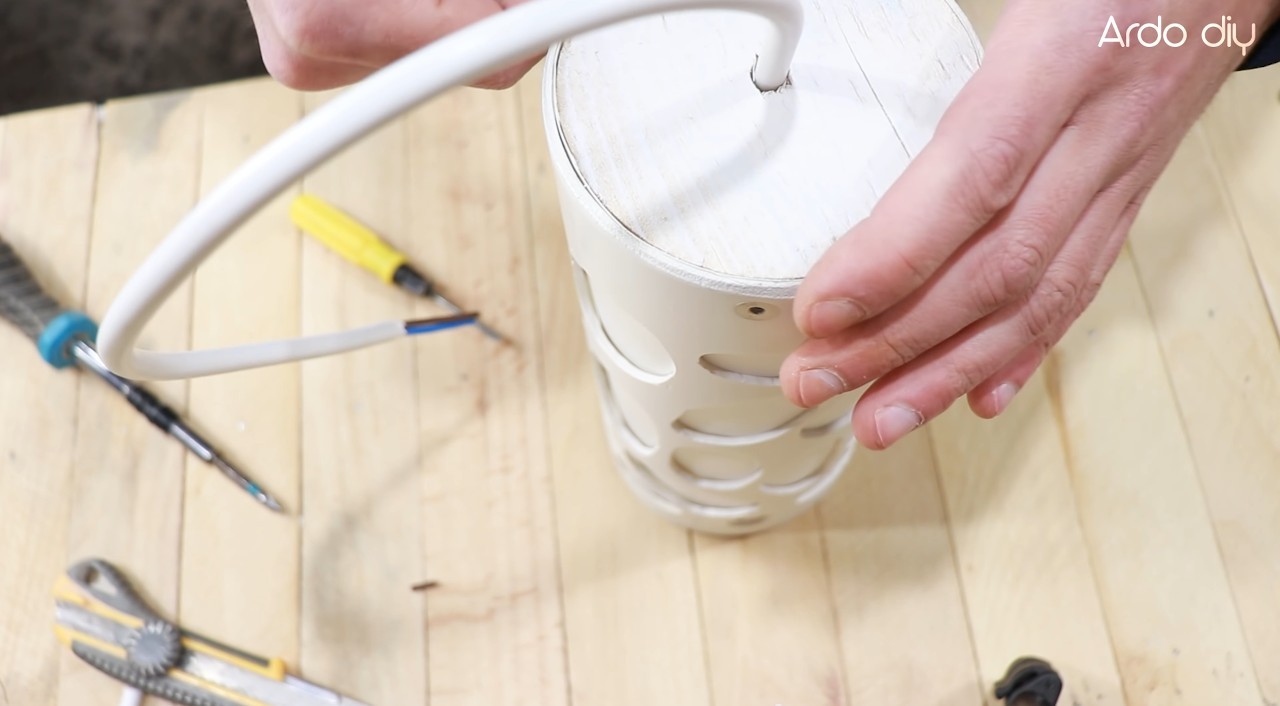
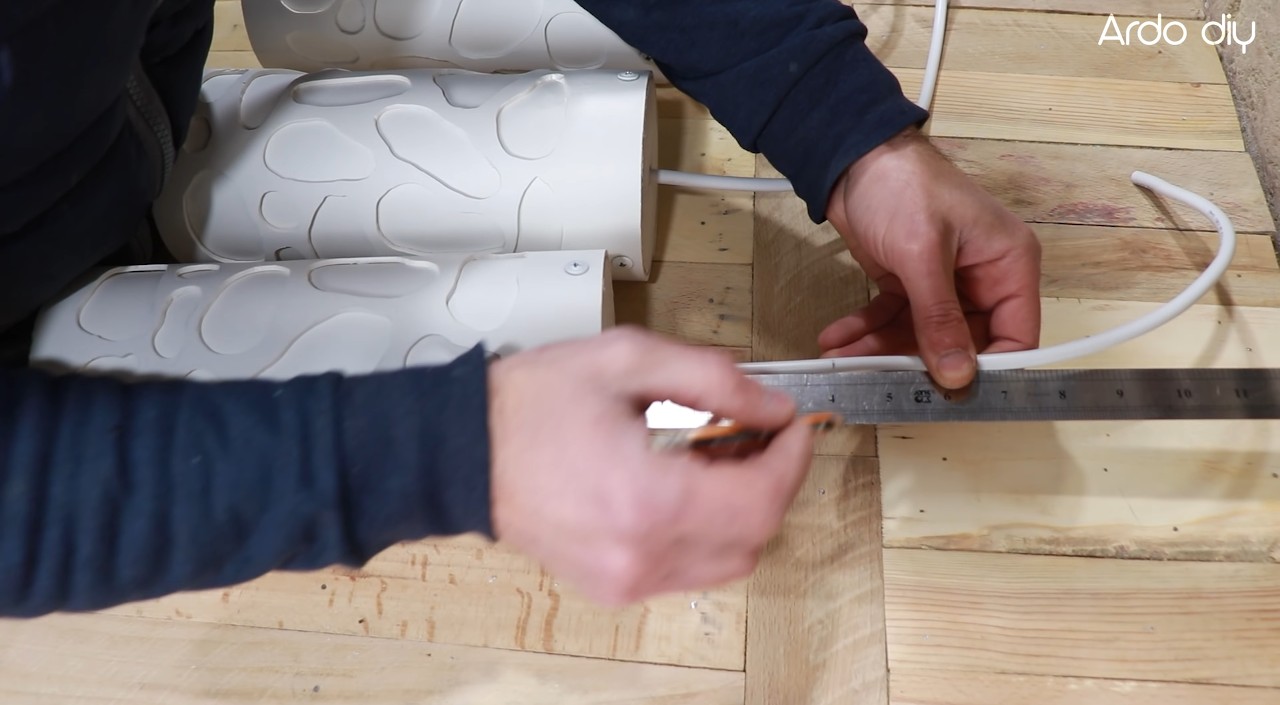
Размещаем палафоны на основе. Намечаем центры. По центрам сверлим отверстия под кабель. Проверяем возможность вставить кабель.
![](https://imbuilder.ru/wp-content/uploads/2022/01/lystra-7-1.jpg)
![](https://imbuilder.ru/wp-content/uploads/2022/01/lystra-7-2.jpg)
![](https://imbuilder.ru/wp-content/uploads/2022/01/lystra-7-3.jpg)
![](https://imbuilder.ru/wp-content/uploads/2022/01/lystra-7-4.jpg)
![](https://imbuilder.ru/wp-content/uploads/2022/01/lystra-7-1-80x80.jpg)
![](https://imbuilder.ru/wp-content/uploads/2022/01/lystra-7-2-80x80.jpg)
![](https://imbuilder.ru/wp-content/uploads/2022/01/lystra-7-3-80x80.jpg)
![](https://imbuilder.ru/wp-content/uploads/2022/01/lystra-7-4-80x80.jpg)
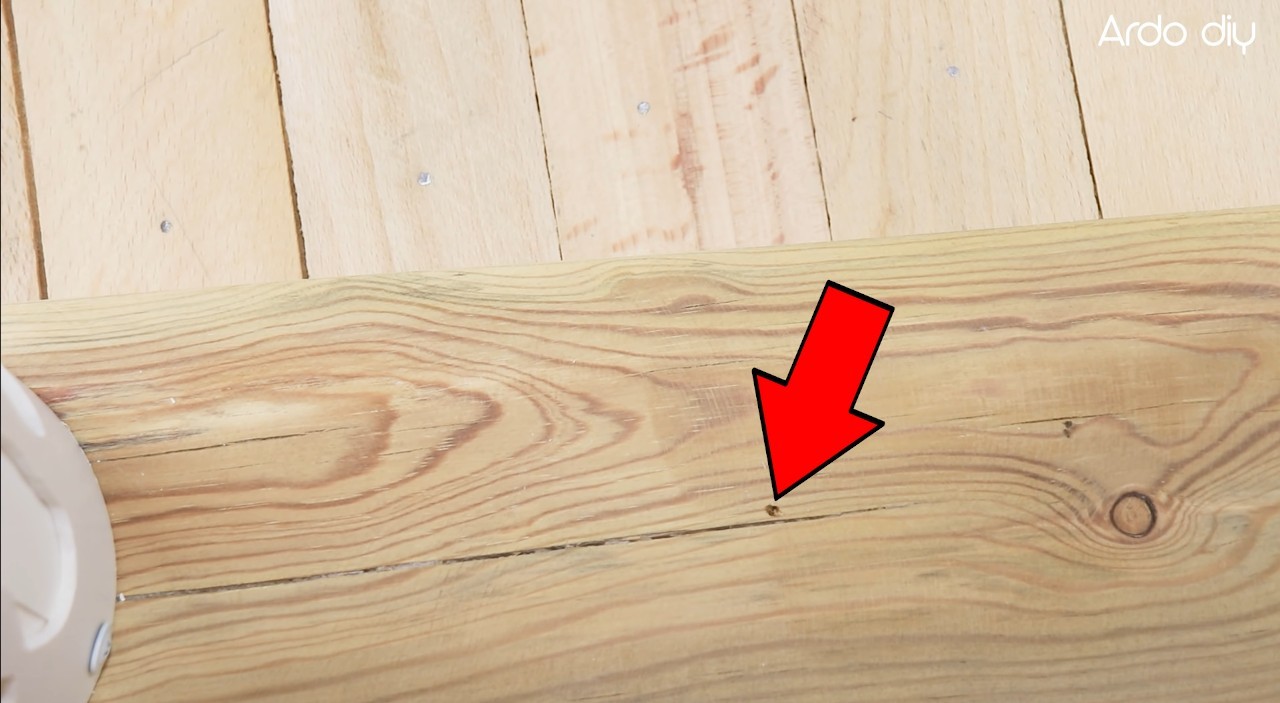
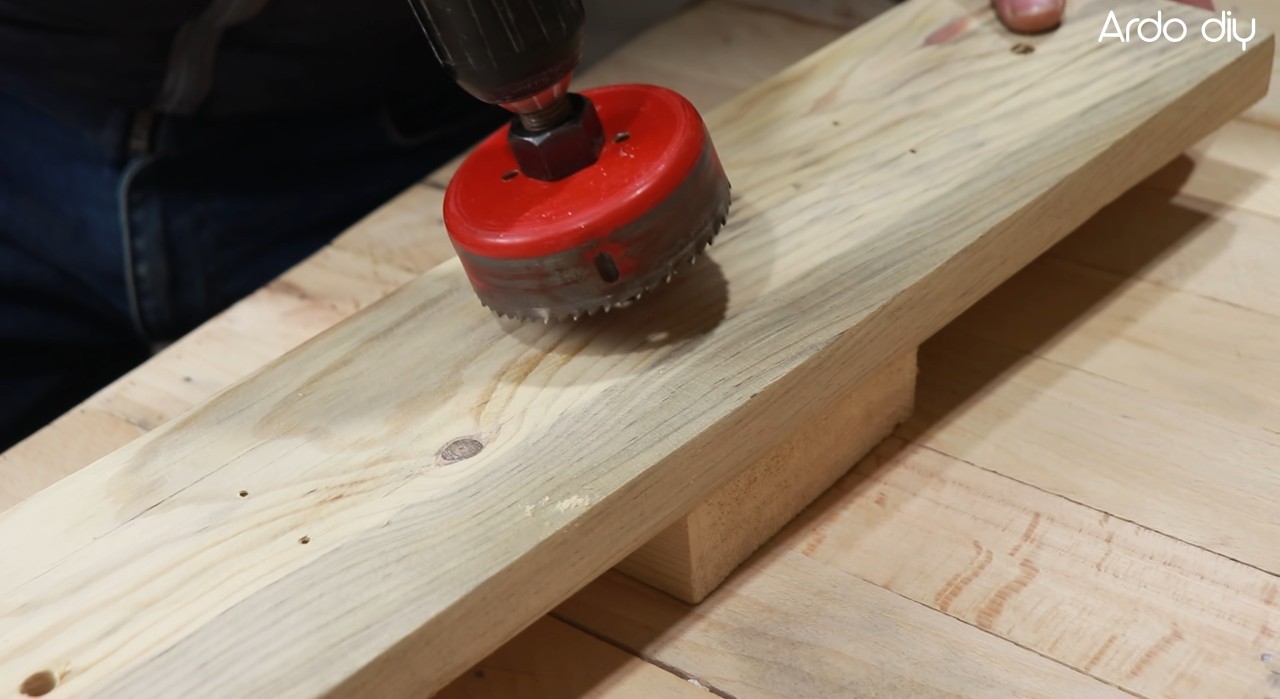
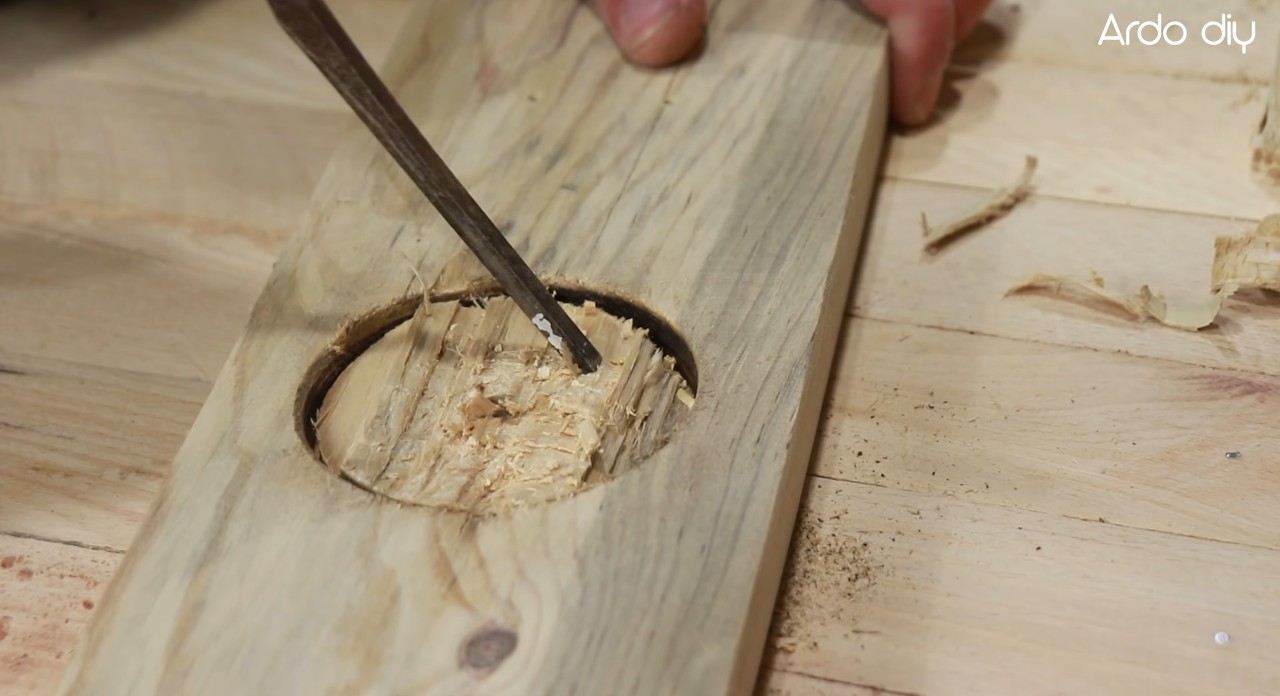
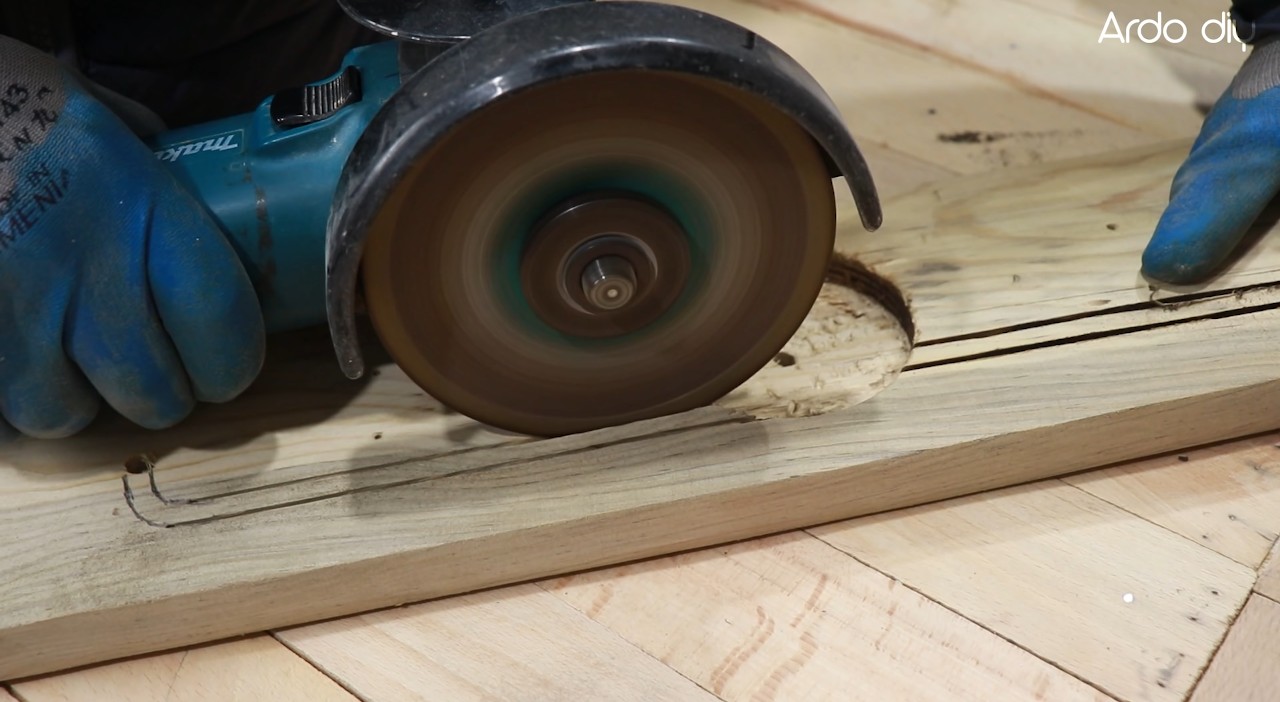
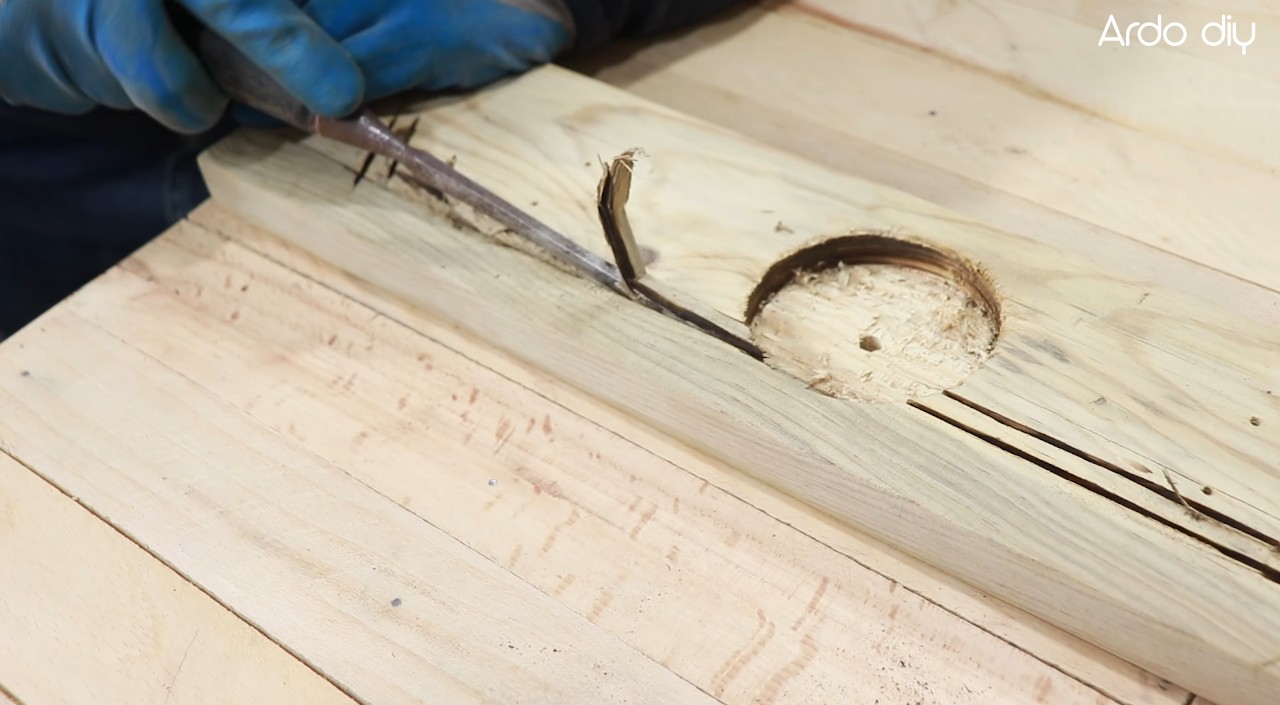
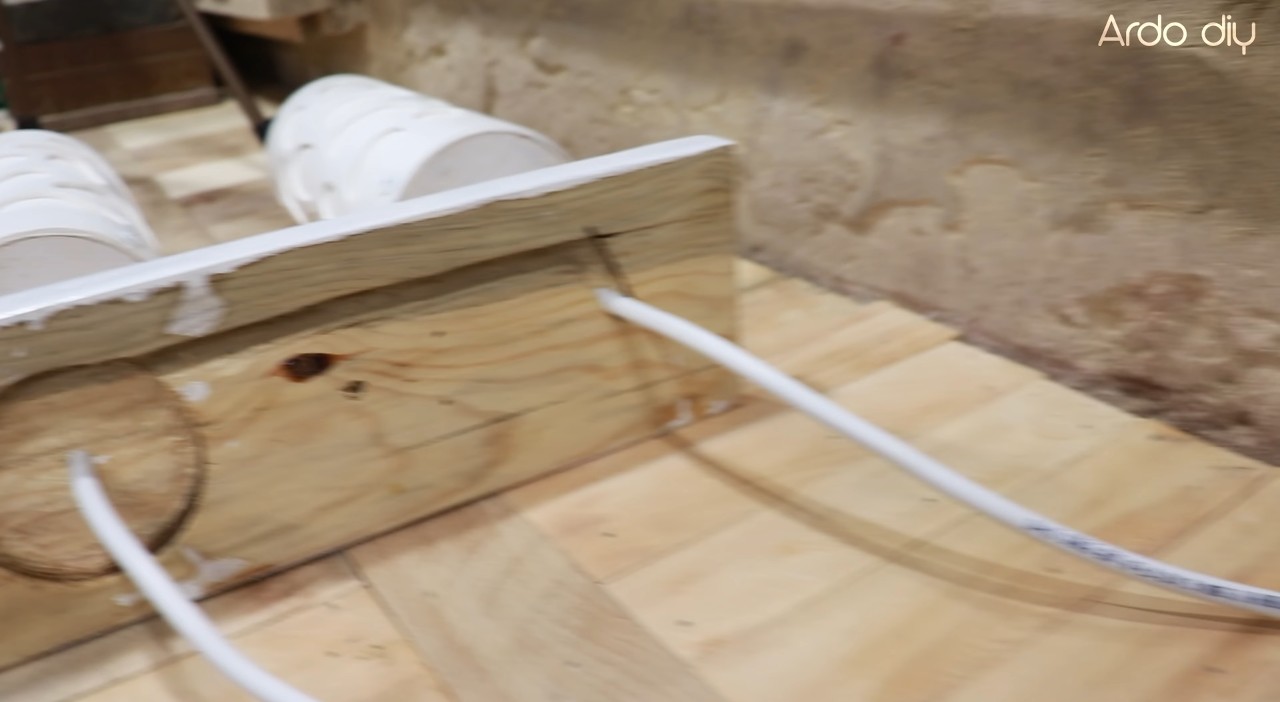
На верхней стороне основы вырезаем гнездо для монтажной коробки (на 2/3 толщины основы) и каналы для укладки кабеля.
![](https://imbuilder.ru/wp-content/uploads/2022/01/lystra-8-1.jpg)
![](https://imbuilder.ru/wp-content/uploads/2022/01/lystra-8-2.jpg)
![](https://imbuilder.ru/wp-content/uploads/2022/01/lystra-8-3.jpg)
![](https://imbuilder.ru/wp-content/uploads/2022/01/lystra-8-4.jpg)
![](https://imbuilder.ru/wp-content/uploads/2022/01/lystra-8-1-80x80.jpg)
![](https://imbuilder.ru/wp-content/uploads/2022/01/lystra-8-2-80x80.jpg)
![](https://imbuilder.ru/wp-content/uploads/2022/01/lystra-8-3-80x80.jpg)
![](https://imbuilder.ru/wp-content/uploads/2022/01/lystra-8-4-80x80.jpg)
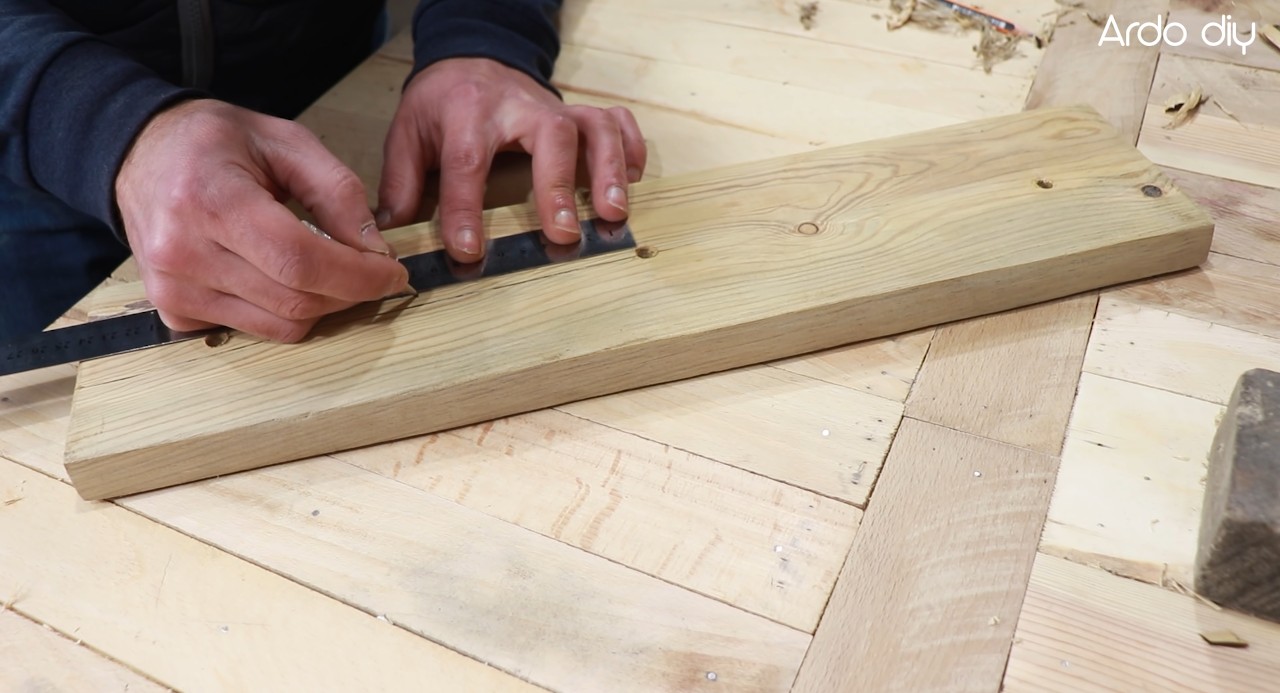
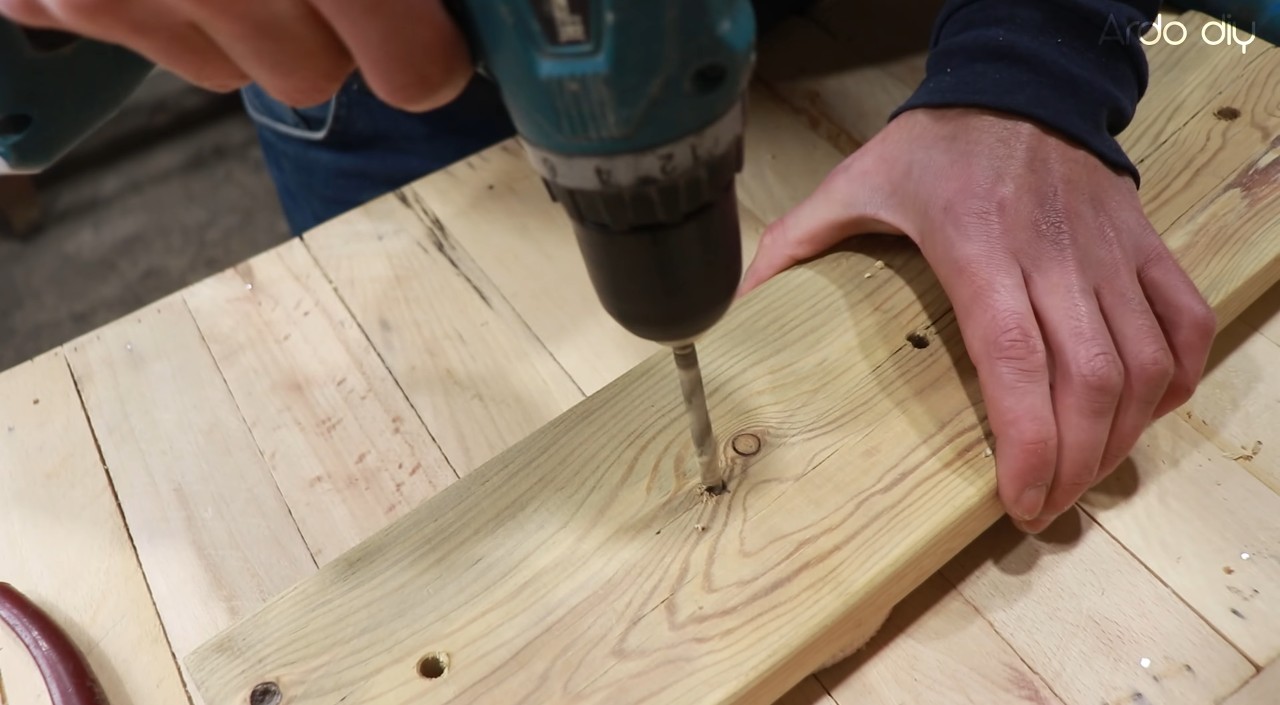
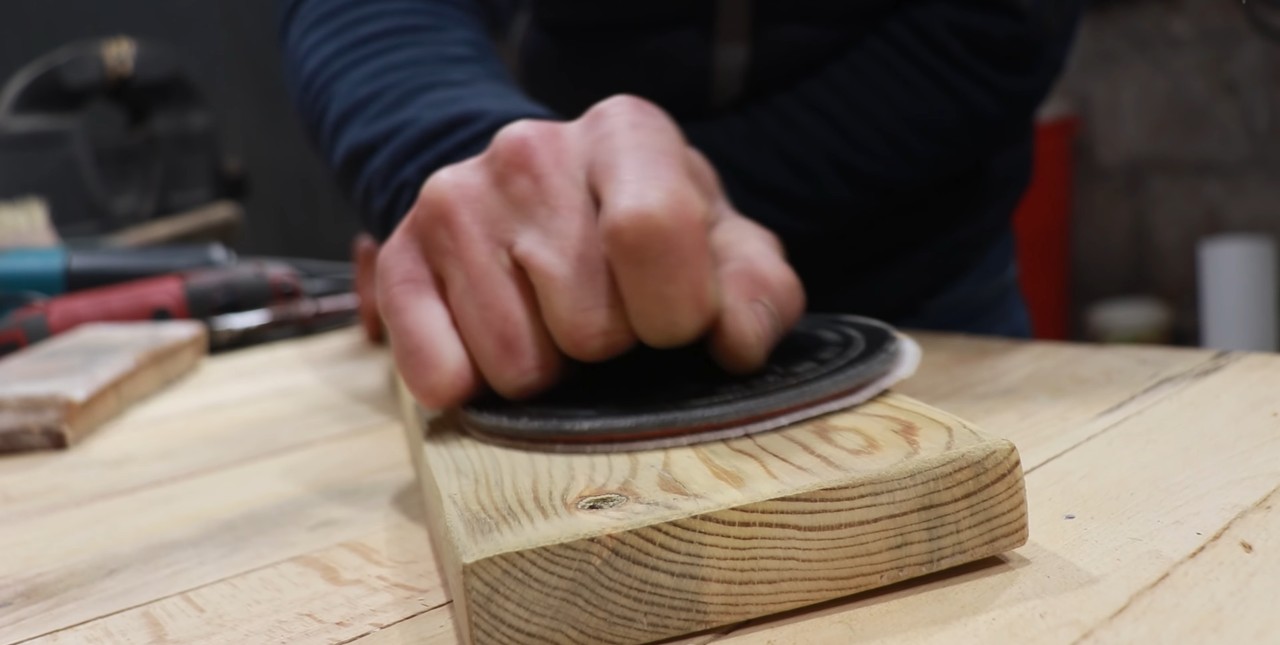
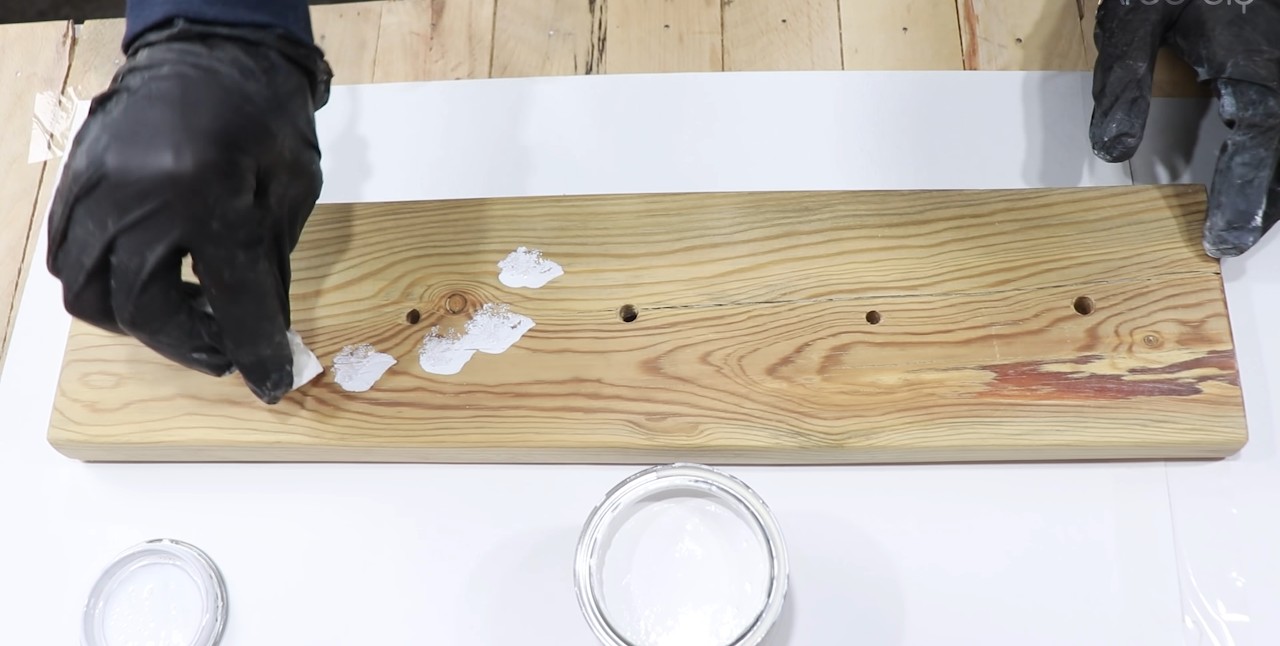
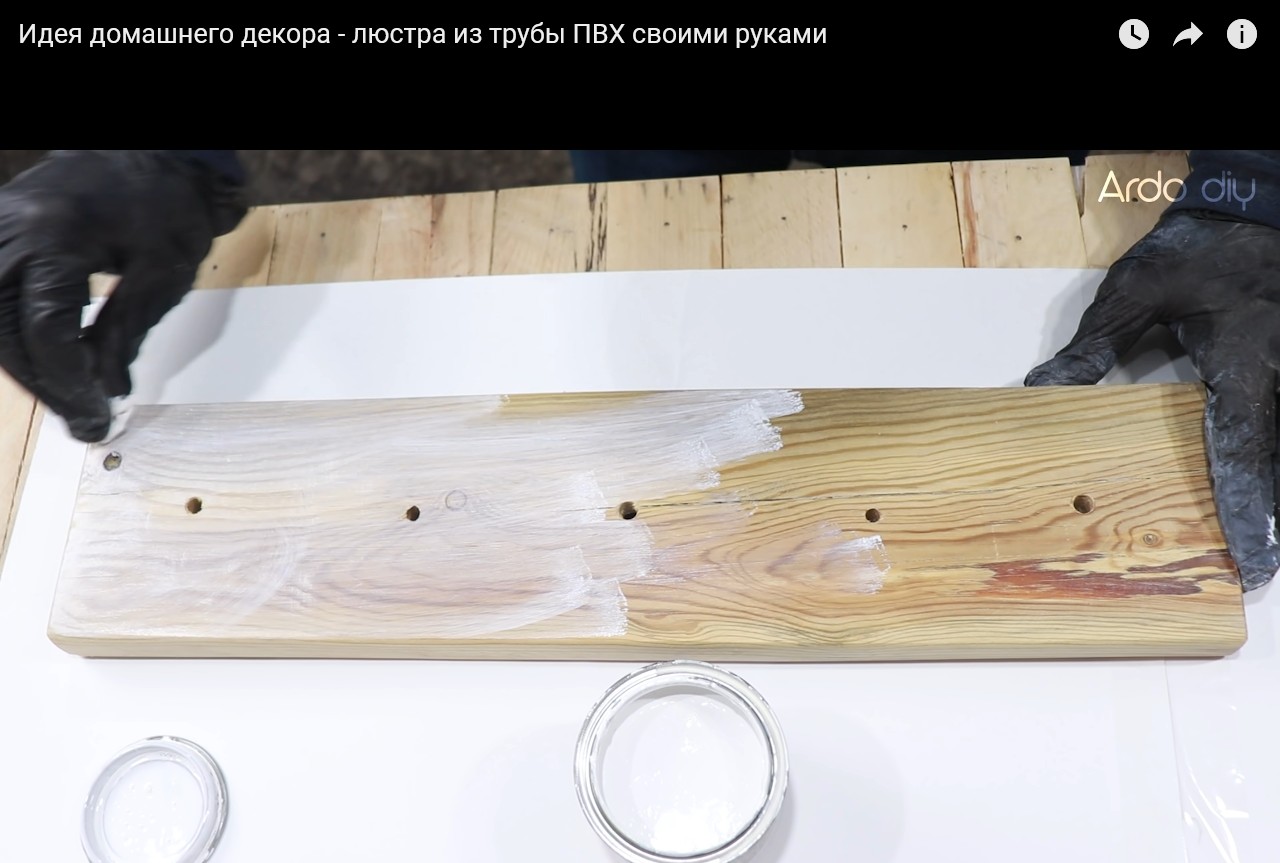
Размечаем центры для крепежа, сверлим отверстия под крепёж. Провидим окончательную обработку основания: полируем, окрашиваем.
![](https://imbuilder.ru/wp-content/uploads/2022/01/lystra-9-1.jpg)
![](https://imbuilder.ru/wp-content/uploads/2022/01/lystra-9-2.jpg)
![](https://imbuilder.ru/wp-content/uploads/2022/01/lystra-9-3.jpg)
![](https://imbuilder.ru/wp-content/uploads/2022/01/lystra-9-4.jpg)
![](https://imbuilder.ru/wp-content/uploads/2022/01/lystra-9-5.jpg)
![](https://imbuilder.ru/wp-content/uploads/2022/01/lystra-9-6.jpg)
![](https://imbuilder.ru/wp-content/uploads/2022/01/lystra-9-7.jpg)
![](https://imbuilder.ru/wp-content/uploads/2022/01/lystra-9-1-80x80.jpg)
![](https://imbuilder.ru/wp-content/uploads/2022/01/lystra-9-2-80x80.jpg)
![](https://imbuilder.ru/wp-content/uploads/2022/01/lystra-9-3-80x80.jpg)
![](https://imbuilder.ru/wp-content/uploads/2022/01/lystra-9-4-80x80.jpg)
![](https://imbuilder.ru/wp-content/uploads/2022/01/lystra-9-5-80x80.jpg)
![](https://imbuilder.ru/wp-content/uploads/2022/01/lystra-9-6-80x80.jpg)
![](https://imbuilder.ru/wp-content/uploads/2022/01/lystra-9-7-80x80.jpg)
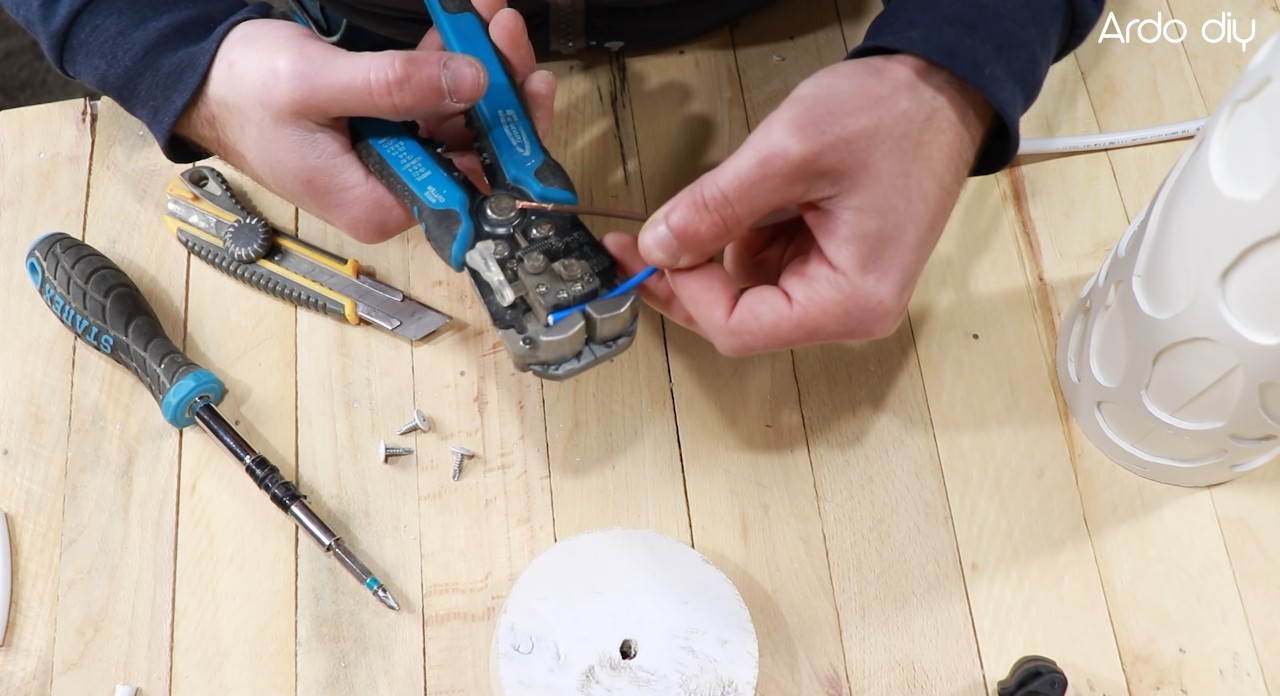
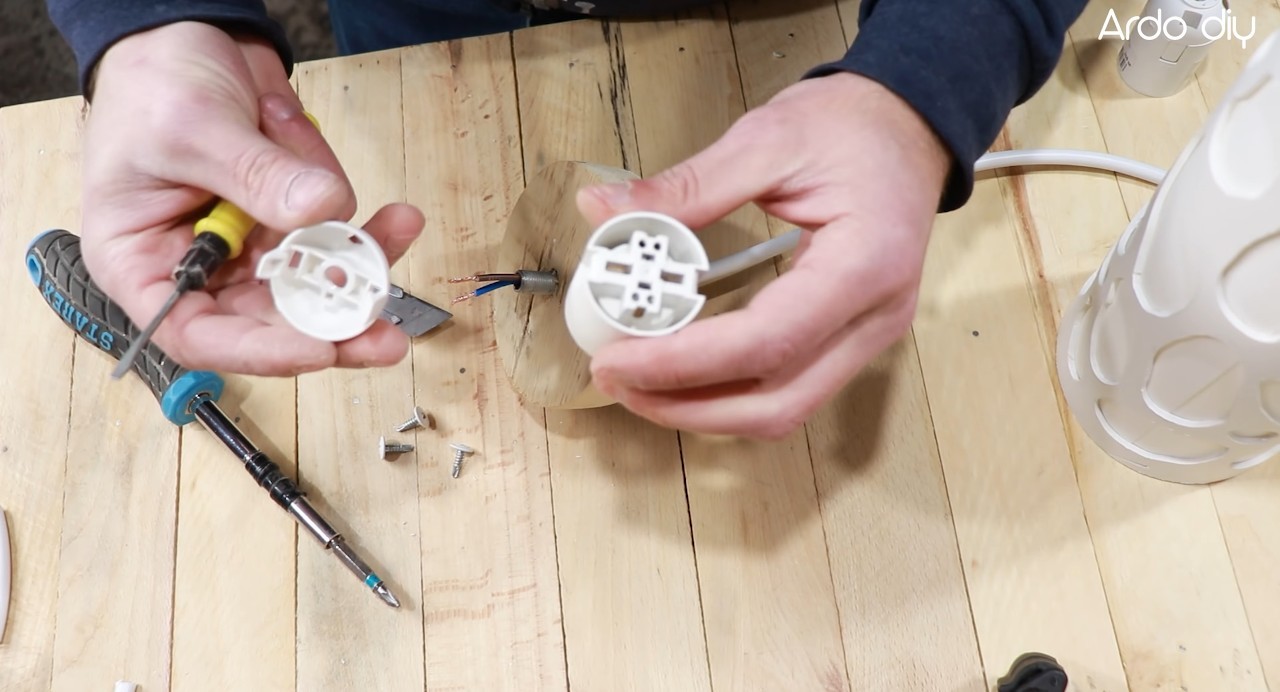
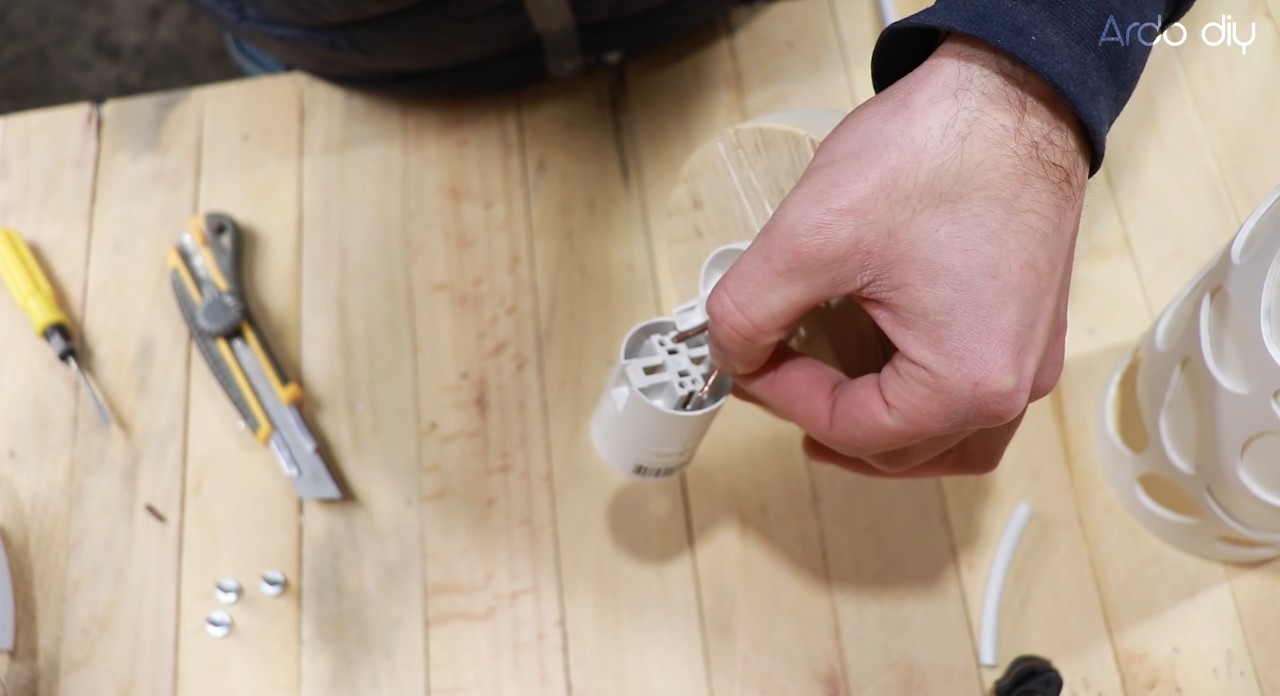
Разбираем плафоны. Удаляем изоляцию с кабеля и жил. Жилы обжимаем (докручиваем). Крепим основание патрона, пропускаем кабель и крепим жилы в патроне и устанавливаем патрон на место.
![](https://imbuilder.ru/wp-content/uploads/2022/01/lystra-10-1.jpg)
![](https://imbuilder.ru/wp-content/uploads/2022/01/lystra-10-2.jpg)
![](https://imbuilder.ru/wp-content/uploads/2022/01/lystra-10-4.jpg)
![](https://imbuilder.ru/wp-content/uploads/2022/01/lystra-10-6.jpg)
![](https://imbuilder.ru/wp-content/uploads/2022/01/lystra-10-7.jpg)
![](https://imbuilder.ru/wp-content/uploads/2022/01/lystra-10-8.jpg)
![](https://imbuilder.ru/wp-content/uploads/2022/01/lystra-10-1-80x80.jpg)
![](https://imbuilder.ru/wp-content/uploads/2022/01/lystra-10-2-80x80.jpg)
![](https://imbuilder.ru/wp-content/uploads/2022/01/lystra-10-4-80x80.jpg)
![](https://imbuilder.ru/wp-content/uploads/2022/01/lystra-10-6-80x80.jpg)
![](https://imbuilder.ru/wp-content/uploads/2022/01/lystra-10-7-80x80.jpg)
![](https://imbuilder.ru/wp-content/uploads/2022/01/lystra-10-8-80x80.jpg)
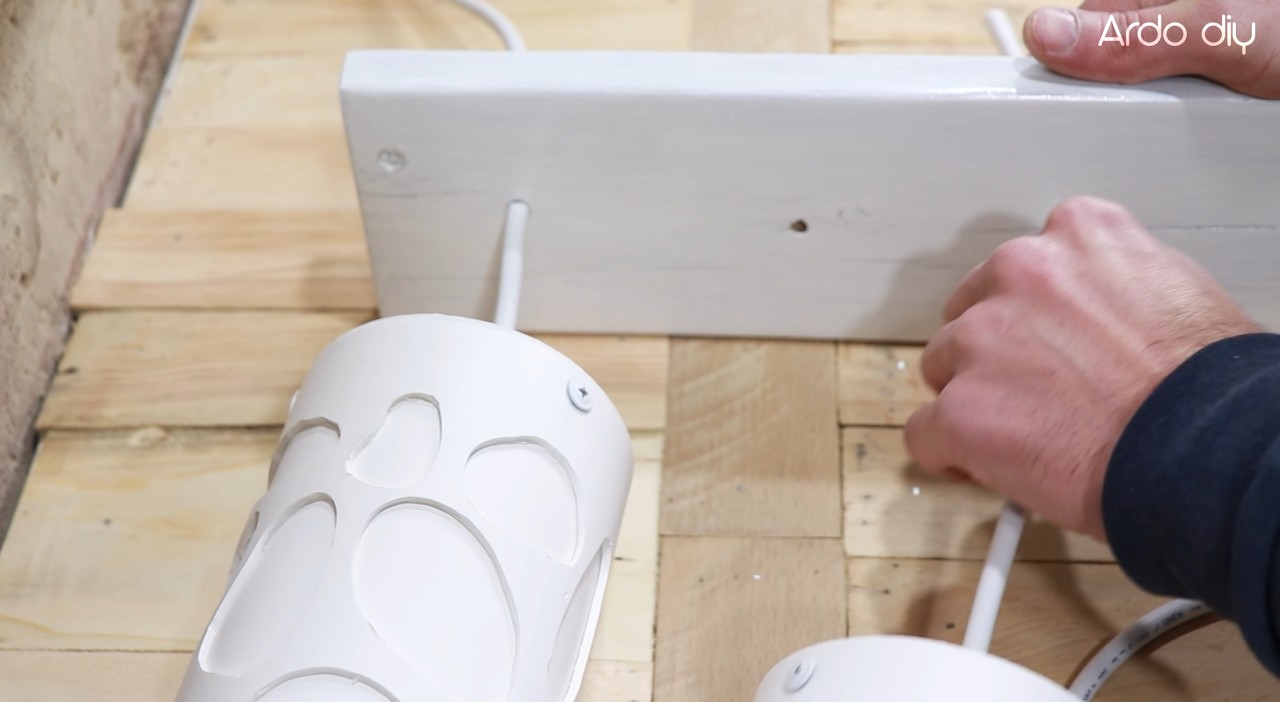
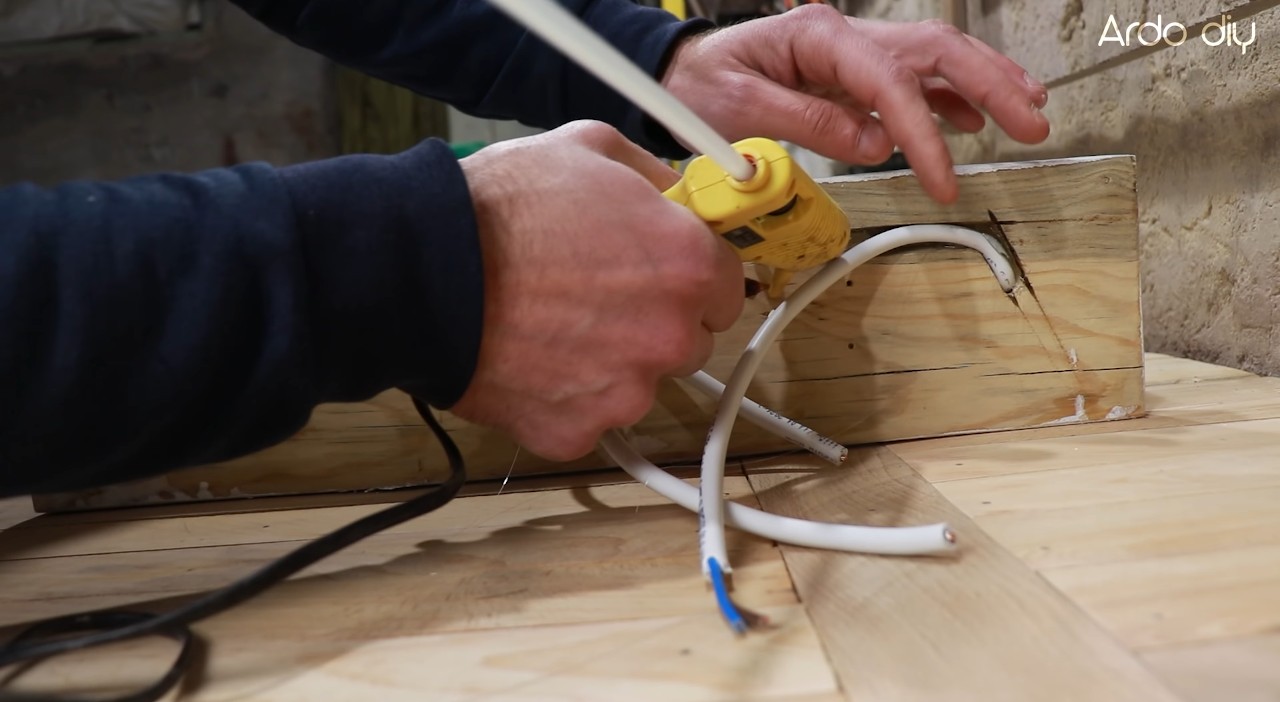
Приступаем к монтажу плафонов на основание. Ставим метки и вставляем кабели в основание (метки уходят в корпус основания).
![](https://imbuilder.ru/wp-content/uploads/2022/01/lystra-11-1.jpg)
![](https://imbuilder.ru/wp-content/uploads/2022/01/lystra-11-2.jpg)
![](https://imbuilder.ru/wp-content/uploads/2022/01/lystra-11-3.jpg)
![](https://imbuilder.ru/wp-content/uploads/2022/01/lystra-11-4.jpg)
![](https://imbuilder.ru/wp-content/uploads/2022/01/lystra-11-1-80x80.jpg)
![](https://imbuilder.ru/wp-content/uploads/2022/01/lystra-11-2-80x80.jpg)
![](https://imbuilder.ru/wp-content/uploads/2022/01/lystra-11-3-80x80.jpg)
![](https://imbuilder.ru/wp-content/uploads/2022/01/lystra-11-4-80x80.jpg)
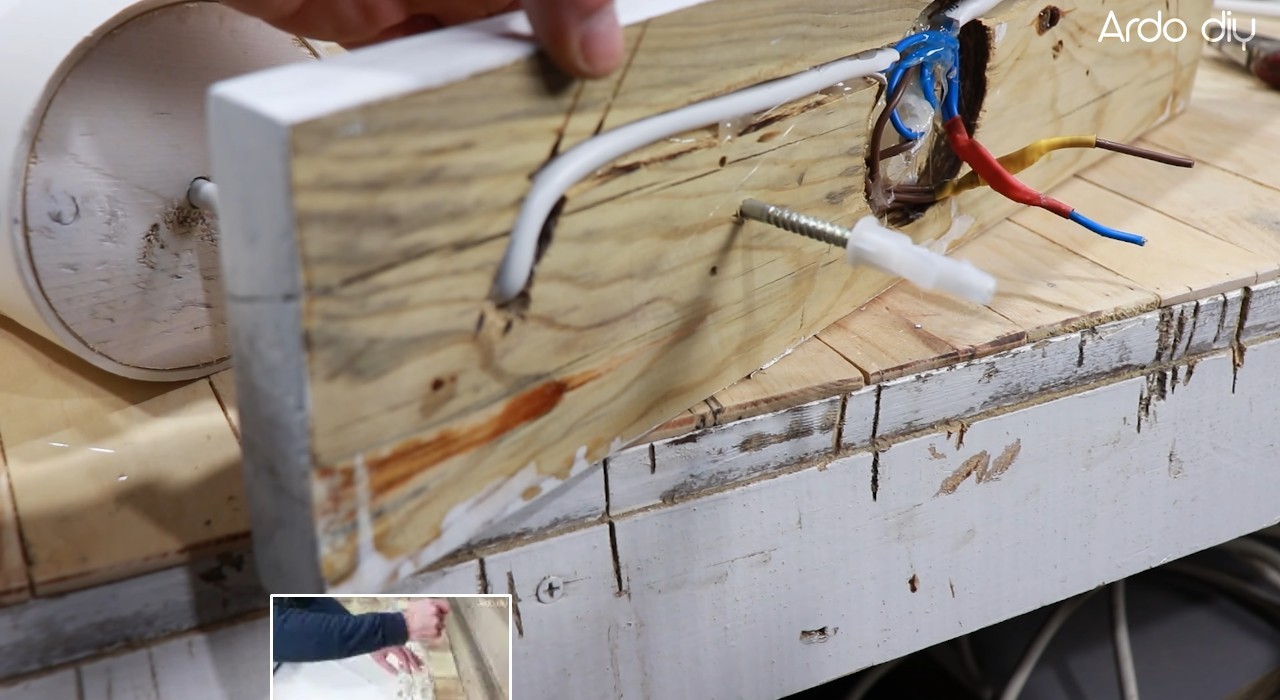
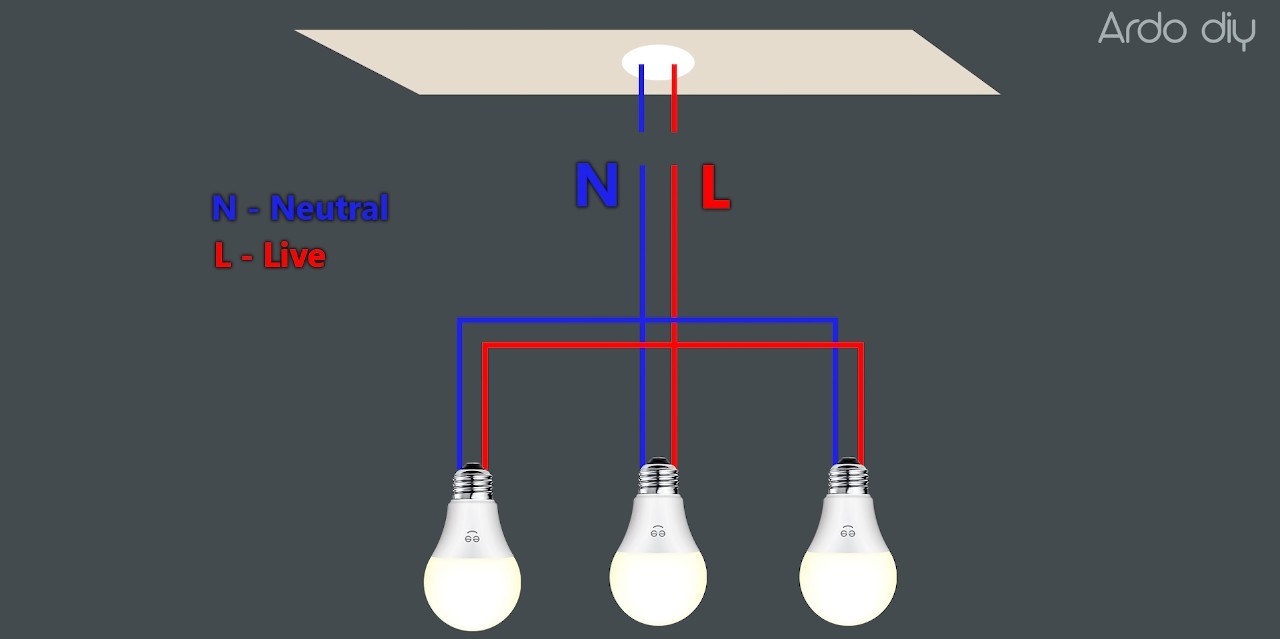
Монтируем проводку в основании. Кабель закладываем в штробы на клей и соединяем жилы по приведённой схеме. Безопасней использовать электромонтажную коробку и клеммную колодку, но автор идеи предложил соединение при помощи скрутки и изоляцию изолентой.
![](https://imbuilder.ru/wp-content/uploads/2022/01/lystra-12-1.jpg)
![](https://imbuilder.ru/wp-content/uploads/2022/01/lystra-12-2.jpg)
![](https://imbuilder.ru/wp-content/uploads/2022/01/lystra-12-3.jpg)
![](https://imbuilder.ru/wp-content/uploads/2022/01/lystra-12-1-80x80.jpg)
![](https://imbuilder.ru/wp-content/uploads/2022/01/lystra-12-2-80x80.jpg)
![](https://imbuilder.ru/wp-content/uploads/2022/01/lystra-12-3-80x80.jpg)
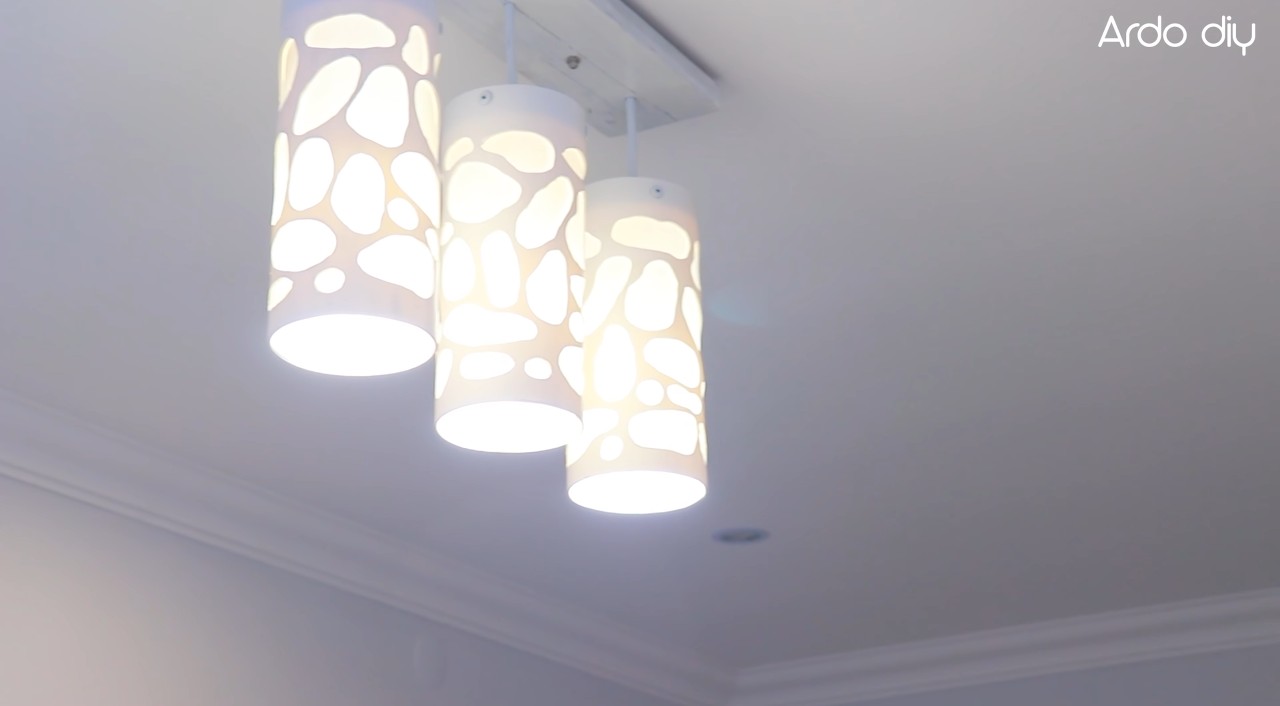
Подключаем к сети. Крепим к потолку и любуемся на результат своего труда.
![](https://imbuilder.ru/wp-content/uploads/2022/01/lystra-13-1-1.jpg)
![](https://imbuilder.ru/wp-content/uploads/2022/01/lystra-13-2-1.jpg)
![](https://imbuilder.ru/wp-content/uploads/2022/01/lystra-13-1-1-80x80.jpg)
![](https://imbuilder.ru/wp-content/uploads/2022/01/lystra-13-2-1-80x80.jpg)
Идеей и технологией создания люстры поделился автор YouTube канала ARDO DIY CRAFTS. Подробнее о том, как сделать люстру из трубы ПВХ, вы можете посмотреть на видео.