Отработавшим покрышкам вторую жизнь, а нам садовую влагостойкую мебель.
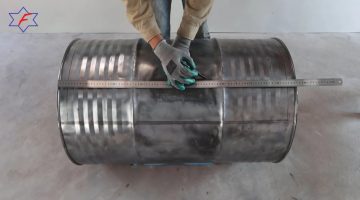
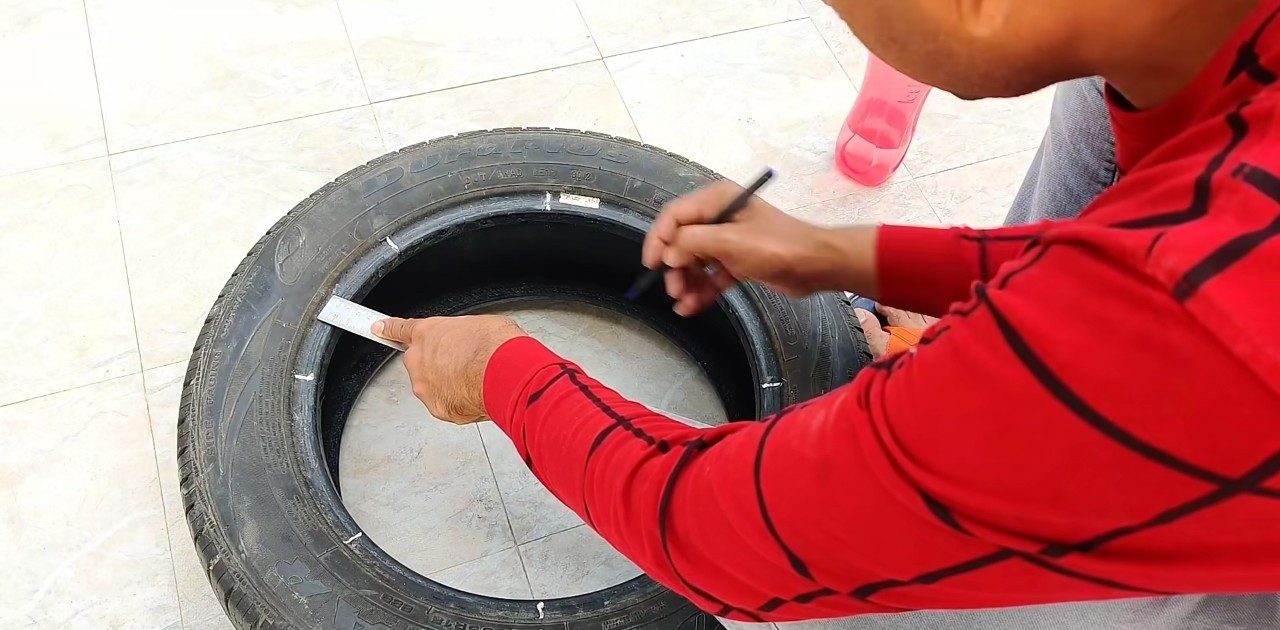
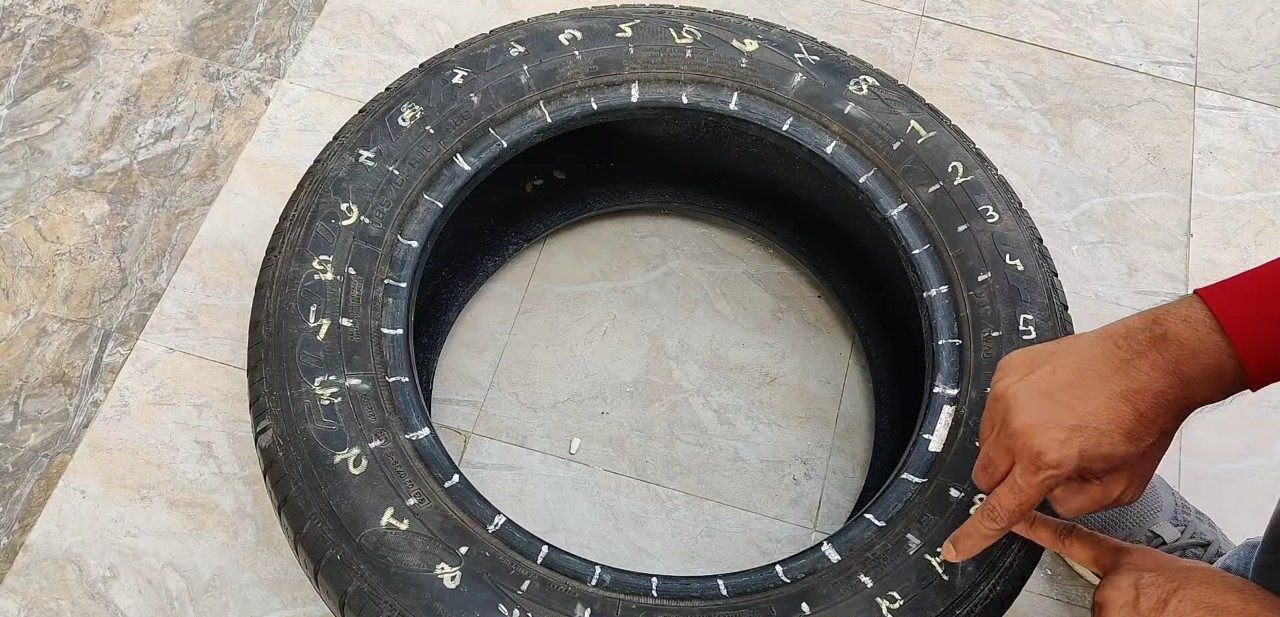
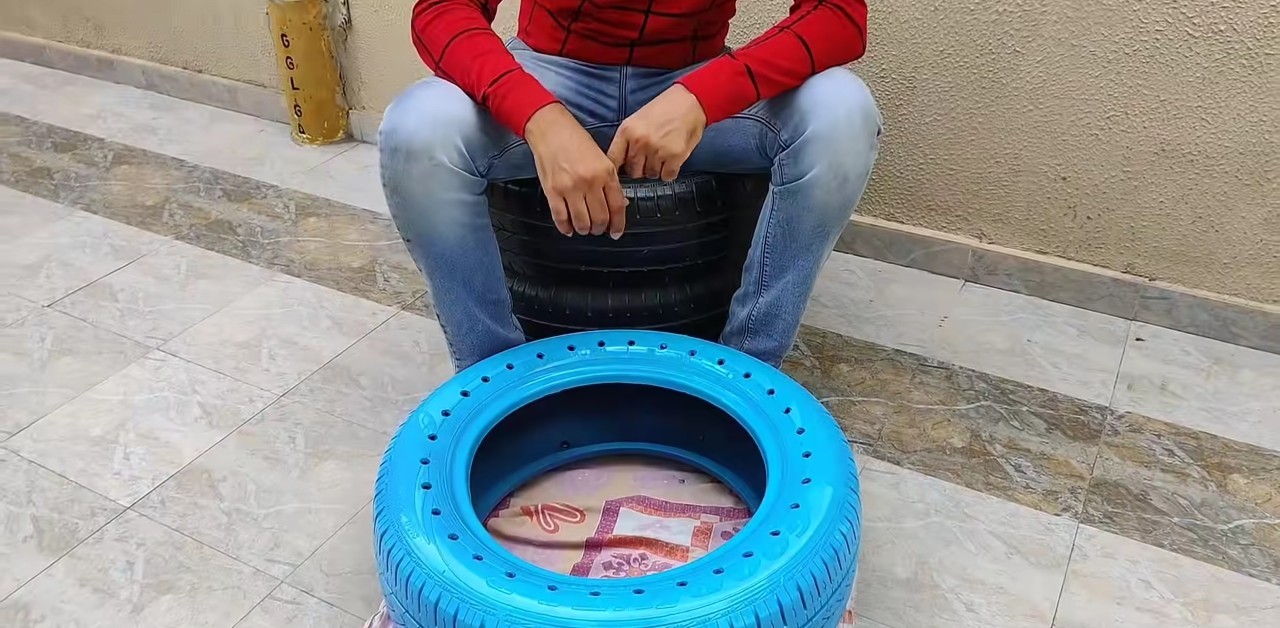
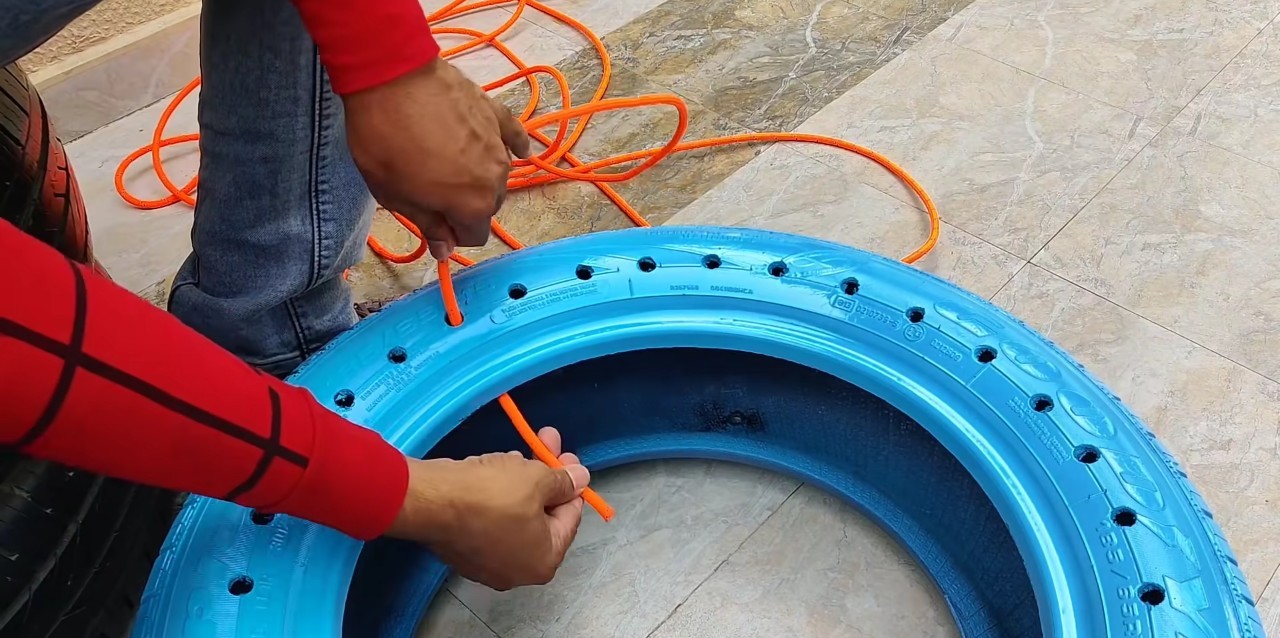
Для изготовления одного пуфика потребуется две соразмерных покрышки (бескамерные шины). Разделим окружность на 32 части, это просто.
![](https://imbuilder.ru/wp-content/uploads/2024/01/puf-1-1-e1641620916926.jpg)
![](https://imbuilder.ru/wp-content/uploads/2024/01/puf-1-2-e1641621019885.jpg)
![](https://imbuilder.ru/wp-content/uploads/2024/01/puf-1-3-e1641621041610.jpg)
![](https://imbuilder.ru/wp-content/uploads/2024/01/puf-1-1-e1641620916926-80x80.jpg)
![](https://imbuilder.ru/wp-content/uploads/2024/01/puf-1-2-e1641621019885-80x80.jpg)
![](https://imbuilder.ru/wp-content/uploads/2024/01/puf-1-3-e1641621041610-80x80.jpg)
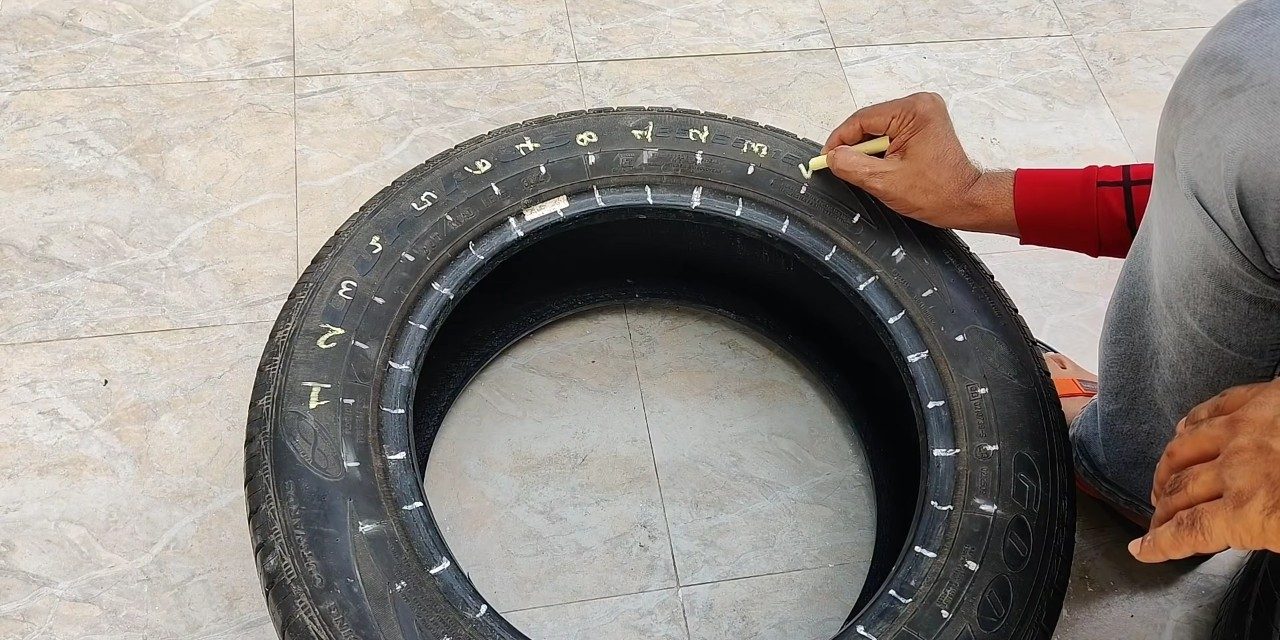
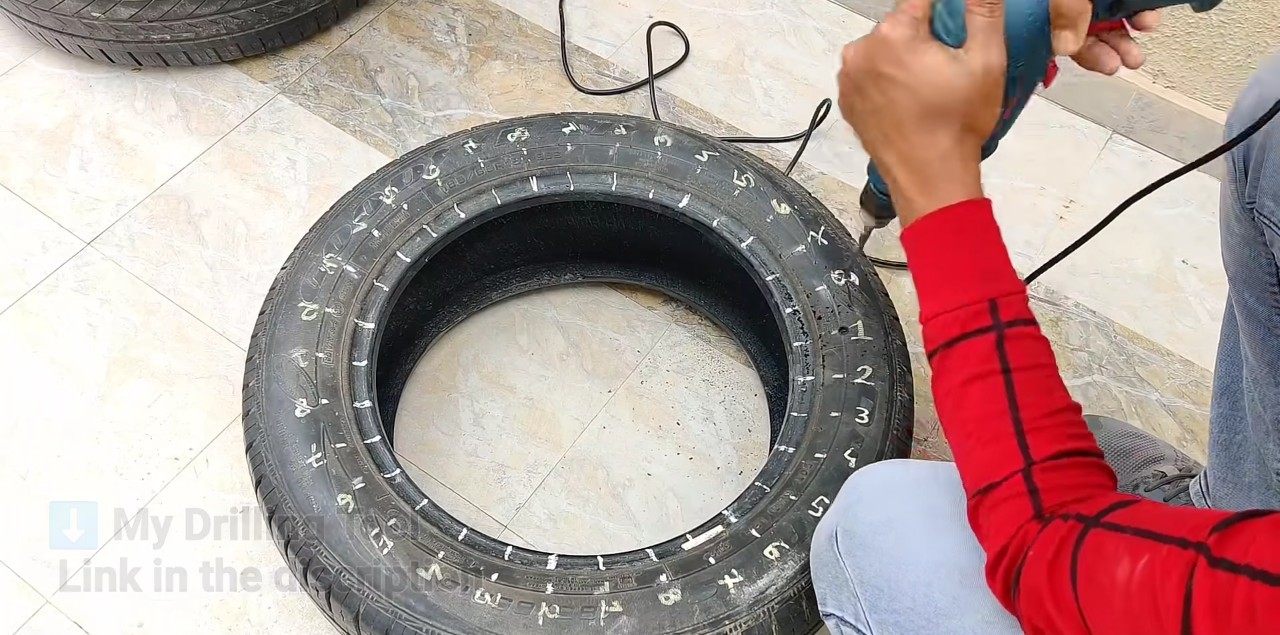
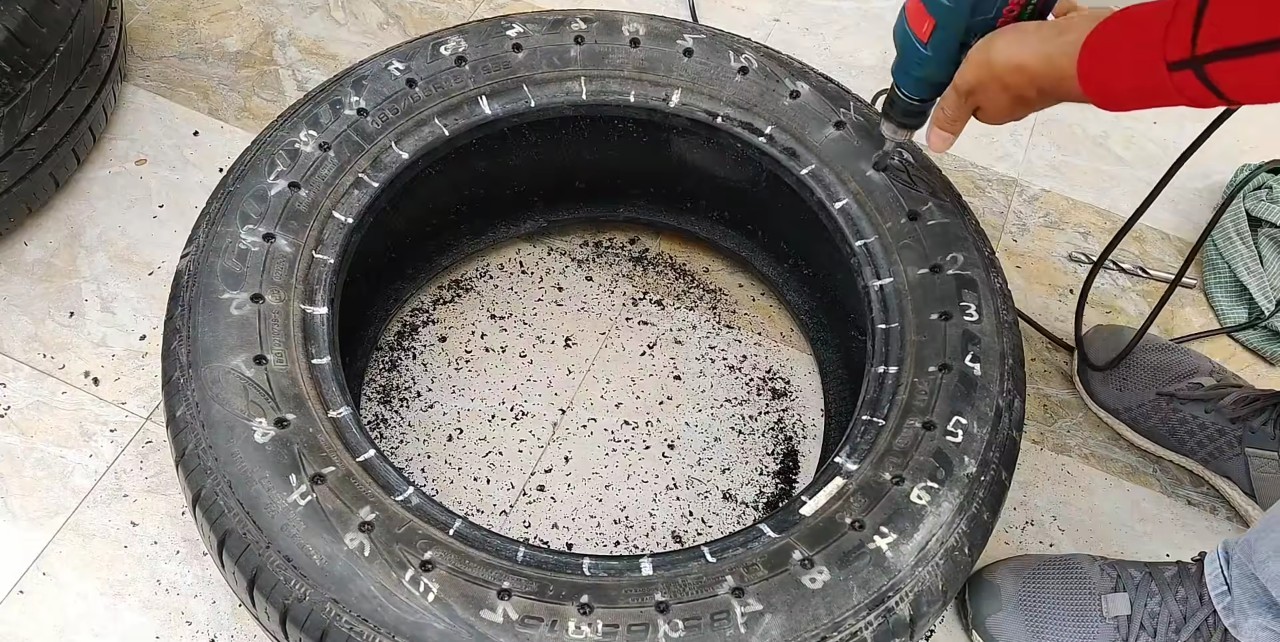
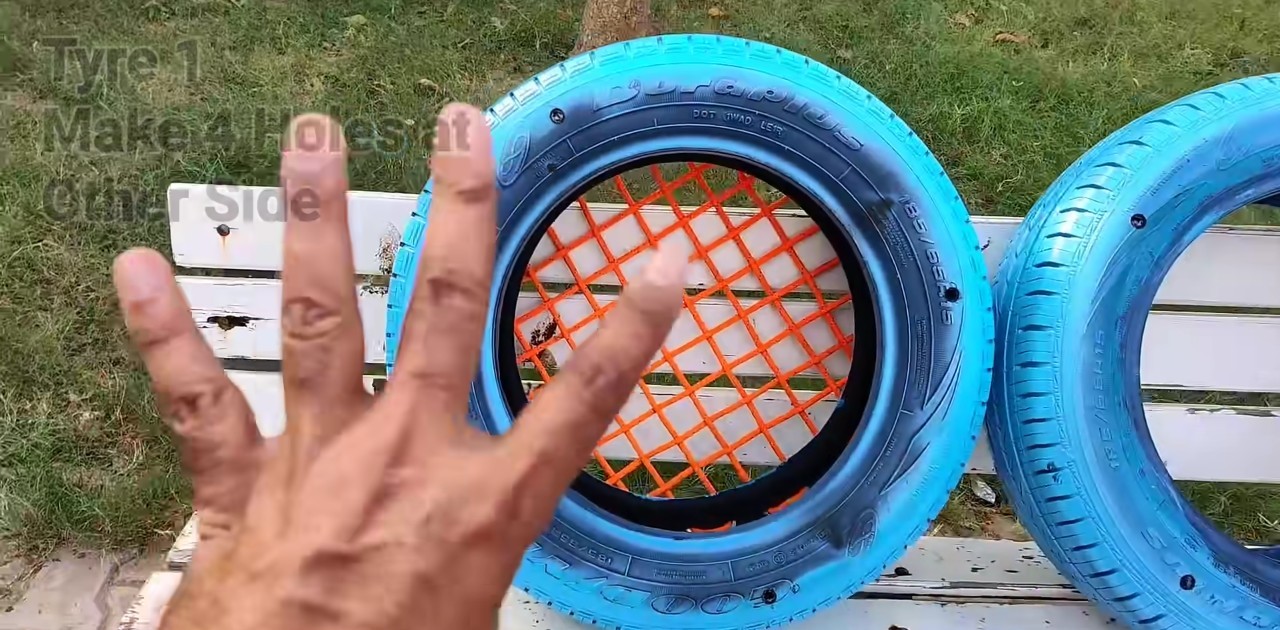
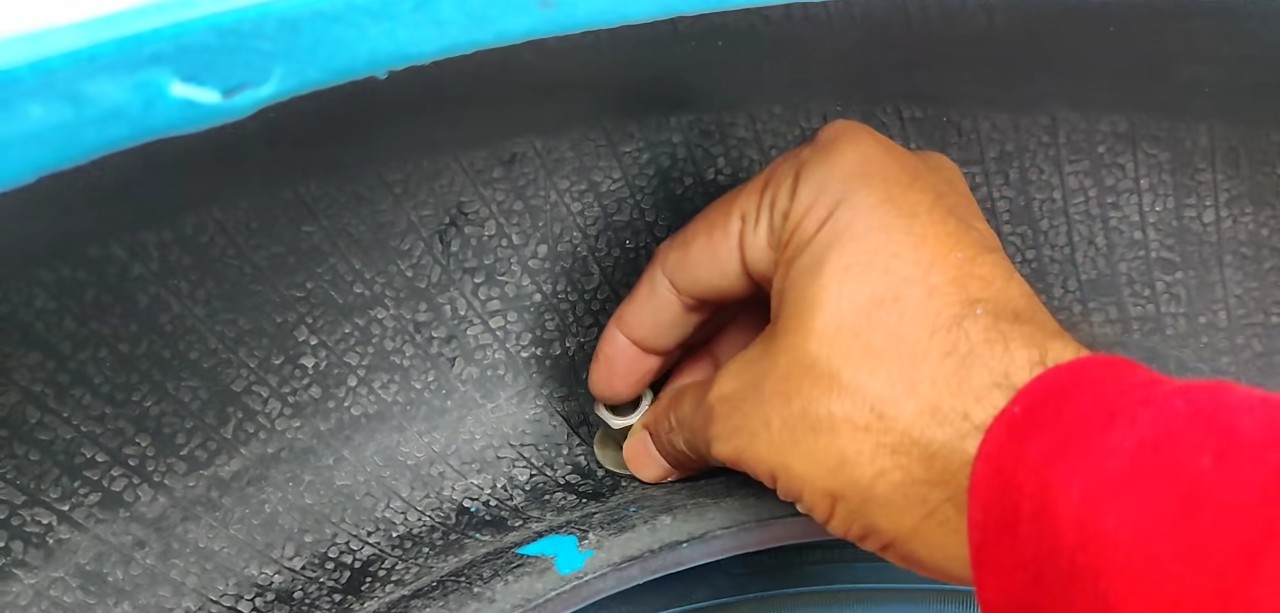
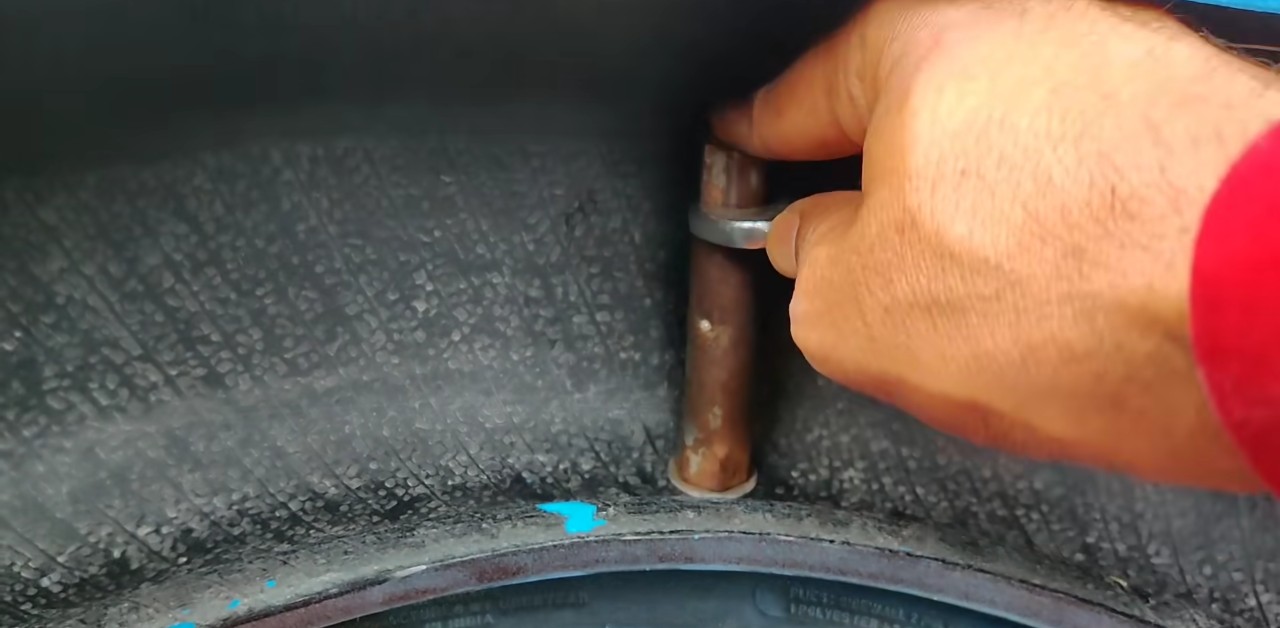
Сверлим 32 отверстия сверлом диаметром больше на 2-3 мм диаметра шпагата на одной стороне покрышки и 4 отверстия сверлом диаметром больше на 2-3 мм диаметра болта. Отверстия прозенкеруем (при отсутствии зенкера пройдём ещё раз сверлом).
![](https://imbuilder.ru/wp-content/uploads/2024/01/puf-2-1.jpg)
![](https://imbuilder.ru/wp-content/uploads/2024/01/puf-2-2.jpg)
![](https://imbuilder.ru/wp-content/uploads/2024/01/puf-2-1-80x80.jpg)
![](https://imbuilder.ru/wp-content/uploads/2024/01/puf-2-2-80x80.jpg)
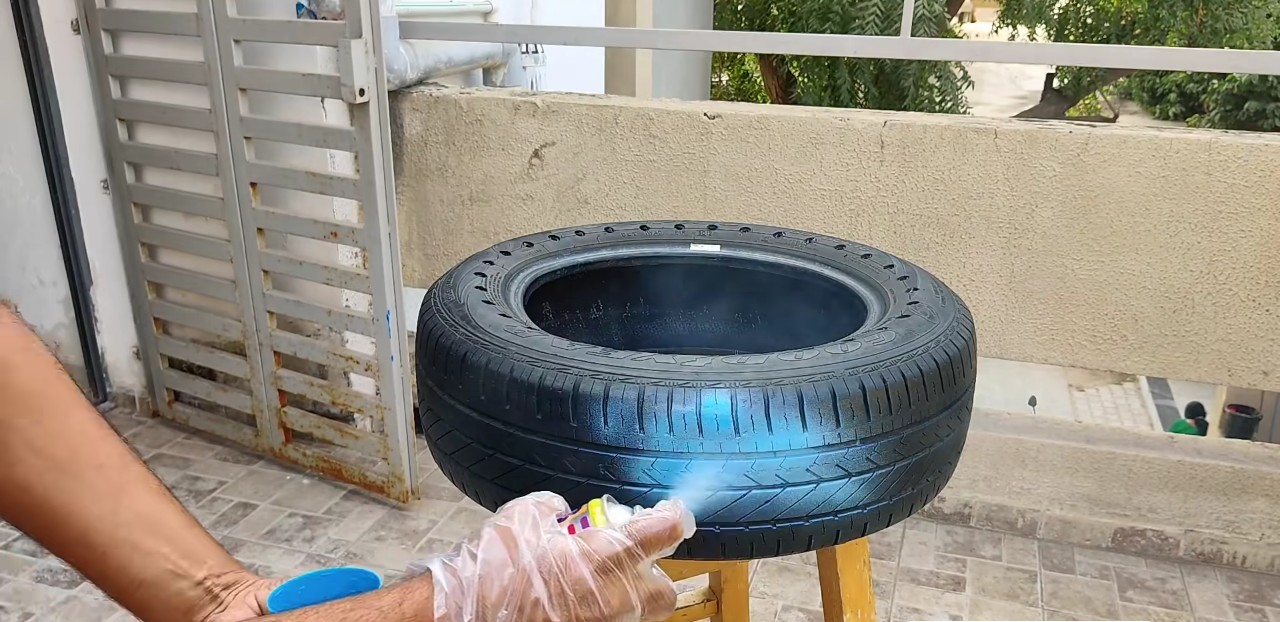
Окрашиваем покрышки аэрозольной краской для наружных работ любого цвета. Даём просохнуть.
![](https://imbuilder.ru/wp-content/uploads/2024/01/puf-3-1.jpg)
![](https://imbuilder.ru/wp-content/uploads/2024/01/puf-3-2.jpg)
![](https://imbuilder.ru/wp-content/uploads/2024/01/puf-3-1-80x80.jpg)
![](https://imbuilder.ru/wp-content/uploads/2024/01/puf-3-2-80x80.jpg)
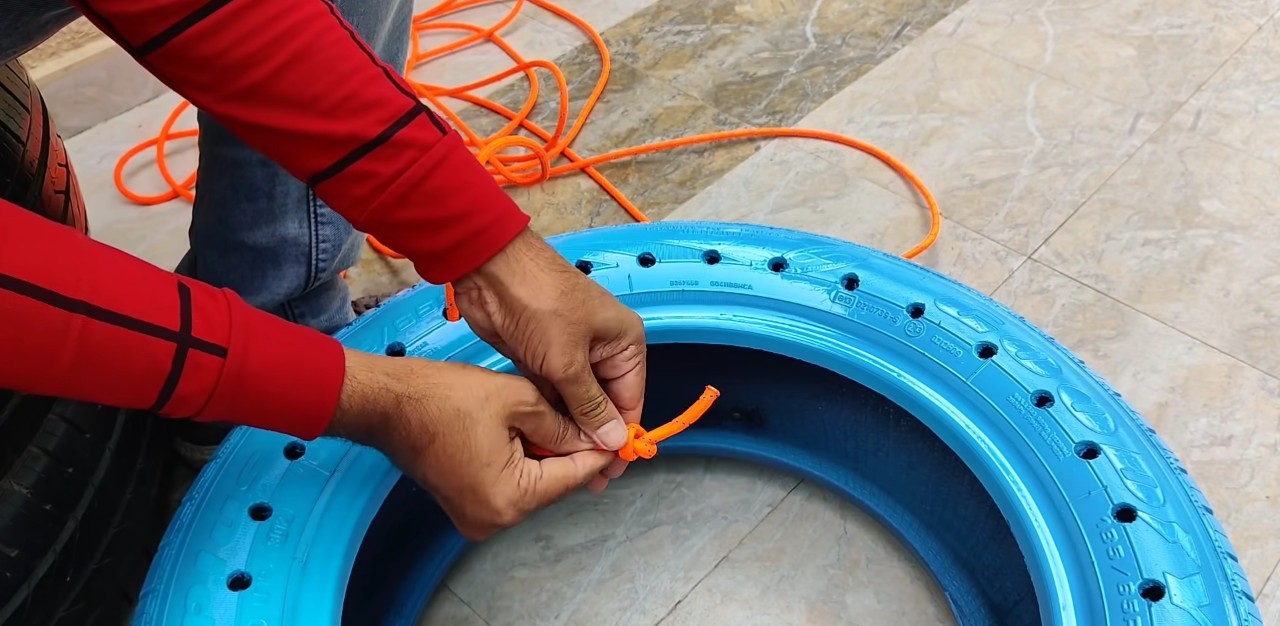
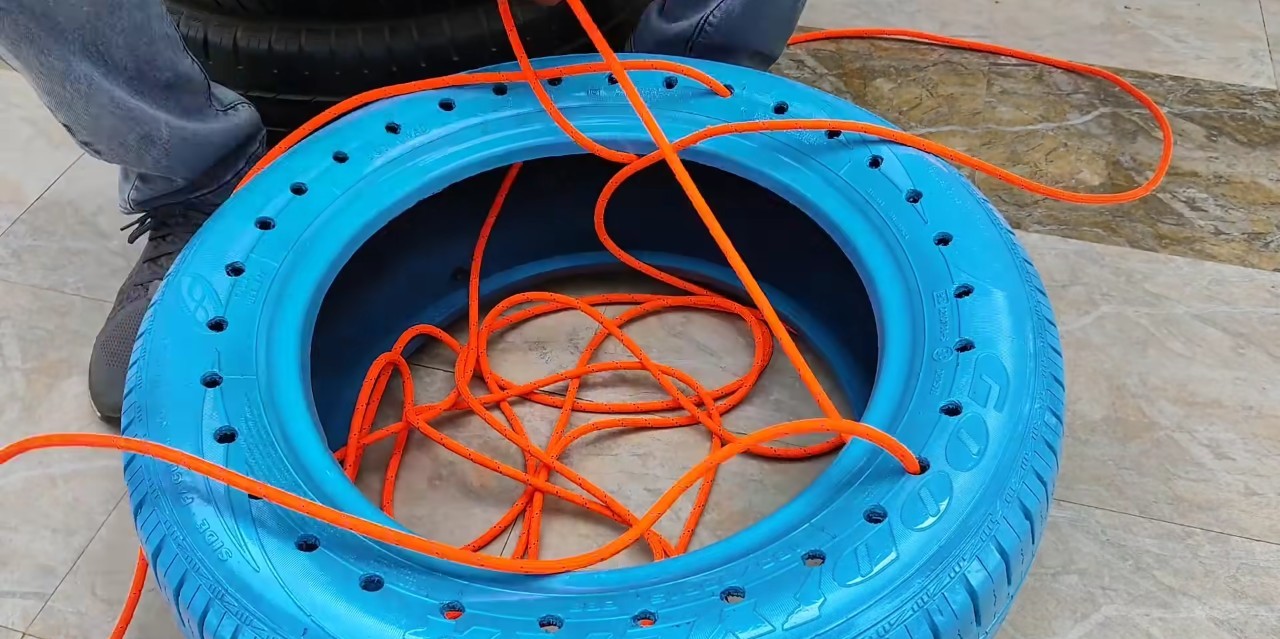
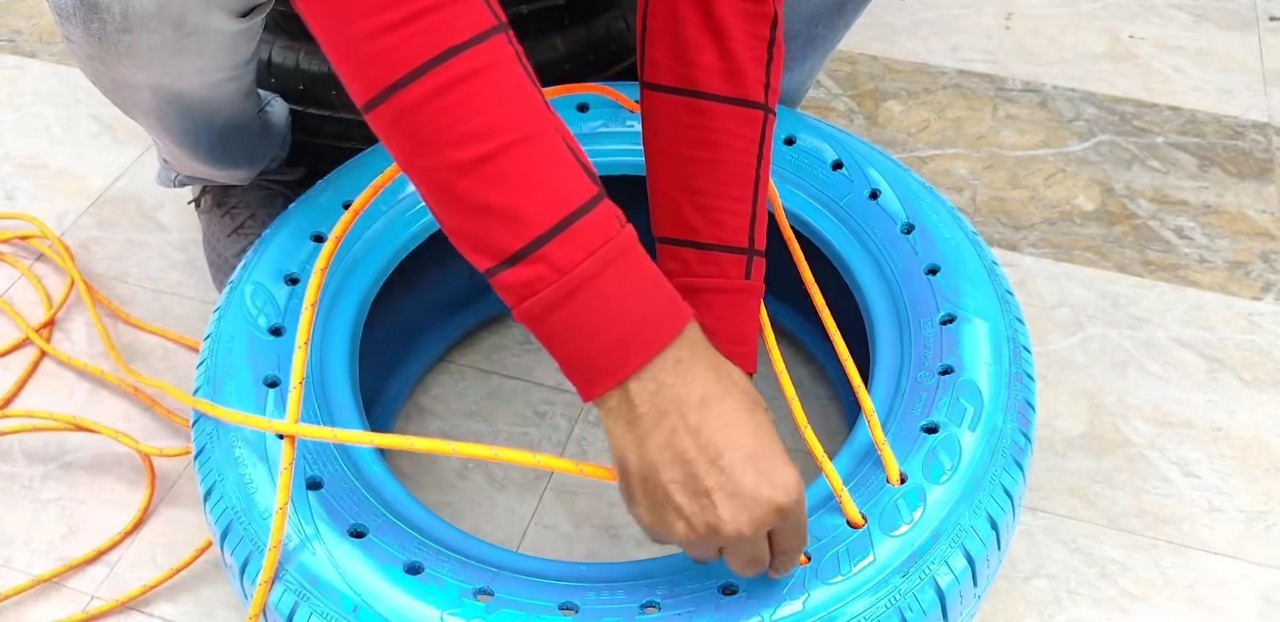
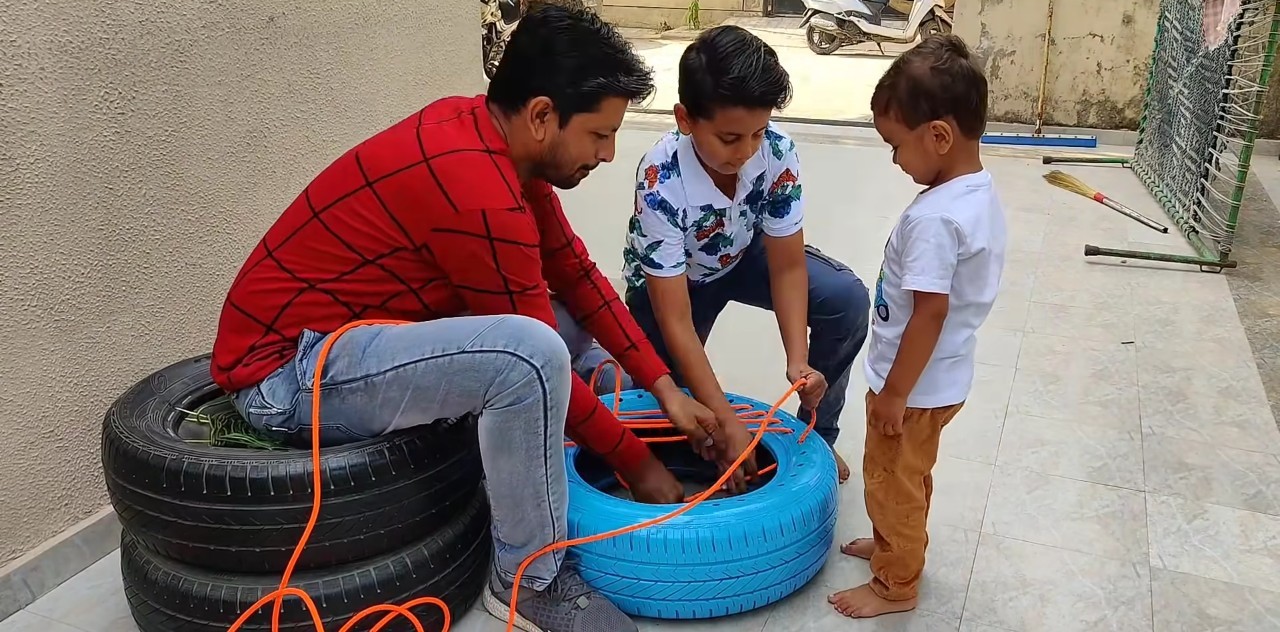
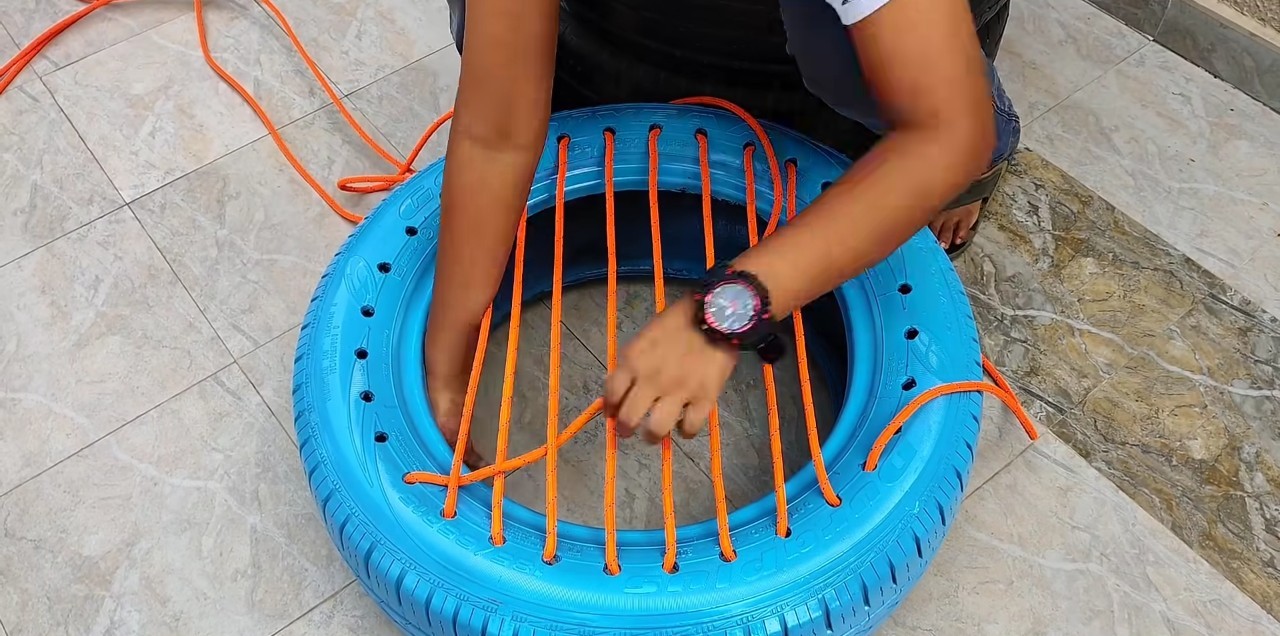
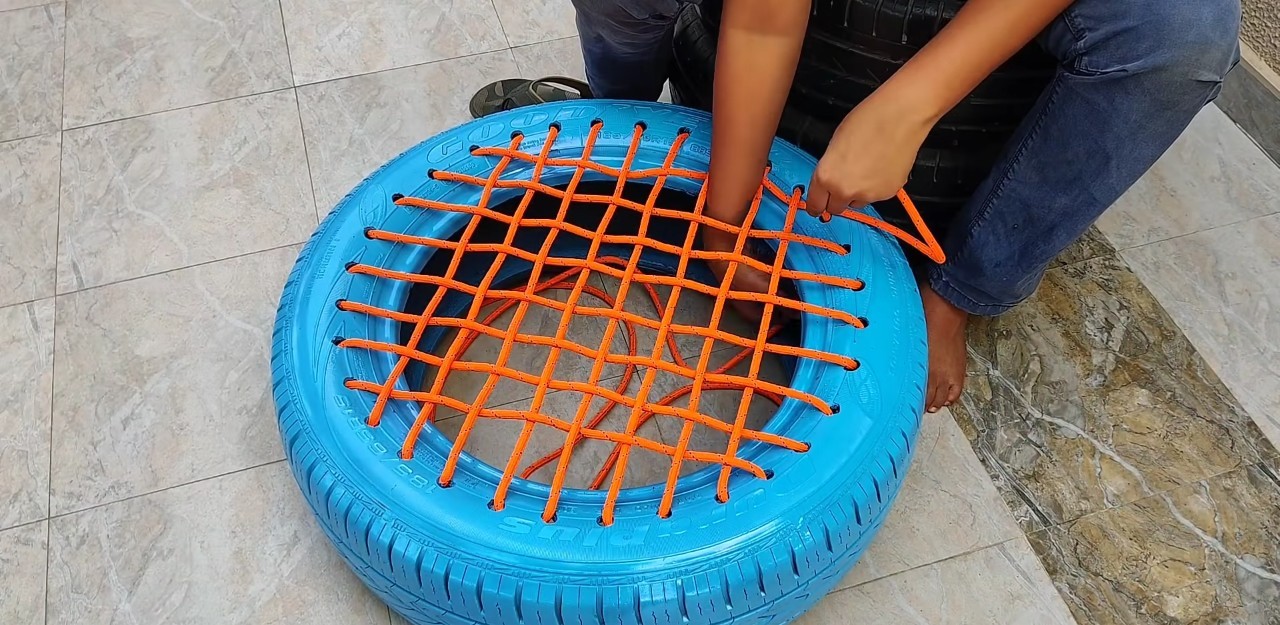
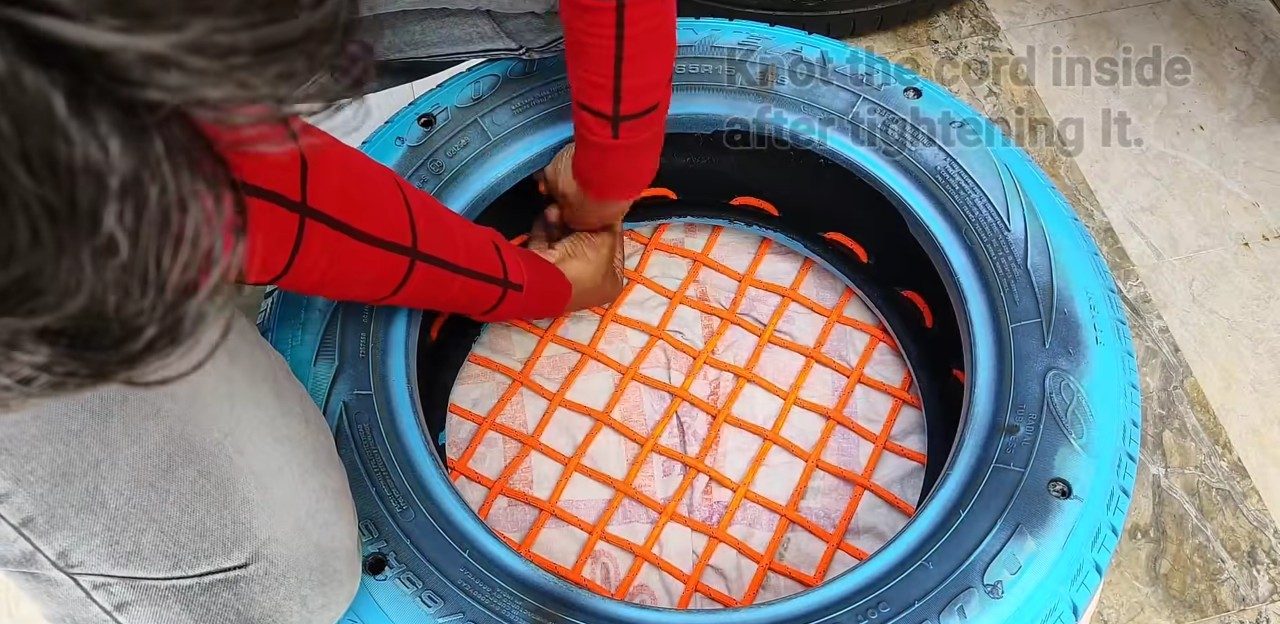
Крепим шпагат узлом внутри покрышки, от него отсчитываем восемь отверстий и в девятое продеваем свободный конец шпагата, протягиваем весь шпагат и достаём свободный конец из десятого отверстия. Начинаем «шнуровать» ещё семь раз, а дети могут помогать протаскивать шпагат.
![](https://imbuilder.ru/wp-content/uploads/2024/01/puf-4-1.jpg)
![](https://imbuilder.ru/wp-content/uploads/2024/01/puf-4-2.jpg)
![](https://imbuilder.ru/wp-content/uploads/2024/01/puf-4-3.jpg)
![](https://imbuilder.ru/wp-content/uploads/2024/01/puf-4-4.jpg)
![](https://imbuilder.ru/wp-content/uploads/2024/01/puf-4-5.jpg)
![](https://imbuilder.ru/wp-content/uploads/2024/01/puf-4-6.jpg)
![](https://imbuilder.ru/wp-content/uploads/2024/01/puf-4-7.jpg)
![](https://imbuilder.ru/wp-content/uploads/2024/01/puf-4-8.jpg)
![](https://imbuilder.ru/wp-content/uploads/2024/01/puf-4-9.jpg)
![](https://imbuilder.ru/wp-content/uploads/2024/01/puf-4-10.jpg)
![](https://imbuilder.ru/wp-content/uploads/2024/01/puf-4-1-80x80.jpg)
![](https://imbuilder.ru/wp-content/uploads/2024/01/puf-4-2-80x80.jpg)
![](https://imbuilder.ru/wp-content/uploads/2024/01/puf-4-3-80x80.jpg)
![](https://imbuilder.ru/wp-content/uploads/2024/01/puf-4-4-80x80.jpg)
![](https://imbuilder.ru/wp-content/uploads/2024/01/puf-4-5-80x80.jpg)
![](https://imbuilder.ru/wp-content/uploads/2024/01/puf-4-6-80x80.jpg)
![](https://imbuilder.ru/wp-content/uploads/2024/01/puf-4-7-80x80.jpg)
![](https://imbuilder.ru/wp-content/uploads/2024/01/puf-4-8-80x80.jpg)
![](https://imbuilder.ru/wp-content/uploads/2024/01/puf-4-9-80x80.jpg)
![](https://imbuilder.ru/wp-content/uploads/2024/01/puf-4-10-80x80.jpg)
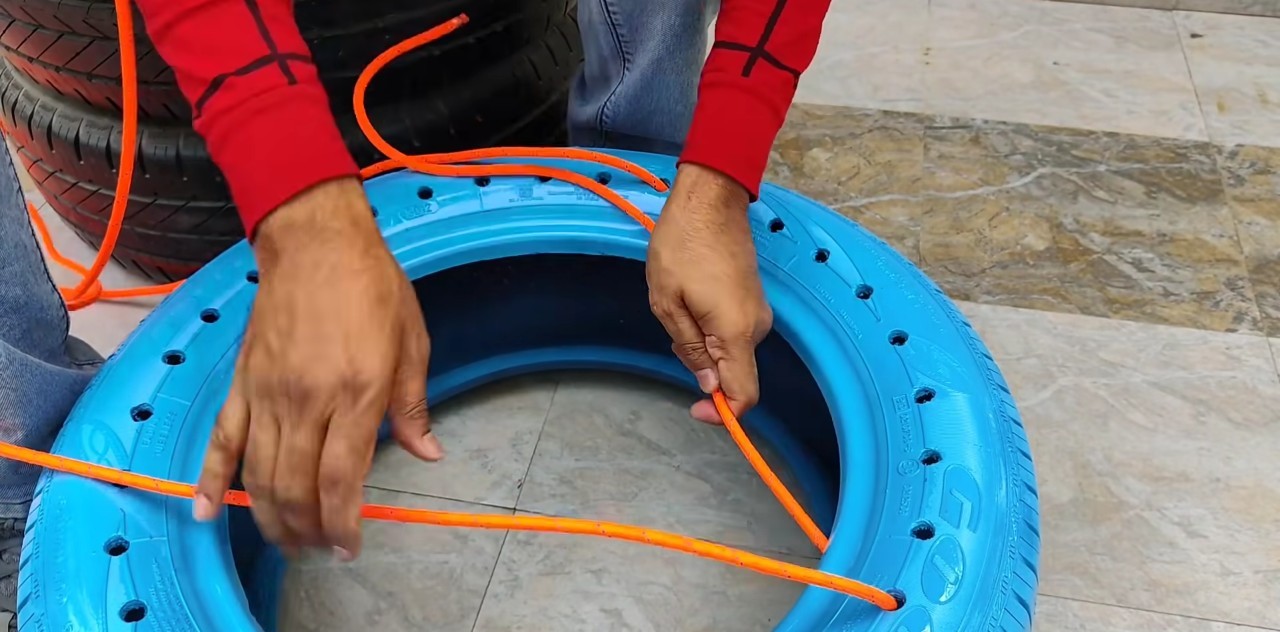
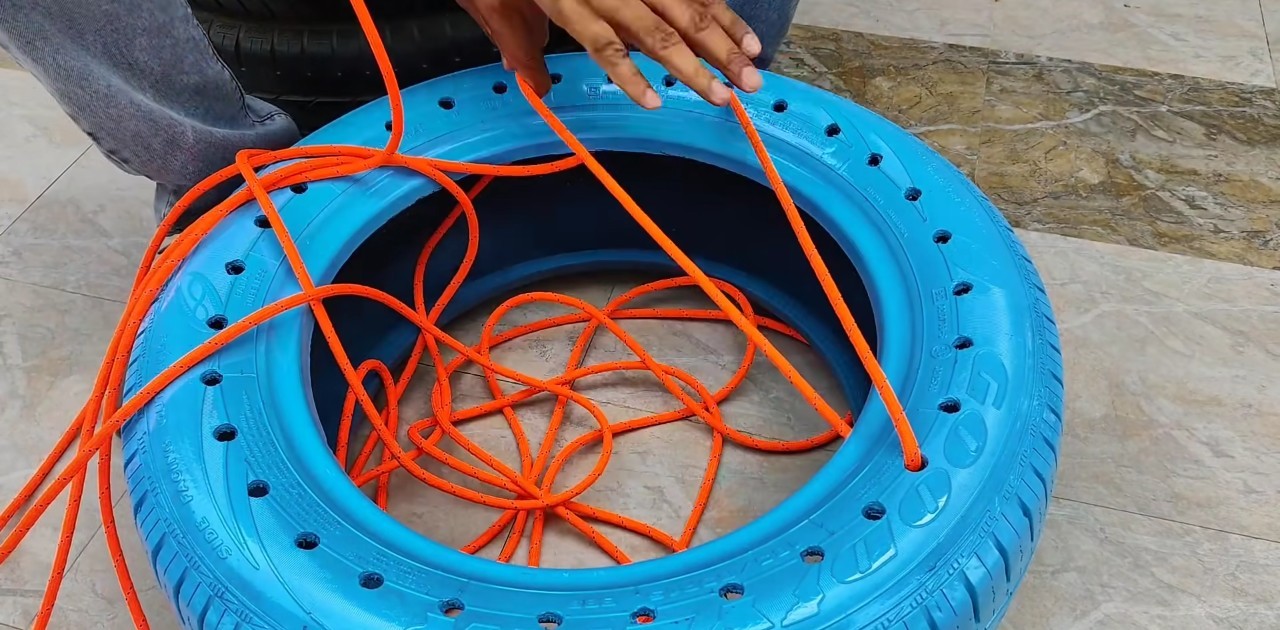
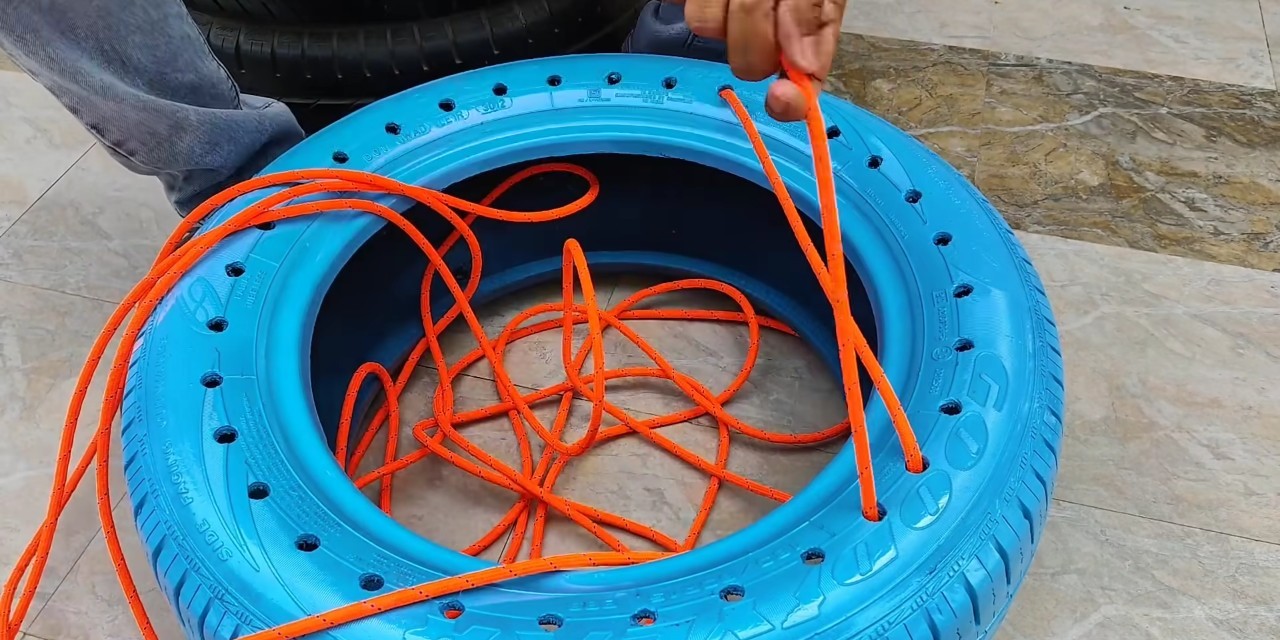
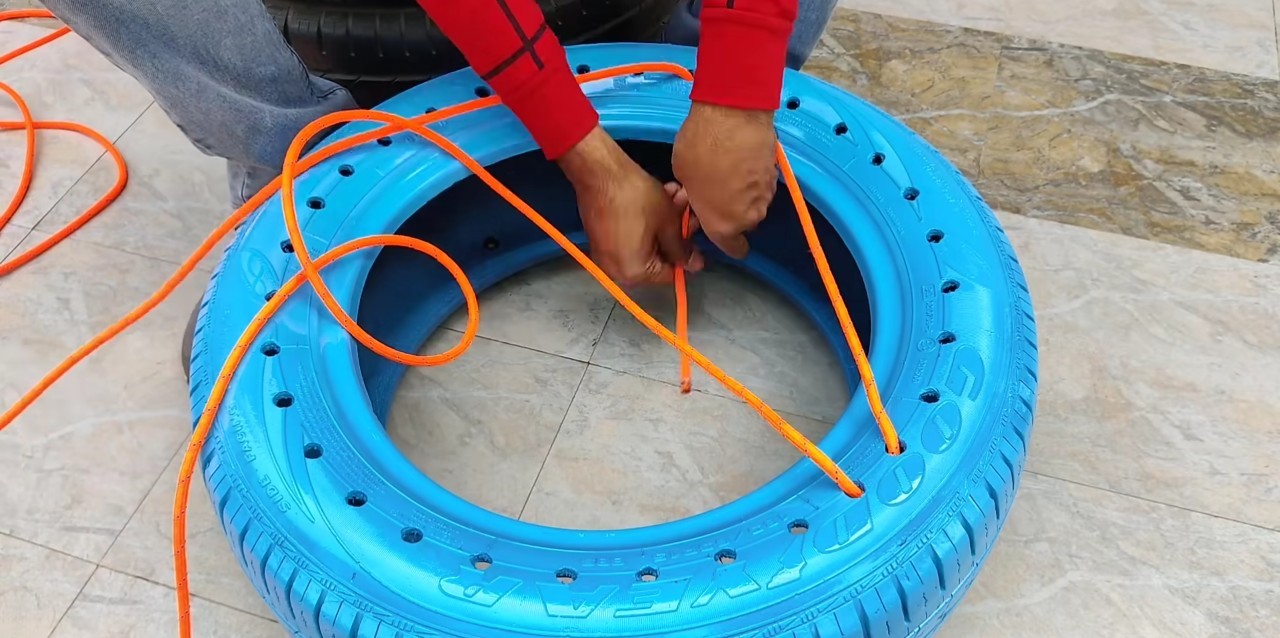
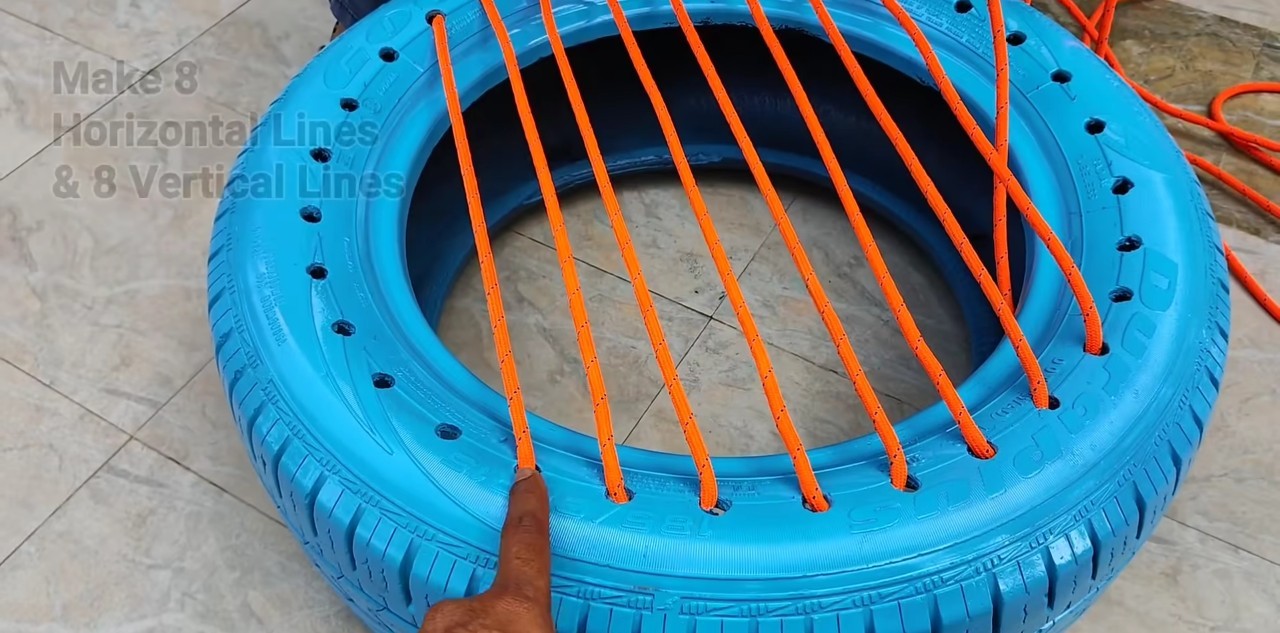
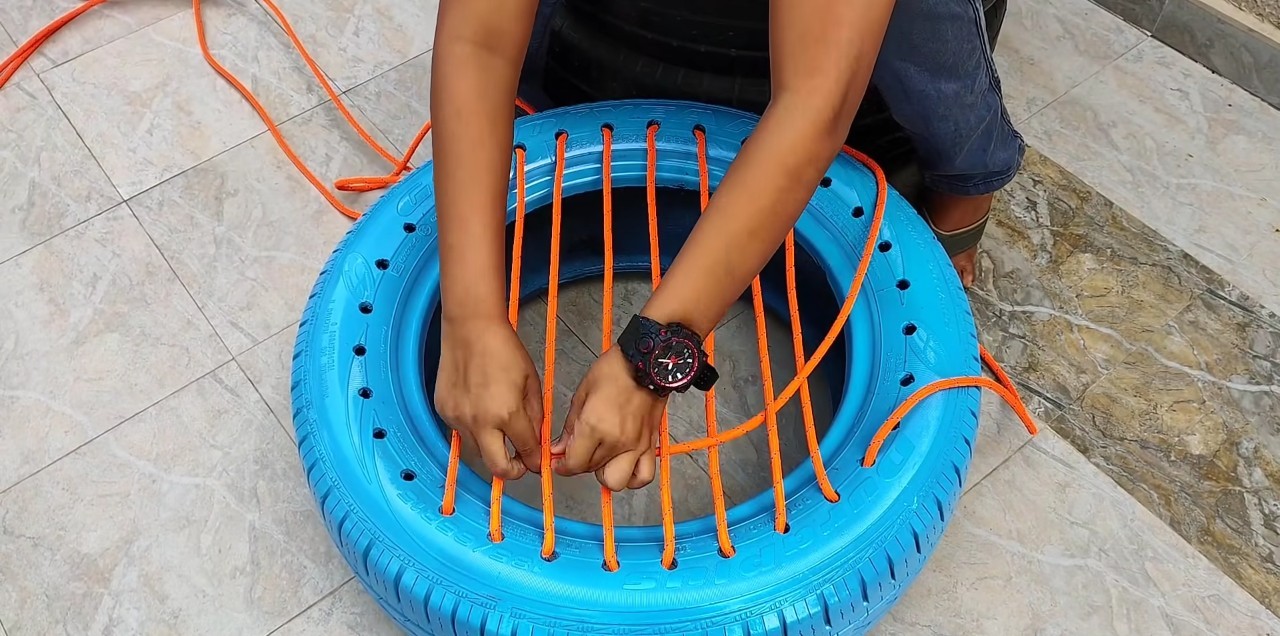
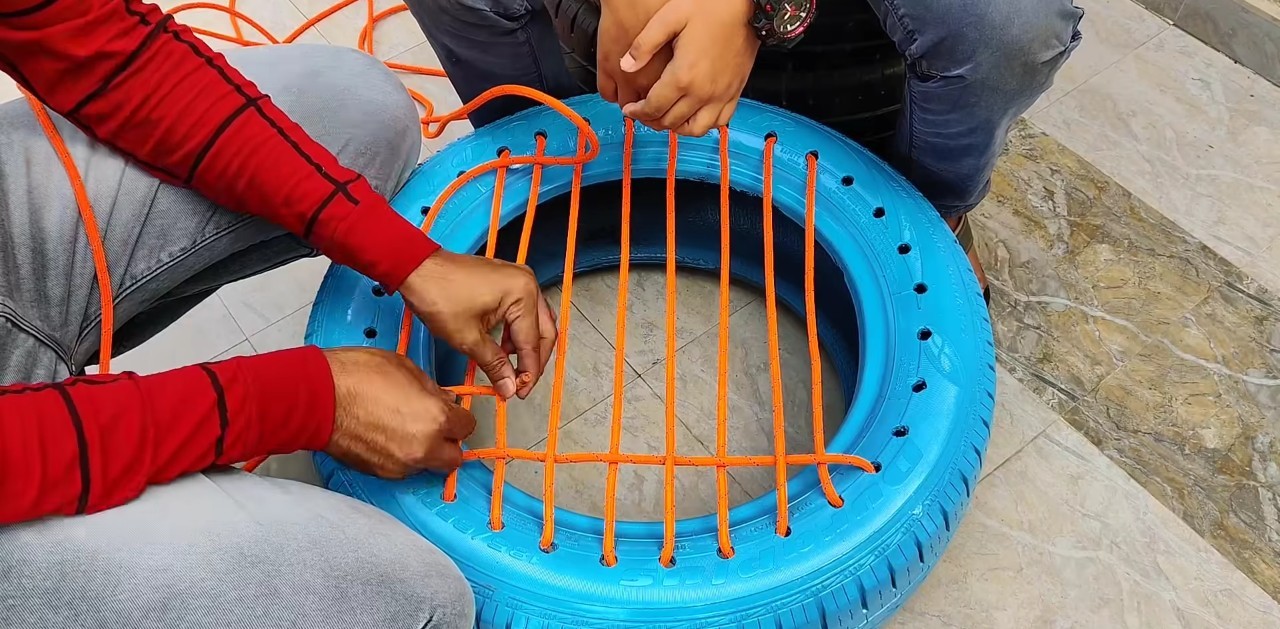
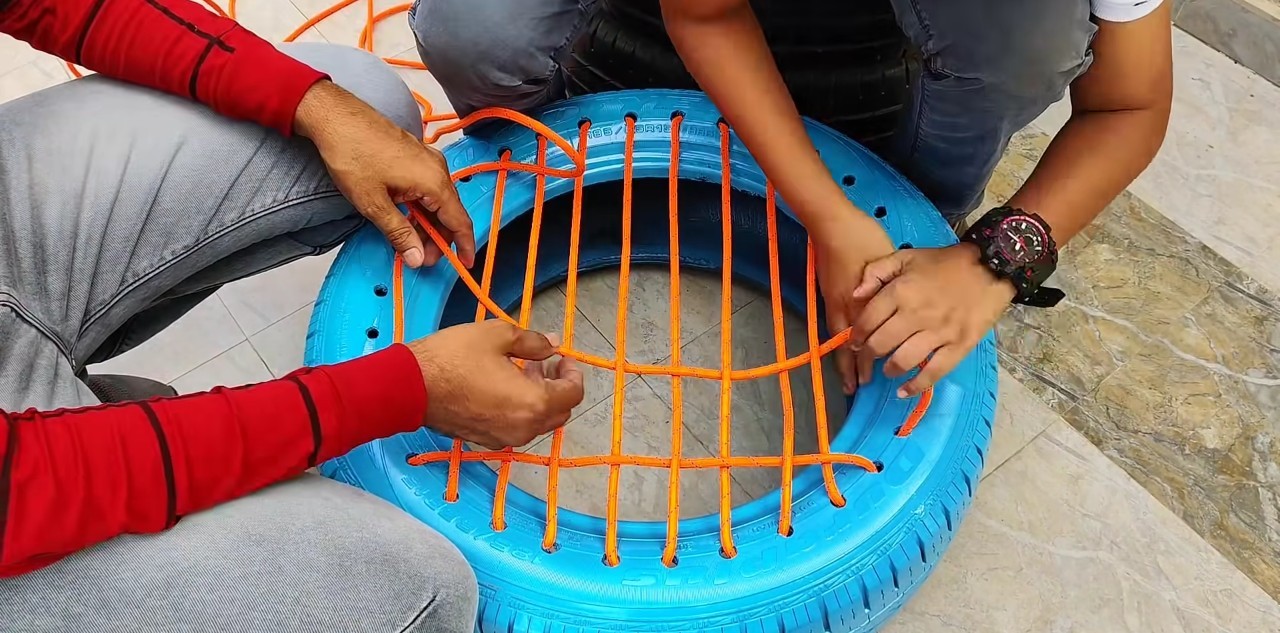
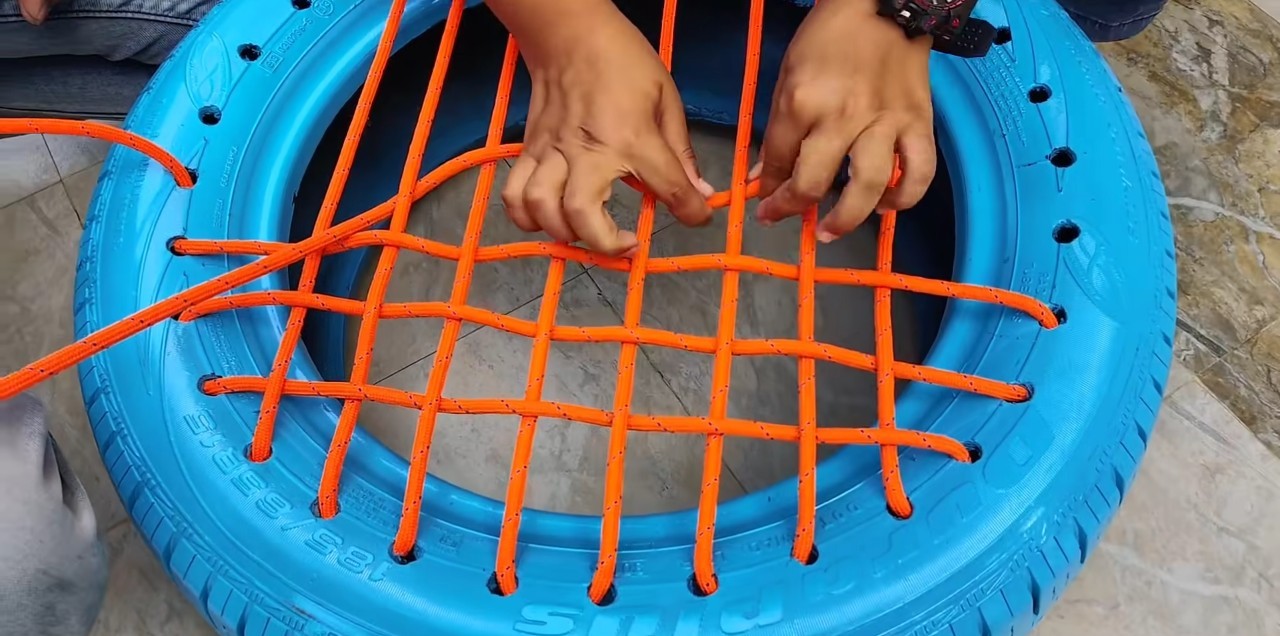
Меняем направление «шнуровки». Шпагат проплетаем «в шахматном порядке». По окончанию переворачиваем покрышку и завязываем на шпагате узел, оставшийся конец обрезаем.
![](https://imbuilder.ru/wp-content/uploads/2024/01/puf-5-2.jpg)
![](https://imbuilder.ru/wp-content/uploads/2024/01/puf-5-3.jpg)
![](https://imbuilder.ru/wp-content/uploads/2024/01/puf-5-4.jpg)
![](https://imbuilder.ru/wp-content/uploads/2024/01/puf-5-5.jpg)
![](https://imbuilder.ru/wp-content/uploads/2024/01/puf-5-6.jpg)
![](https://imbuilder.ru/wp-content/uploads/2024/01/puf-5-7.jpg)
![](https://imbuilder.ru/wp-content/uploads/2024/01/puf-5-8-e1641624078829.jpg)
![](https://imbuilder.ru/wp-content/uploads/2024/01/puf-5-9.jpg)
![](https://imbuilder.ru/wp-content/uploads/2024/01/puf-5-2-80x80.jpg)
![](https://imbuilder.ru/wp-content/uploads/2024/01/puf-5-3-80x80.jpg)
![](https://imbuilder.ru/wp-content/uploads/2024/01/puf-5-4-80x80.jpg)
![](https://imbuilder.ru/wp-content/uploads/2024/01/puf-5-5-80x80.jpg)
![](https://imbuilder.ru/wp-content/uploads/2024/01/puf-5-6-80x80.jpg)
![](https://imbuilder.ru/wp-content/uploads/2024/01/puf-5-7-80x80.jpg)
![](https://imbuilder.ru/wp-content/uploads/2024/01/puf-5-8-e1641624078829-80x80.jpg)
![](https://imbuilder.ru/wp-content/uploads/2024/01/puf-5-9-80x80.jpg)
Используя эту покрышку как трафарет на второй покрышке намечаем и просверливаем отверстия для болтов.
![](https://imbuilder.ru/wp-content/uploads/2024/01/puf-6-1.jpg)
![](https://imbuilder.ru/wp-content/uploads/2024/01/puf-6-2-e1641624410765.jpg)
![](https://imbuilder.ru/wp-content/uploads/2024/01/puf-6-1-80x80.jpg)
![](https://imbuilder.ru/wp-content/uploads/2024/01/puf-6-2-e1641624410765-80x80.jpg)
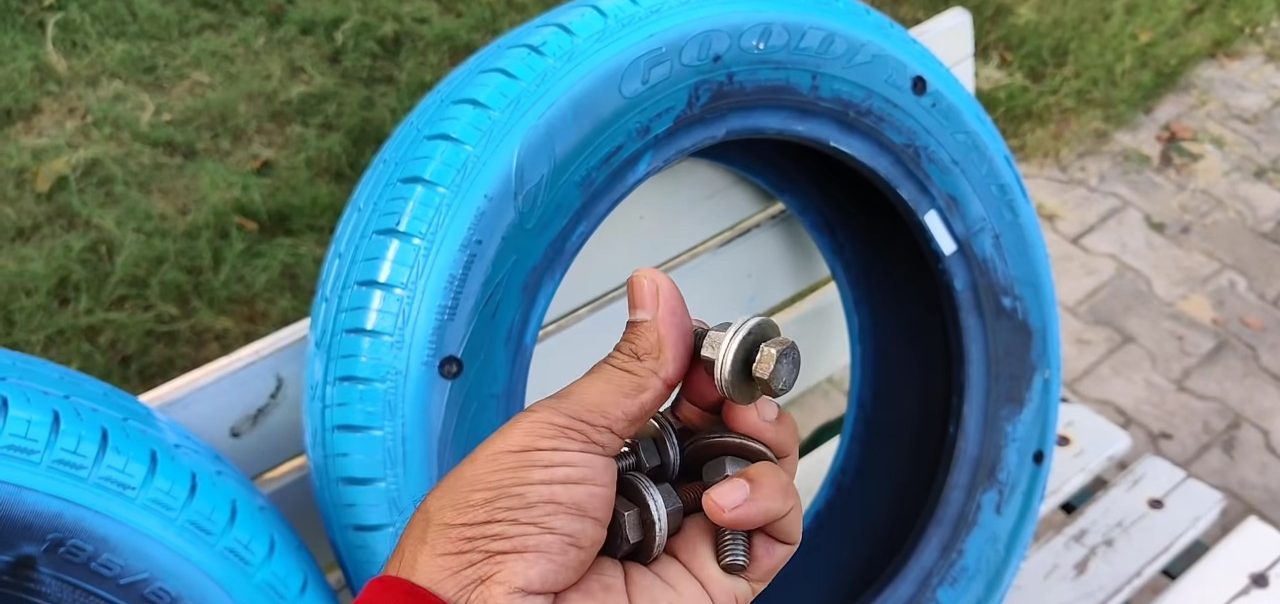
Соединяем покрышки болтами, обтягиваем гайки.
![](https://imbuilder.ru/wp-content/uploads/2024/01/puf-7-1.jpg)
![](https://imbuilder.ru/wp-content/uploads/2024/01/puf-7-2.jpg)
![](https://imbuilder.ru/wp-content/uploads/2024/01/puf-7-1-80x80.jpg)
![](https://imbuilder.ru/wp-content/uploads/2024/01/puf-7-2-80x80.jpg)
Пуф готов.
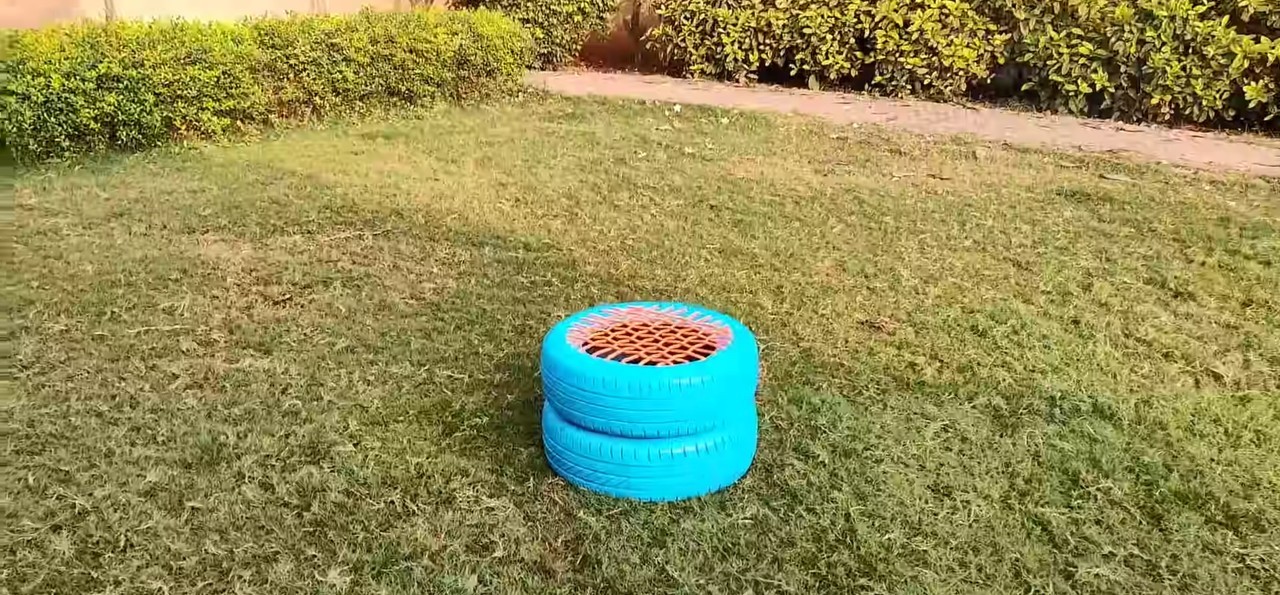
Изготавливать садовые пуфики по такой технологии можно различного размера. Диаметр изменяем подбором покрышек, а высоту — их количеством.
Технологией создания долговечных садовых пуфов поделился автор YouTube канала DIY Garden Ideas. Процесс создания пуфа, вы можете посмотреть на видео.